
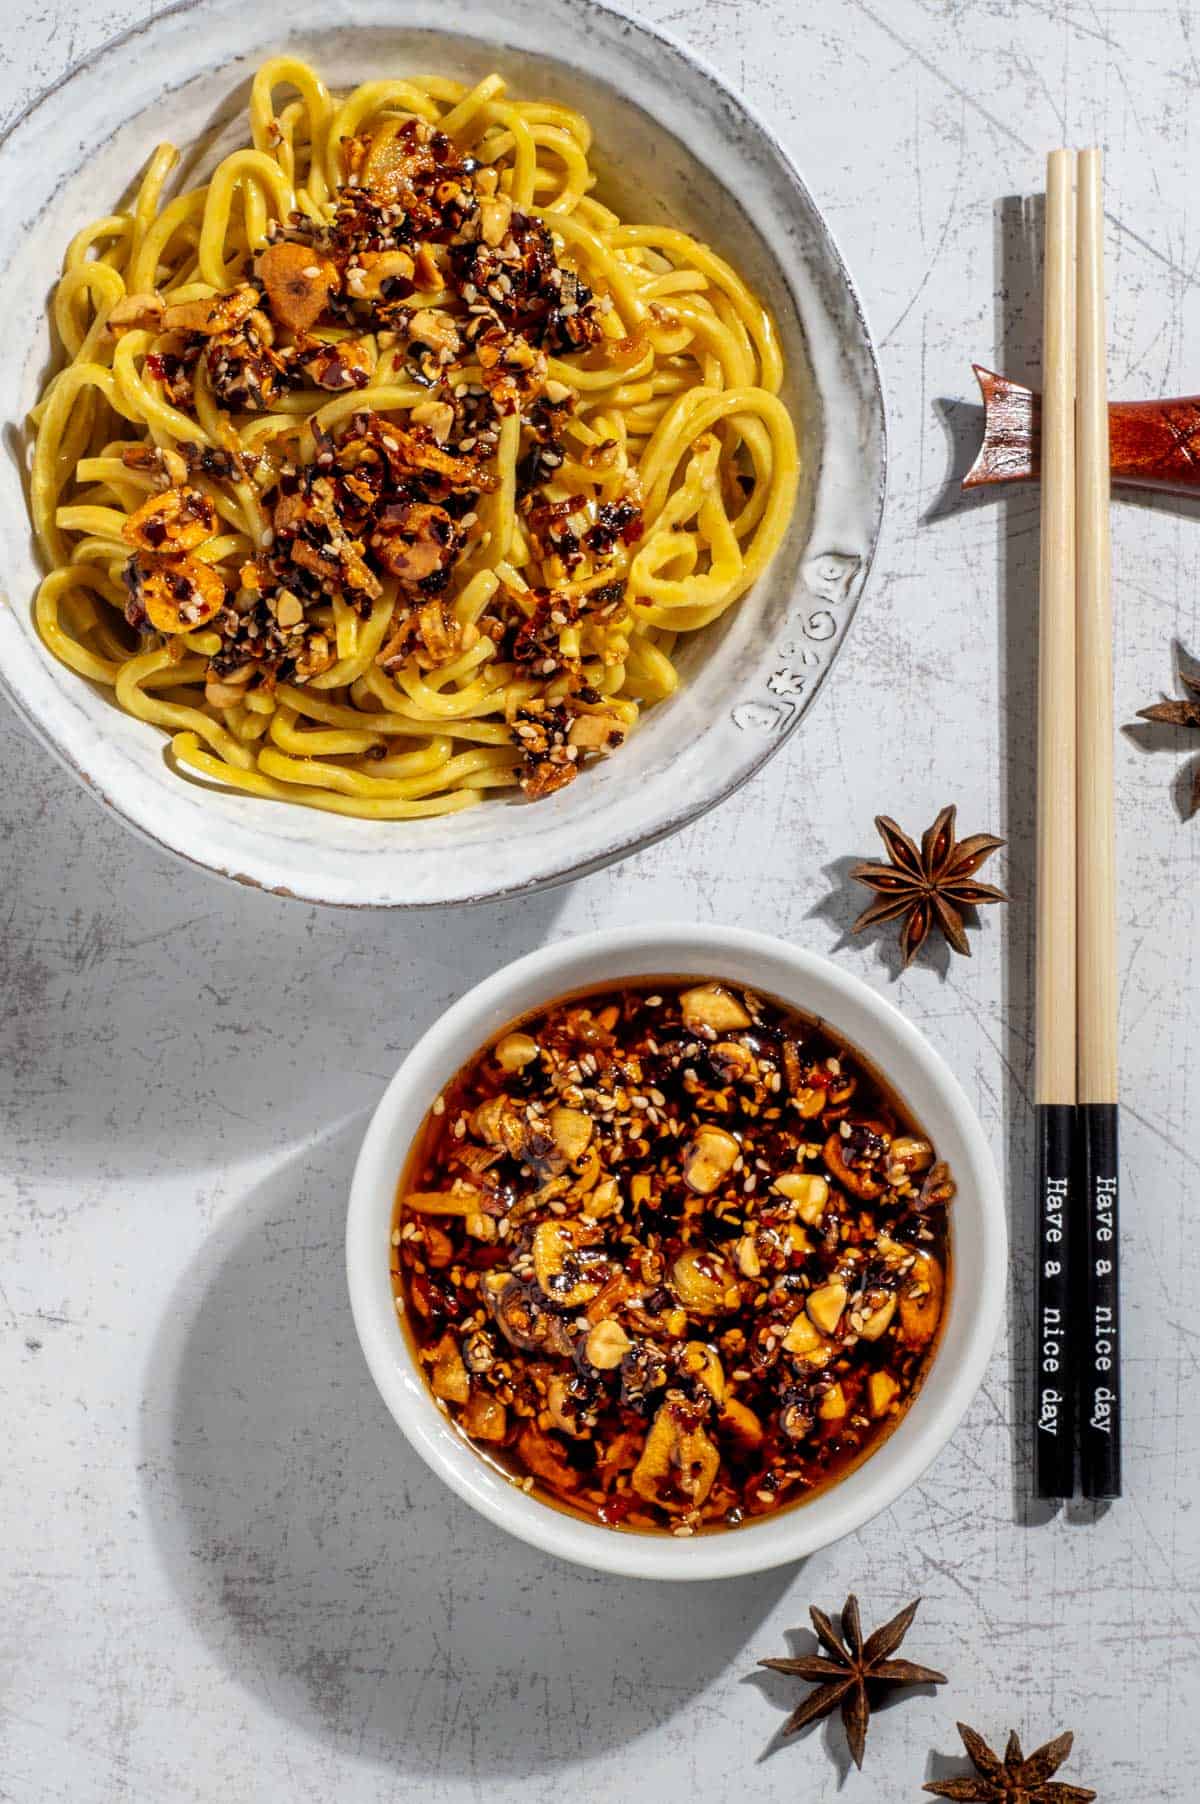
This homemade chilli oil is packed with crispy garlic, shallots, ginger, roasted peanuts, sesame seeds and chilli flakes. It's closer to chilli crisp than plain chilli oil, with lots of crunchy bits and a savoury, spicy oil you can spoon over noodles, rice, eggs, dumplings and roasted vegetables.
The aromatics start in cold oil and cook gently, which helps them turn golden and crisp without burning. It's bold, crunchy and useful enough to keep in the fridge for quick meals.
What is crispy chilli oil?
Crispy chilli oil, also called chilli crisp, is a spicy oil-based condiment with crunchy bits like fried garlic, shallots, sesame seeds, nuts and chilli flakes. This homemade version is savoury, crunchy and less oily than some jarred versions, with roasted peanuts for extra texture.
Why make it at home?
Store-bought chilli oil can be too oily, too mild or not quite crunchy enough, especially if you like plenty of crispy bits.
This homemade version is bold, savoury and full of texture, but still doable with supermarket ingredients. You can control the heat, the crunch and the amount of oil, so it ends up exactly how you like it.
Why this version is easy
- No specialist chillies needed - supermarket chilli flakes work.
- Crunchy but not too oily - roasted peanuts, sesame, garlic and shallots add texture.
- Cold-oil method - the aromatics heat gently, which makes burning less likely.
- Easy to adjust - use milder chilli flakes, more oil or extra peanuts to suit your taste.
- Useful on almost everything - noodles, rice, eggs, dumplings, vegetables and sandwiches.
Key ingredient notes and substitutions
The oil
Peanut oil works well because it has a high smoke point and a subtle nutty flavour. Sunflower, canola, vegetable or grapeseed oil will also work.
Avoid olive oil, coconut oil and sesame oil as the main oil, as their flavours are too strong for this recipe.
Save toasted sesame oil as a finishing drizzle if you want extra sesame flavour.
Chilli flakes/red pepper flakes
Everyday supermarket chilli flakes work well and usually give a decent kick.
For a milder, brighter red oil, use gochugaru.
For a deeper, smokier heat, use Sichuan chilli flakes. You can also blend them, such as half gochugaru and half regular chilli flakes, for colour and heat.
How spicy is it?
With regular supermarket chilli flakes, this chilli oil is medium-hot. For milder heat, use mostly gochugaru. For more fire, add extra chilli flakes or a pinch of cayenne.
A note on hot oil - When the hot oil hits the chilli flakes, it should sizzle gently. If the flakes crackle violently or smell burnt, the oil is too hot. Let it cool for a minute before pouring, or the chilli can turn bitter.
Garlic, ginger and shallots
Slice them thinly and evenly so they crisp at the same rate. Cook them slowly in the oil until golden blonde, not brown. They will keep cooking in the residual heat, so it's better to stop slightly early than too late.
Cooling the crispy bits - After straining, spread the garlic, ginger and shallots out on kitchen paper and let them cool fully before stirring them back into the chilli oil. This helps them stay crunchy and reduces excess moisture in the jar.
Whole spices
Cinnamon, star anise and peppercorns infuse the oil with warmth and depth, then get removed before jarring.
Sichuan peppercorns can be used instead of black peppercorns for a tingly, numbing finish. You can also add 1-2 cloves, a bay leaf, dried orange peel, coriander seeds or a few crushed cardamom pods.
Mushroom powder
Adds savoury depth and rounds out the chilli, garlic and peanuts. You can buy it or make your own by blitzing dried shiitake or porcini mushrooms into a fine powder.
MSG also works well, or you can use a small crumbled chicken stock cube. If you don't have any of these, leave it out.
Peanuts
These add crunch, nuttiness and body. Use roasted, unsalted peanuts and chop them finely so they mix evenly with the sesame seeds and crispy aromatics. Cashews, almonds or toasted sunflower seeds also work.
Sesame seeds
Add texture and a gentle nuttiness. White sesame seeds work well, but you can use black sesame seeds or a mix of both.
Soy sauce
Adds saltiness and savoury depth. Use light soy sauce if you have it. Dark soy sauce can be stronger and darker, so use a little less if substituting.
Rice vinegar
Adds a small amount of acidity to balance the oil, chilli and peanuts. You can use black vinegar for a deeper flavour, but add it sparingly.
Sugar
A little sugar balances the heat and savoury ingredients. It should not make the chilli oil taste sweet; it just rounds out the edges.
Adjusting the texture
The more nuts and sesame seeds you add, the drier and crunchier the chilli crisp will be. Add a little extra oil if you prefer it looser and more spoonable.
How to make homemade crispy chilli oil
Mix the chilli base
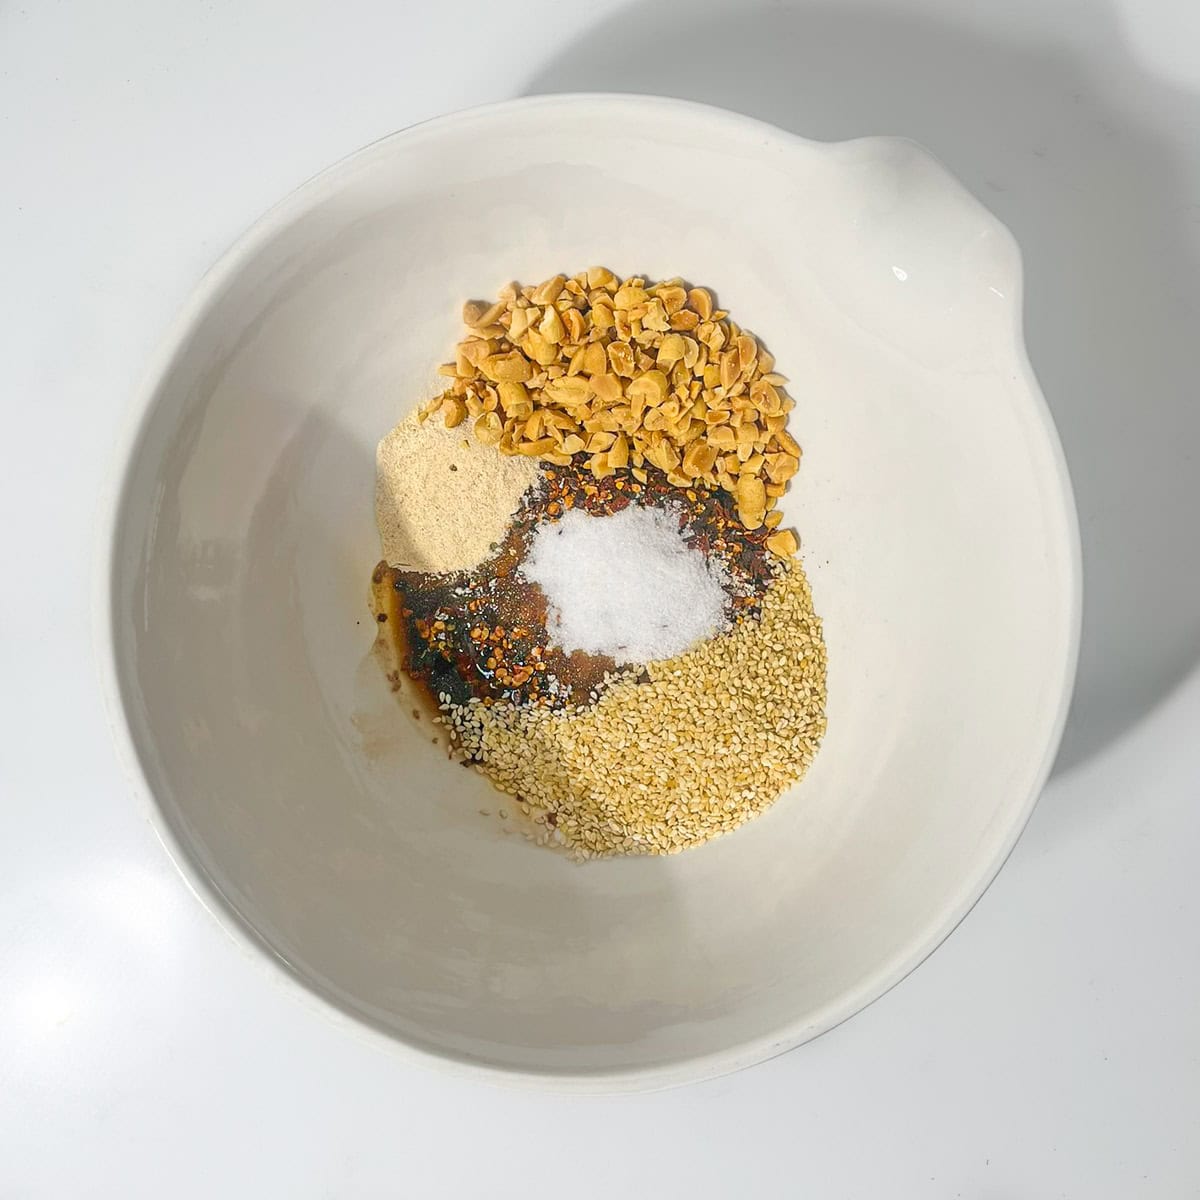
1. Add the chilli flakes, salt, sugar, mushroom powder, soy sauce, rice vinegar, sesame seeds and chopped peanuts to a large heatproof bowl.
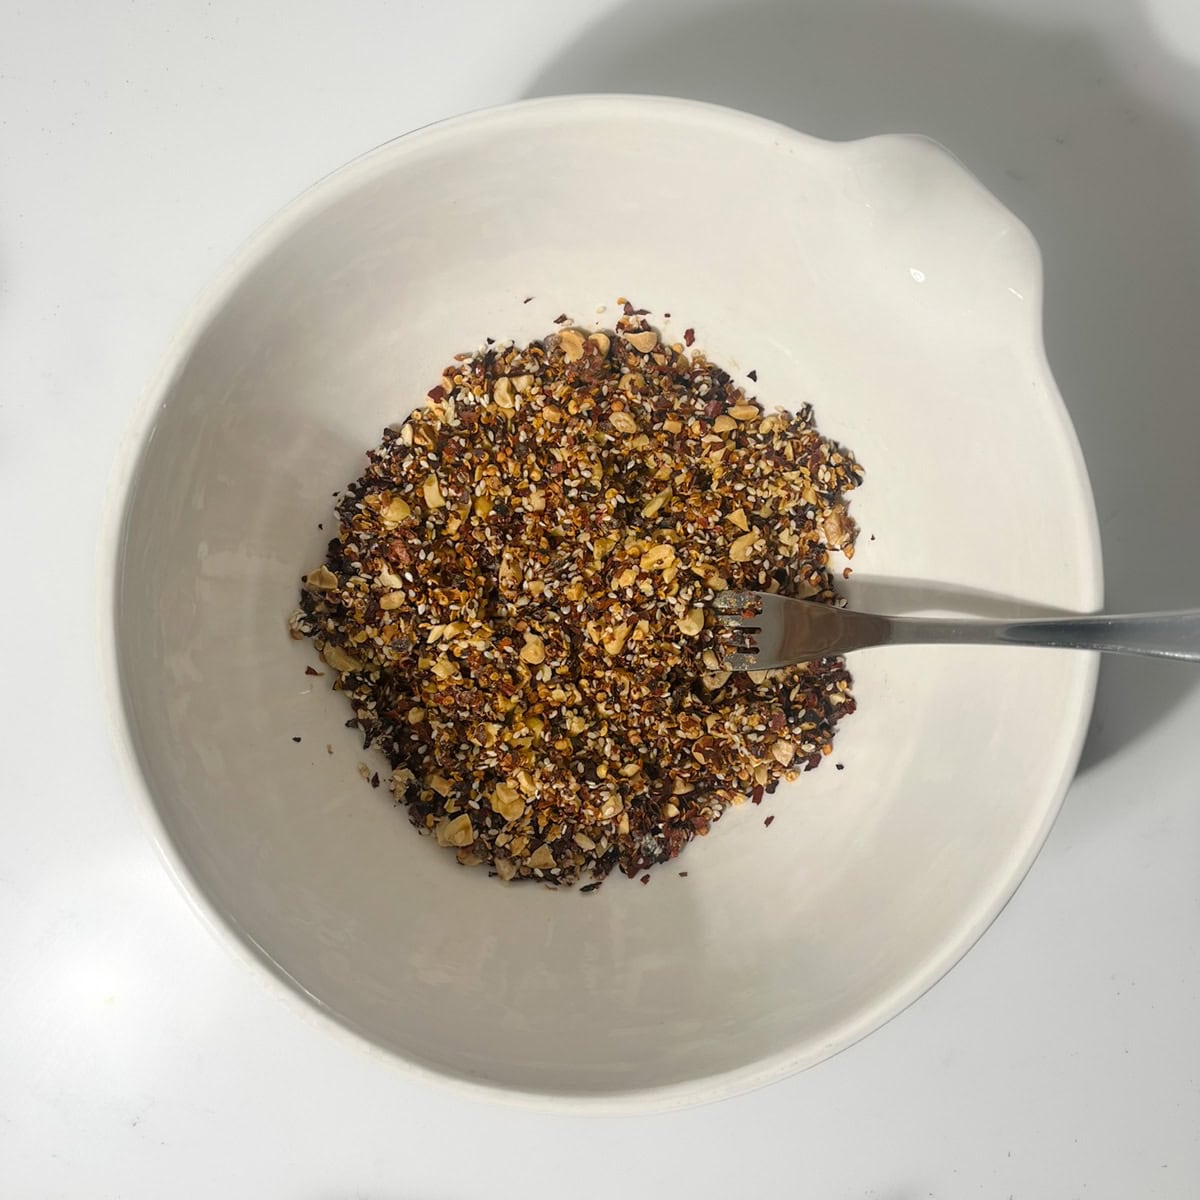
2. Stir everything together and place the bowl somewhere safe, such as in the kitchen sink. The hot oil will sizzle and bubble when poured over the chilli base.
Infuse the oil
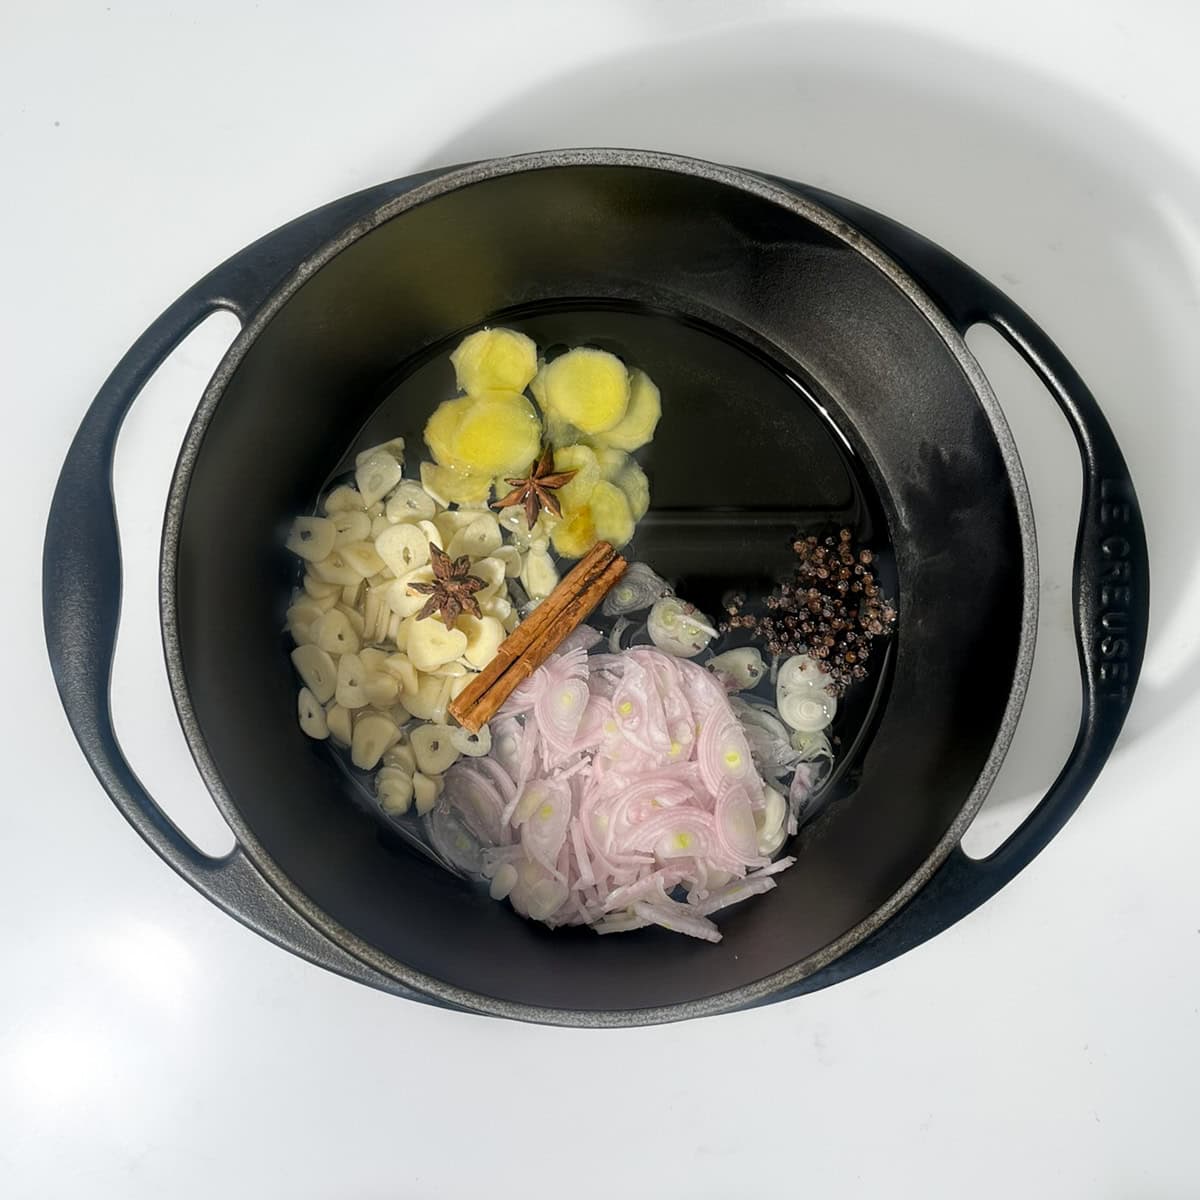
3. Add the oil, shallots, garlic, ginger, cinnamon, star anise and peppercorns to a heavy-based saucepan.
4. Set the pan over medium-low heat and let everything bubble gently for 13-15 minutes, stirring now and then. The garlic and shallots should turn golden blonde, not brown. If they darken too quickly or the oil smokes, lower the heat straight away.
Strain
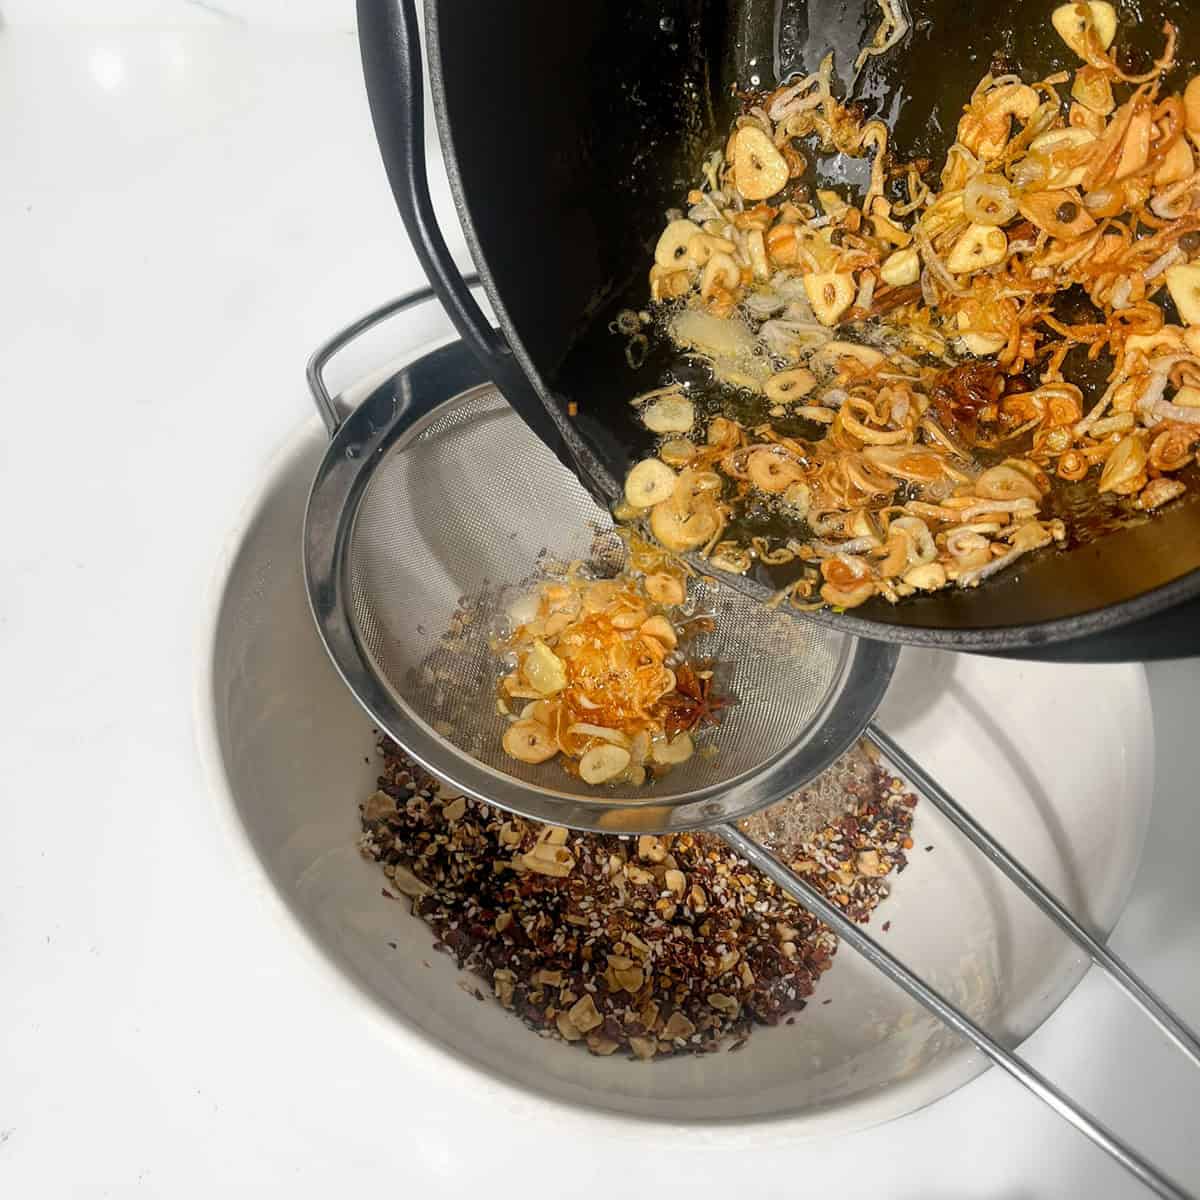
5. Carefully pour the hot oil through a sieve directly over the chilli base. It will sizzle, so pour slowly and keep your face and hands back.
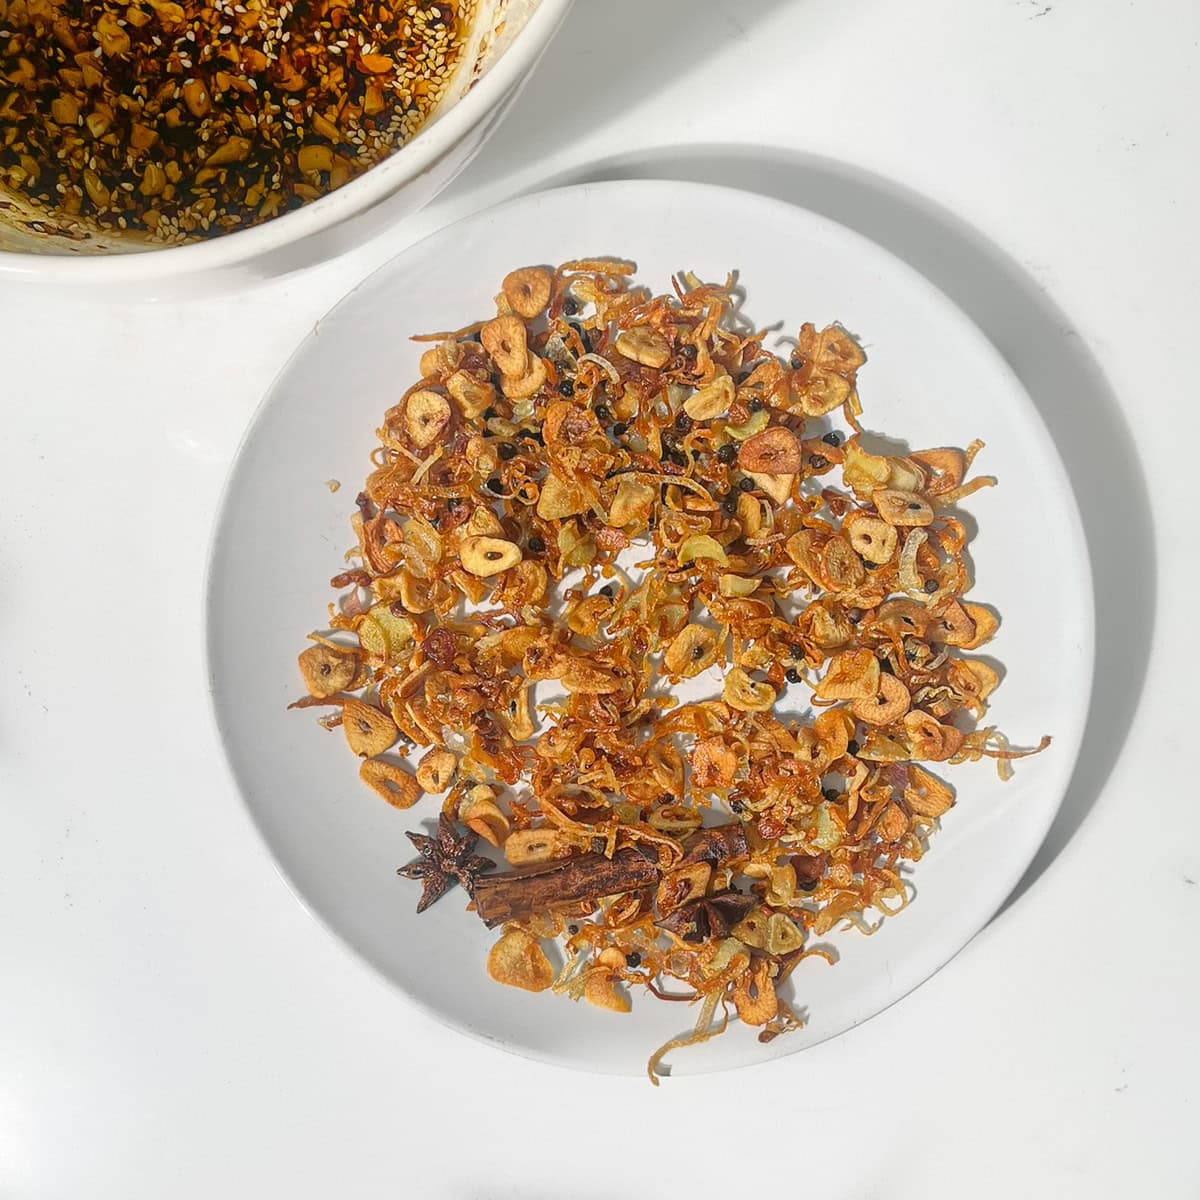
6. Tip the garlic, shallots and ginger left in the sieve onto a plate lined with kitchen paper. Spread them out and let them cool completely so they crisp up properly.
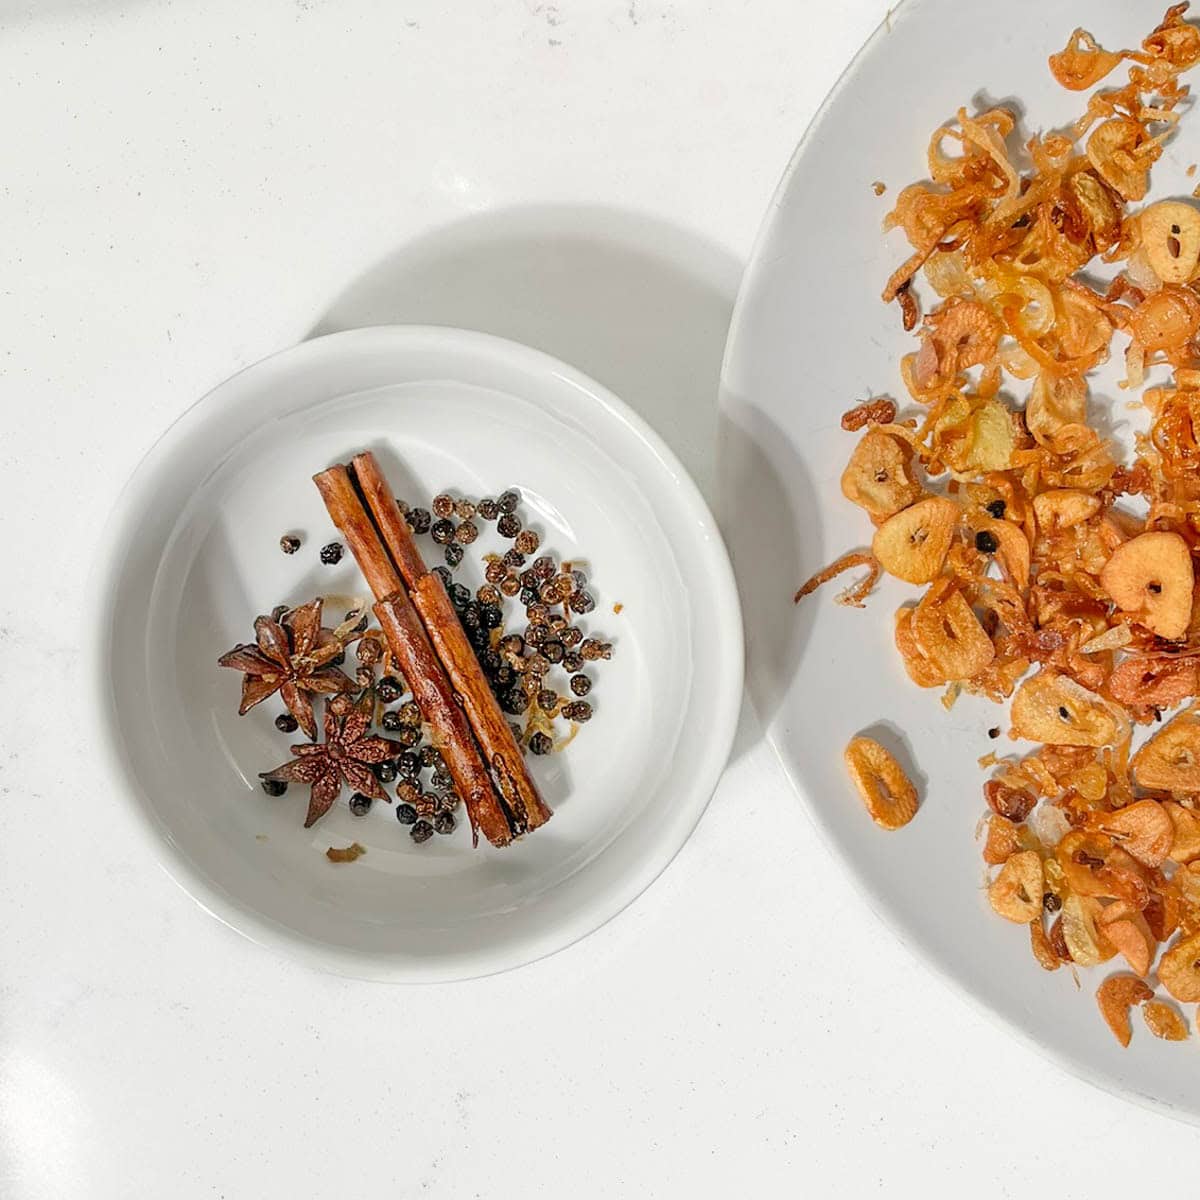
7. Once cooled, remove the cinnamon stick, star anise and most of the peppercorns. You can remove the ginger too if you prefer a smoother texture.
Combine
8. Stir the cooled crispy garlic, shallots and any ginger you're keeping back into the chilli oil.
9. Let the chilli oil cool completely before spooning it into a clean jar. Store in the fridge and use a clean, dry spoon each time.
Food safety note
Because this homemade chilli oil contains fresh garlic, shallots and ginger, store it in the fridge and use a clean, dry spoon each time. Make sure the crispy bits are fully cooked, cooled and dry before stirring them back in. For best quality and safety, use within 1 week.
Variations
Milder chilli oil - Use mostly gochugaru instead of regular chilli flakes.
Hotter chilli oil - Add extra chilli flakes or a pinch of cayenne.
Sichuan-style - Use Sichuan peppercorns for a tingly, numbing finish.
Nut-free - Use toasted sunflower seeds or leave the nuts out.
Extra tangy - Add a small splash of black vinegar once cooled.
Looser chilli oil - Add extra oil if you prefer more oil and fewer crunchy bits.
How to use crispy chilli oil
Spoon it over:
- fried, scrambled, poached or boiled eggs
- noodles, ramen or stir-fries
- plain rice, fried rice or rice bowls
- dumplings, wontons or gyoza
- roast vegetables, especially potatoes, sweet potatoes, carrots and mushrooms
- cucumber salad or cold noodle salad
- grilled cheese, toast or sandwiches
- mayo, hummus, tahini dressing or yoghurt dips
Spoon this crispy chilli oil over satay chicken stir-fry, orange chicken, noodles, rice bowls, or crispy mushrooms. It's also good with eggs, dumplings and even a toasted sourdough cheese sandwich if dinner is taking a chaotic turn.
Top tips
Start with cold oil
Heating the oil and aromatics together gives the garlic, ginger and shallots time to crisp slowly and infuse the oil.
Keep the heat low
Low and slow gives you golden, crisp bits instead of bitter ones.
Use a clean, dry spoon
Moisture can shorten the storage life of homemade chilli oil.
Storage

Let the chilli oil cool completely, then transfer it to a clean jar and store it in the fridge.
Because this recipe uses fresh garlic, shallots and ginger, keep it cold and use a clean, dry spoon every time. For best quality and safety, use within 1 week.
The oil may thicken or solidify in the fridge, especially if using peanut oil. Let it sit at room temperature for a few minutes and stir before serving.
FAQs
It's closer to chilli crisp because it has crunchy garlic, shallots, peanuts and sesame seeds, not just chilli-infused oil.
Yes. Because this version contains fresh garlic, shallots and ginger, store it in the fridge and use a clean, dry spoon each time.
The oil was probably too hot, or the garlic and chilli flakes scorched. Cook the aromatics gently and pour the oil over the chilli flakes when it sizzles gently, not violently.
They may not have cooled fully before being stirred back in, or moisture may have got into the jar. Let the crispy bits cool separately and always use a clean, dry spoon.
Yes. Use toasted sunflower seeds, cashews or almonds, or leave the nuts out completely.
Recipe

Homemade Crispy Chilli Oil
Equipment
- 1 heavy-based saucepan
- 1 large heatproof bowl
- storage jars of choice
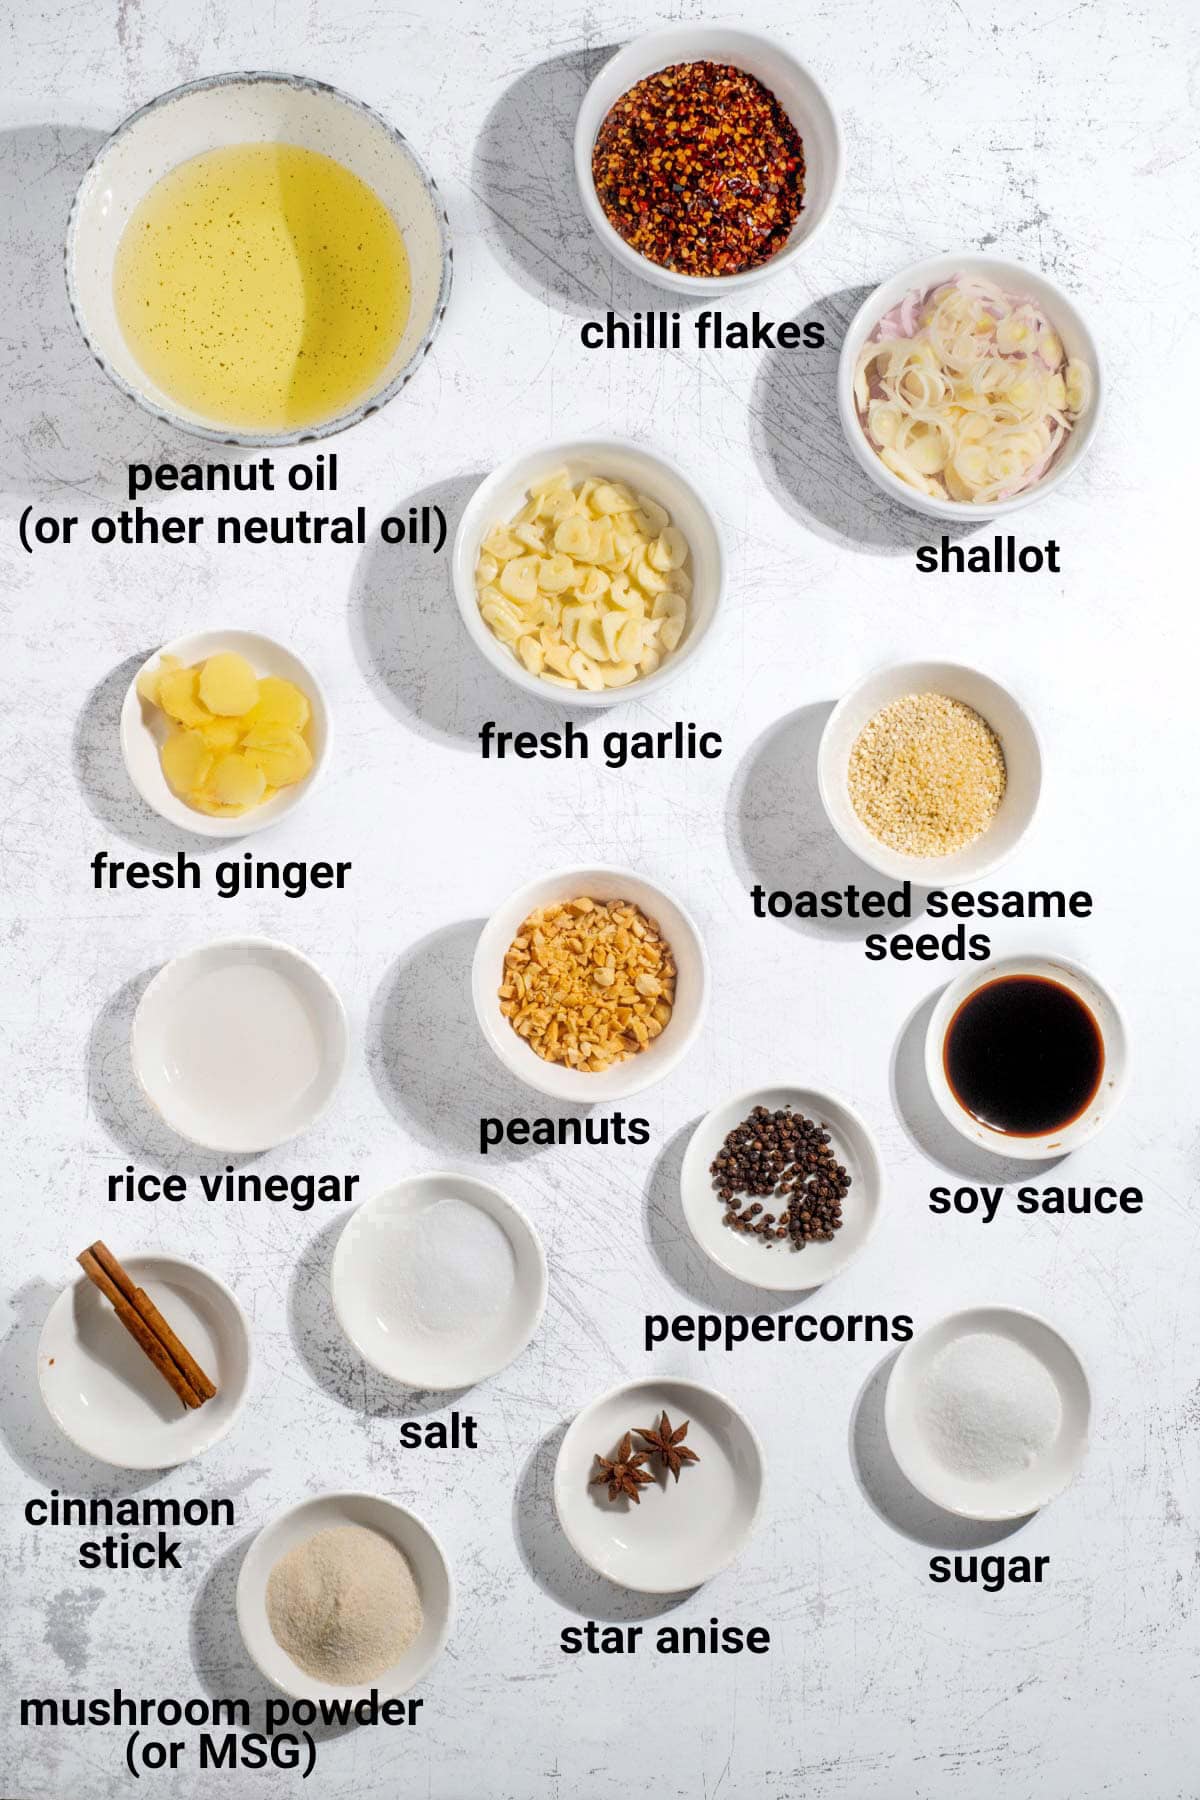
Ingredients
For the chilli base
- ½ cup chilli flakes/red pepper flakes - everyday chilli flakes, or Gochugaru, or Sichuan
- ½ teaspoon salt
- 2 teaspoons sugar
- 1 tablespoon mushroom powder, MSG or stock cube
- 2 teaspoons soy sauce
- 1 teaspoon rice vinegar
- 3 tablespoons toasted sesame seeds
- 4 tablespoons roasted peanuts, chopped - measured before chopping
For the oil infusion
- 1 cup peanut oil or neutral oil - up to 1½ cup if you like more oil
- 2.6 ounces (75g) shallot, finely sliced
- 10 garlic cloves, finely sliced
- 1 inch (2.5cm/1") fresh ginger, finely sliced
- 1 cinnamon stick
- 2 star anise
- 1 teaspoon black peppercorns - or Sichuan peppercorns
Instructions
Mix the chilli base
- Add the chilli flakes, salt, sugar, mushroom powder, soy sauce, rice vinegar, sesame seeds and chopped peanuts to a large heatproof bowl.½ cup chilli flakes/red pepper flakes, ½ teaspoon salt, 2 teaspoons sugar, 1 tablespoon mushroom powder, MSG or stock cube, 2 teaspoons soy sauce, 1 teaspoon rice vinegar, 3 tablespoons toasted sesame seeds, 4 tablespoons roasted peanuts, chopped
- Stir everything together and place the bowl somewhere safe, such as in the kitchen sink. The hot oil will sizzle and bubble when poured over the chilli base.
Infuse the oil
- Add the oil, shallots, garlic, ginger, cinnamon, star anise and peppercorns to a heavy-based saucepan.1 cup peanut oil or neutral oil, 2.6 ounces (75g) shallot, finely sliced, 10 garlic cloves, finely sliced, 1 inch (2.5cm/1") fresh ginger, finely sliced, 1 cinnamon stick, 2 star anise, 1 teaspoon black peppercorns
- Set the pan over medium-low heat and let everything bubble gently for 13-15 minutes, stirring now and then. The garlic and shallots should turn golden blonde, not brown. If they darken too quickly or the oil smokes, lower the heat straight away.
Strain
- Carefully pour the hot oil through a sieve directly over the chilli base. It will sizzle, so pour slowly and keep your face and hands back.
- Tip the garlic, shallots and ginger left in the sieve onto a plate lined with kitchen paper. Spread them out and let them cool completely so they crisp up properly.
- Once cooled, remove the cinnamon stick, star anise and most of the peppercorns. You can remove the ginger too if you prefer a smoother texture.
Combine
- Stir the cooled crispy garlic, shallots and any ginger you're keeping back into the chilli oil.
- Let the chilli oil cool completely before spooning it into a clean jar. Store in the fridge and use a clean, dry spoon each time.
Notes
Food safety note
Because this homemade chilli oil contains fresh garlic, shallots and ginger, store it in the fridge and use a clean, dry spoon each time. Make sure the crispy bits are fully cooked, cooled and dry before stirring them back in. For best quality and safety, use within 1 week.
**Nutritional data disclaimer**
Please keep in mind that the nutritional information provided below is calculated by a third party and we cannot guarantee the accuracy. We try our best to give you the most accurate information, but we do not take responsibility for errors that may be present. Also, the nutritional value of the recipe may change depending on the exact brands and products used. We recommend that you consult with a qualified healthcare professional or registered dietitian for personalised advice on your dietary needs.
Nutrition
For food safety advice, including guidance on food allergies

Leave a Reply