Show your love with these beautiful sugar cookies on a stick, perfect for Valentine's Day!
Imagine the kudos when you present a bouquet of these heart-shaped beauties to your special someone. Or watch your child's classmates' eyes light up as they receive a special Valentine's cookie made just for them.
This classic recipe for sugar cookies provides fool-proof, crispy, buttery cookies. Their sturdy texture makes them ideal for use with fun-shaped cookie cutters and for decorating them to your heart's content with royal icing. Or, if you don't feel up to the piping task, they also look very sweet with sparkly sprinkles.
Happy baking!
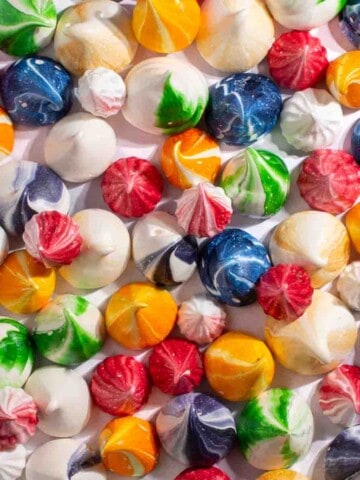
For more homemade Valentine's gift ideas, try these velvety rum truffles with ginger. Or if you'd like to give your Valentine some fancy sweet treats for afternoon tea, have a look at these mini meringue kisses. Romance on a plate!

Jump to:
What's to love about these cookies
- Makes a thoughtful gift for your Valentine's or someone special.
- A hassle-free recipe that comes together with ease.
- This classic sugar cookie recipe is perfect for use with cookie cutters. Shapes cut beautifully thanks to the sturdy yet tender dough.
- These cookie pops last well and can be made well in advance.
- Endless decorating options - royal icing, quick and easy sprinkles or just leave them plain!
Key ingredients and substitutions
Unsalted butter
We like to use unsalted butter for the pure, rich flavour it lends the cookies. However, salted butter works great too, just leave out the added salt in the recipe.
Sugar
Regular granulated sugar is perfect here, but castor sugar can also be used if that's what you have on hand.
Vanilla extract
Vanilla enhances the flavours beautifully, but feel free to switch it up with another extract like orange or almond if you prefer.
A pinch of warm spice like cinnamon or mixed spice would be delish too, especially if you want to make Christmas-themed cookies on sticks.
Egg
Be sure to let the eggs come to room temperature before mixing them in. Allowing eggs to come to room temperature before use helps them blend and incorporate more easily with the rest of the ingredients.
A little trick is to set them in warm water for a few minutes to speed up the warming.
Flour
All-purpose flour is the way to go here. It gives the cookies just the right structure.
Gel food colouring
Hands down the best choice for vivid colours without thinning out the icing too much. A little goes a long way, so start with a small amount.
Bamboo skewers
We like bamboo skewers since they have a nice sharp point for poking into the cookies. Standard kebab/wooden skewers work perfectly.
Heart-shaped cookie cutter
For this recipe, we used a heart-shaped cookie cutter that's 8cm across the widest part. This size cutter will yield 18 cookies at 8mm thickness.
How to make cookies on sticks
Bake the cookies:
- Prepare a few baking sheets by lining them with parchment paper.
- Using a stand or hand mixer, cream together the butter, sugar and vanilla extract until light and fluffy in texture.
- Add the egg and mix until fully incorporated.
- In a separate large bowl, sift together the flour and salt.
- Gradually add the dry ingredients to the wet ingredients in three additions, mixing just until no dry flour remains. Do not overmix.
- On a lightly floured surface, roll out the dough to a thickness of a minimum 8mm (⅓ of an inch).
- Use a heart-shaped cookie cutter to cut out shapes. Reroll scraps as needed.
- On a completely flat surface, gently insert the bamboo sticks into the cookies. Please see the detailed recipe card further down for more tips on how to do this successfully.
- If you are not planning on using royal icing for decoration, now would be the time to add any sprinkles to the cookies, before baking.
- Transfer the heart-shaped cookies onto a cookie sheet. If you place them in the below pattern, it will save you some space on the trays:

- Preheat the oven to 180C/356F/gas mark 4.
- For best results, firm up the cookies before baking by placing them in the fridge whilst preheating the oven. This will help the cookies hold their shape whilst baking.
- Bake for 12 minutes or until the outside edges of the cookies are a light golden brown colour.
- Allow the cookies to cool down slightly on their trays before moving them.
- When the cookies are cooled, slide a spatula underneath each cookie and gently lift it onto a cooling rack.
At this stage, don't try and pick them up by the skewers, they will still be too soft and the skewer might break through the soft dough. Once completely cooled you can handle them to your heart's content.
To make the royal icing:
For beautifully smooth and uniform icing coverage, you'll need to make flooding consistency royal icing:
- In a bowl, mix together icing sugar/powdered sugar, egg whites and vanilla extract until well blended.
- Before adding any water, test the consistency by drizzling a small amount of icing from a spoon onto the surface. It should slowly disappear after about 10 seconds.
- If the drizzled icing ribbon disappears too quickly, the icing is too thin. Add more powdered sugar to thicken it up.
- If the icing is too thick and the ribbon takes longer to disappear, the icing is too dense. Add a few drops of water and retest to get the right consistency.
- For piping finer details, remove some icing before thinning the bulk of it. Thicken it to toothpaste consistency by adding more powdered sugar.
- Divide the prepared flooding icing between bowls for each colour you want. Use a toothpick to stir in gel food colouring a little at a time until the desired shade develops.
- Transfer the coloured icing to piping bags fitted with small tips. Decorate the cookies as desired.
- Allow the iced cookies to dry undisturbed for 12-24 hours before handling so the icing can be fully set.
For expert tips on how to decorate cookies, see this video by Wilton. Also, have a read at this article by Litteviews-Crafts on the best piping tips to use.
Variations and alternative ways to decorate
- 'Hundreds and thousands' sprinkles.
- 'Vermicelli' sprinkles.
- Small heart-shaped sprinkles.
- For a fun twist, dust the cookies with edible glitter and a large fluffy brush.
- Drizzle with melted chocolate. You can use a mixture of milk chocolate, white chocolate and dark chocolate.
- Dip the entire surface in chocolate. Pink ruby chocolate would look very pretty for Valentine's cookies.
- If dipping in chocolate, consider adding a few bits of gold leaf for extra bling.
- Alternatively, keep the cookies plain and just tie beautiful ribbons around the skewers. You can also wrap the sticks tightly in colourful crinkle paper.
- Make miniature cookies with smaller cookie cutters and use a lollipop stick, or an ice cream stick, instead of a long bamboo skewer. You can usually find all sorts of sticks to use at a good quality craft store.
- Add chocolate chips to the cookie dough for chocolate chip cookie sticks. Enjoy with a cold glass of milk!
- Cut out flower shapes, instead of hearts, to make flower cookie bouquets.
- For Christmas, make festive cookie pops using snowflake cutters, reindeer cutters etc.
Storage
The iced cookies will keep well for up to 30 days in an airtight container. If you are planning on making them as gifts, you can make them up to 2 weeks in advance. The start of February would be a good time if they are meant for Valentine's Day.
The cookies freeze well for up to 6 months in an airtight container.
Other cookie recipes you might enjoy
Hallongrotter - Swedish thumbprint cookies
Tinginys - Lithuanian lazy cookies
Condensed milk chocolate chip cookies
Chocolate chip cookies without brown sugar
Spice biscuits - 'Outydse Soetkoekies'
FAQ
Butter cookies are made with a higher proportion of butter to flour, eggs and sugar. They are usually quite rich and crumbly in consistency.
Sugar cookies, on the other hand, are made with a much higher sugar-to-flour, eggs and butter ratio. This makes them a bit tougher, and stronger and therefore ideal for cutting shapes out of.
More Valentine's recipes
Recipe

Cookies on sticks
Ingredients
For the cookies
- 240 grams unsalted butter - softened
- 200 grams sugar
- 1 teaspoon vanilla extract - 5ml
- 1 egg - room temperature
- 400 grams plain flour
- ½ teaspoon salt - 2.5ml
- bamboo skewers
For the royal icing
- 340 grams icing sugar
- 2 egg whites
- ½ teaspoon vanilla extract
- 1-2 teaspoons water
- gel food colouring in your preferred colours
Instructions
To make the cookies
- Prepare a few cookie sheets by lining them with parchment paper. Depending on the size of your sheets, you will likely need a minimum of two sheets.
- Using a stand or hand mixer, cream together the butter, sugar and vanilla extract until light and fluffy in texture.
- Add the egg and mix until fully incorporated.
- In a separate bowl, sift together the flour and salt.
- Gradually add the dry ingredients to the creamed butter mixture in three additions, mixing just until no dry flour remains. Do not overmix.**Tip: If you are using a stand mixer, you can do this step with the machine. If you are using an electric hand mixer, rather mix the flour in by hand. The dough will get quite stiff and you might put too much strain on your hand mixer.
- On a lightly floured surface, roll out the dough to a thickness of minimum 8mm (⅓ of an inch).This thickness will provide enough support for the skewer to hold the cookies securely.
- Use a heart-shaped cookie cutter to cut out shapes. Reroll scraps as needed.For this recipe, we used a heart shaped cookie cutter that's 8cm across the widest part. This size cutter will yield 18 cookies at 8mm thickness
To insert the skewers
- Using the sharp ends of the bamboo skewers, gently push them into the bottom point of each heart-shaped cookie.
- As you insert the skewer, slowly roll it back and forth between thumb and index finger. This helps ease it through the dough.
- Try to keep the skewer as horizontal as possible as you push it in. This prevents accidentally poking it through the top surface.
- Place the fingers from your other hand on top of the cookie. You'll be able to feel the skewer's movement through the dough.
- Push the skewer in as deep as possible without breaking through the top surface. This provides stability.
- Once inserted, gently press down on the surface surrounding the skewer. This compacts the dough tightly around it.
- If you are not planning on using royal icing for decoration, now would be the time to add any sprinkles to the cookies, before baking.
How to space the cookies on the baking tray
- Transfer the heart-shaped cookies onto the baking sheets.
- To save space on your baking tray, place the cookies in the pattern shown on this picture.

Bake the cookies
- Preheat the oven to 180C/356F/gas mark 4.
- To firm up the cookies before baking, place them in the fridge whilst preheating the oven. This will help the cookies hold their shape whilst baking.
- Bake for 12 minutes or until the outside edges of the cookies are a light golden colour.
- Allow the cookies to cool down slightly on their trays before moving them.
- When the cookies are cooler, slide a spatula underneath each cookie and gently lift it onto the cooling rack. At this stage, don't try and pick them up by the skewers, they will still be too soft and the skewer might break through the soft dough. Once completely cooled you can handle them to your heart's content.If you find a skewer that's either coming out or feels a bit loose, you can pipe some royal icing into the hole and let it dry with the skewer in place.
To make the royal icing
- For beautifully smooth and uniform icing coverage, you'll need to make flooding consistency royal icing.
- In a bowl, mix together icing sugar/powdered sugar, egg whites and vanilla extract until well blended.
- Before adding any water, test the consistency by drizzling a small amount of icing from a spoon onto the surface. It should slowly disappear after about 10 seconds.
- If the drizzled icing ribbon disappears too quickly, the icing is too thin. Add more powdered sugar to thicken it up.
- If the icing is too thick and the ribbon takes longer to disappear, the icing is too dense. Add a few drops of water and retest to get the right consistency.
- Optional: For piping finer details, remove some icing before thinning the bulk of it. Thicken it to toothpaste consistency by adding more powdered sugar. Set this thicker icing aside for adding details later after you've covered the cookies with the thinner icing.
- Divide the prepared flooding icing between bowls for each colour you want. Use a toothpick to stir in the gel food colouring a little at a time until the desired shade develops.
- Transfer the coloured icing to piping bags fitted with small tips. Decorate the cookies as desired.See the blog post further up for links to the experts on how to pipe beautiful cookies and which piping tips to use for each method.
- Allow the iced cookies to dry undisturbed for 12-24 hours before handling so the icing can fully set.
**Nutritional data disclaimer**
Please keep in mind that the nutritional information provided below is calculated by a third party and we cannot guarantee the accuracy. We try our best to give you the most accurate information, but we do not take responsibility for errors that may be present. Also, the nutritional value of the recipe may change depending on the exact brands and products used. We recommend that you consult with a qualified healthcare professional or registered dietitian for personalised advice on your dietary needs.
Nutrition
For food safety advice, including guidance on food allergies




Leave a Reply