
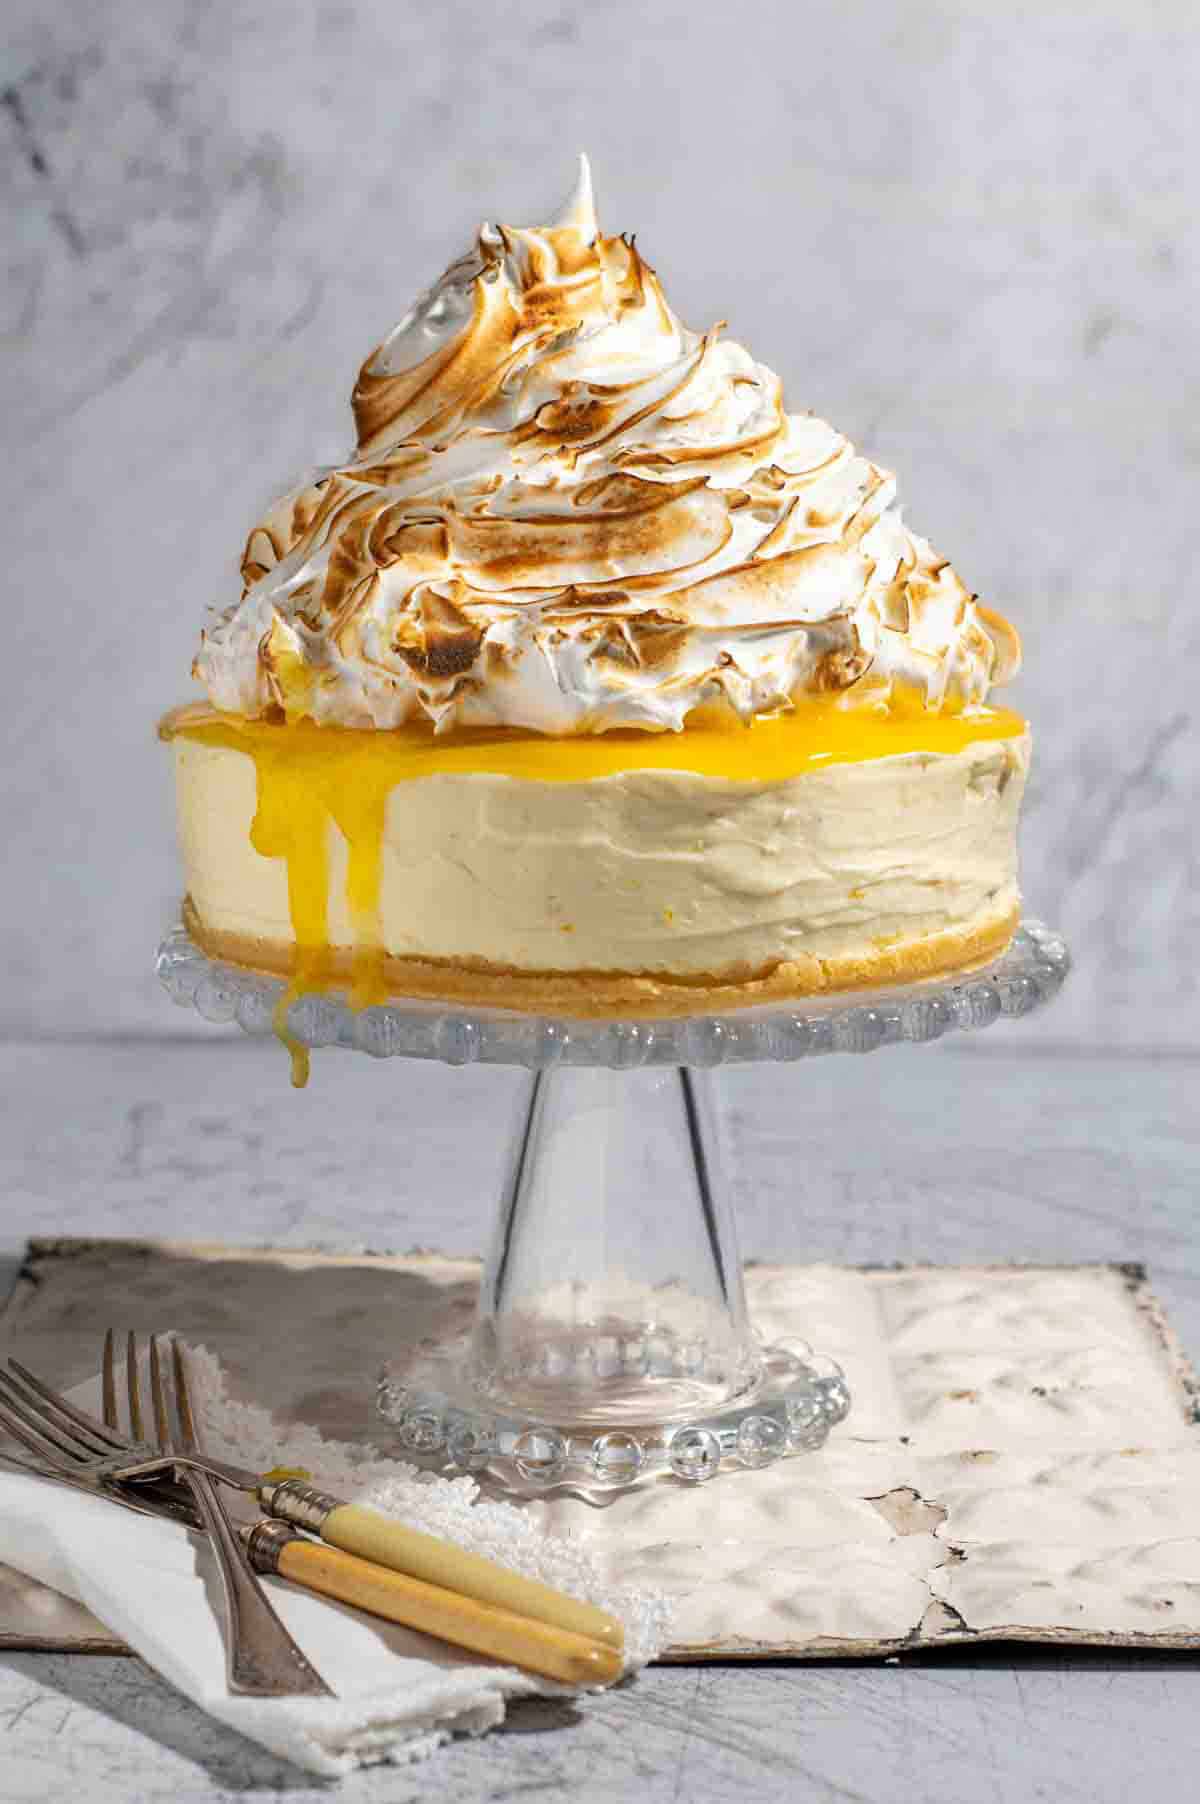
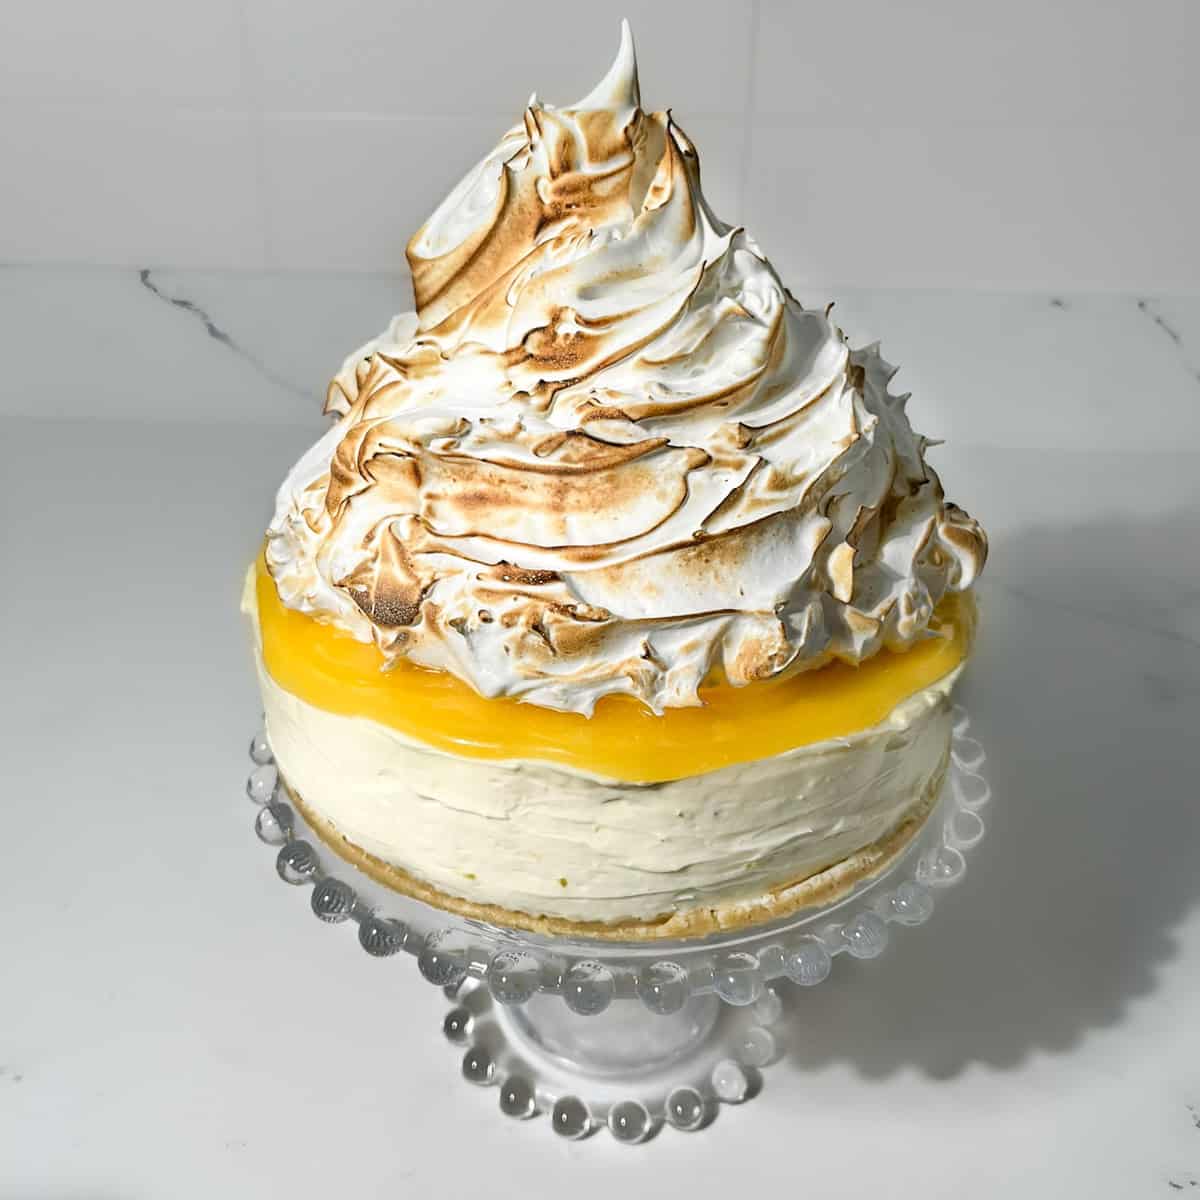
This no-bake lemon meringue cheesecake is a refreshing celebration of bright, creamy flavours layered with glossy lemon curd (shop-bought!) and crowned with a delicate swirl of Swiss meringue.
The buttery biscuit base provides the perfect foundation for a luscious, lemon-infused filling, enriched with white chocolate to give it just the right balance of softness, sweetness and sliceability.
What truly sets this cheesecake apart is the Swiss meringue topping. Easy to prepare with a glossy, airy finish that holds its shape beautifully without any of the usual meringue dramas. No weeping, no collapsing, no baking required.
The result is a pristine, elegant dessert that slices neatly and looks as impressive as it tastes👌
Jump to:
- Recipe highlights
- Recipes to try next...
- Key ingredient notes and substitutions
- Quick tip
- Quick tip
- Why Swiss meringue?
- How to torch meringue
- Step-by-step instructions
- Storing and freezing
- Drinks that pair well with a lemon meringue cheesecake
- Scaling the recipe
- FAQs
- Recipe
- How to torch meringue
- Scaling the recipe
Recipe highlights
- No oven or waterbaths needed. Perfect as a summer dessert.
- Four delicious layers: Buttery biscuit base + creamy lemon filling + lemon curd + Swiss meringue.
- White chocolate makes the filling stable enough to slice cleanly.
- Swiss meringue = no weeping meringue, no drama.
- Great make-ahead option.
- Easy to adapt into mini cheesecakes.
Recipes to try next...
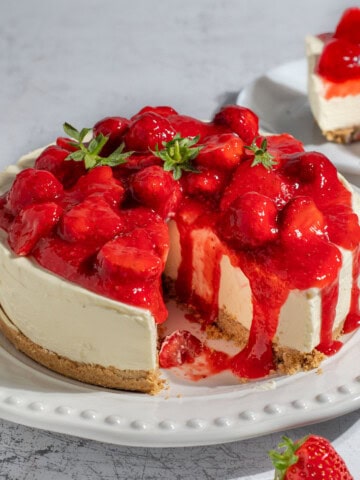
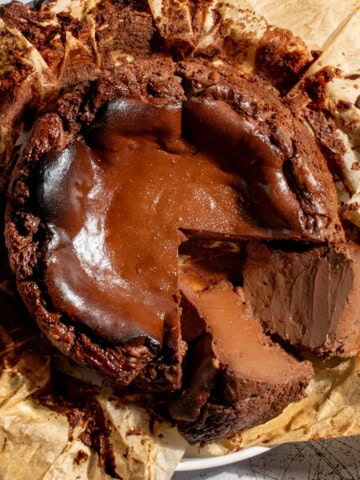
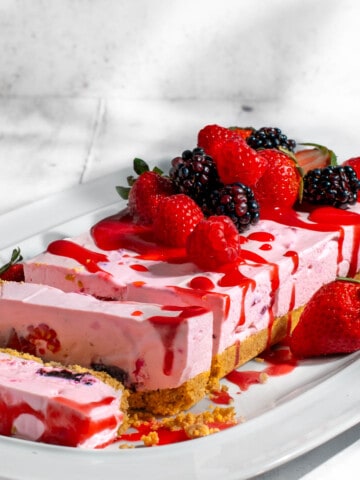
If you love this lemon meringue cheesecake, you'll also enjoy our other cheesecake favourites: The classic, luscious Strawberry Cheesecake, the rich, caramelised Chocolate Basque Cheesecake, and the light, fruity No-Bake Berry Cheesecake.
Key ingredient notes and substitutions

Shortbreads, digestives or graham crackers
We usually reach for shortbreads in this recipe; they give a rich, buttery flavour and a slightly firmer base.
For a lighter, crunchier texture, digestives or graham crackers are a better option.
White chocolate
This is what gives the filling its rich, creamy sweetness and helps it set beautifully without any need for gelatin.
As the chocolate firms up in the fridge, it gives the cheesecake just the right amount of structure.
While a good-quality bar (or chips) with real cocoa butter will give the best flavour, we've often used supermarket own-brand white chocolate and it's still absolutely delicious.
Cream cheese and mascarpone
This duo is the backbone of the filling.
Cream cheese brings that classic tangy richness, while mascarpone adds an extra-smooth, almost whipped quality that makes the texture unbelievably creamy.
Stick to full-fat versions for the best flavour and structure, especially in a cheesecake without baking. This is not the moment for moderation.
Double cream (heavy cream)
Try your best to use double cream here. The high fat content gives the filling its rich, luxurious texture.
If you're in a pinch, whipping cream will work too, and single cream at a stretch, but the result won't be quite as dreamy.
Lemon curd
We use a good-quality shop-bought lemon curd to keep things simple.
Just look for one made with real lemons and butter for the best flavour and texture. Of course, if you prefer homemade, go right ahead.
Quick tip
If your curd feels too thick to spread, pop it in the microwave for a few seconds to loosen it slightly. Give it a good whisk to smooth it out before using.
Caster sugar (superfine sugar) or granulated sugar
We use caster sugar in the Swiss meringue. It's also known as superfine sugar in the US.
The finer texture helps it dissolve more quickly into the egg whites, which gives you a smoother, glossier meringue.
You can use regular white granulated sugar if that's what you have. It will still work! Just be patient as it may take a little longer to melt.
To check if it's ready, rub a bit of the mixture between your fingers. If it feels gritty, keep whisking gently over the heat until the sugar has fully dissolved.
Quick tip
In the US, superfine sugar (caster sugar) can be pricey, but you can easily make your own.
Just pulse regular granulated sugar in a food processor for 15-20 seconds until it feels slightly finer and softer to the touch, like fine sand.
Don't over-blitz or you'll end up with powdered sugar!
Why Swiss meringue?
Here's a quick breakdown of how Swiss and Italian meringue differ in preparation: 👇

If you're familiar with different types of meringue, you might be wondering why we've chosen Swiss over Italian for this cheesecake.
Simply put, it's easier, safer, and more suited to a no-bake dessert.
Swiss meringue gives you that glossy, cloud-like swirl without the stress of boiling sugar syrup.
It's wonderfully stable, holds its shape beautifully, and of all the times we've made this recipe, it's never failed us.
How to torch meringue

You'll need a kitchen torch for this.
Don't be tempted by the oven. This is a no-bake, cold cheesecake, and it will melt under the grill!
If it's your first time making Swiss meringue, it's worth getting one. A small, inexpensive torch does the job, and trust me, you'll want to make this meringue again and again and again...
Hover the torch like you're painting with fire, just enough to kiss the peaks with colour. Don't linger too long in one place, it can go from pure white to scorched in a split second.
Step-by-step instructions
Prepare the base

1. Line the base of an 8-inch (20cm) springform tin with baking paper. The easiest way is to place a sheet over the base, clamp the sides shut, then trim the excess paper for a neat finish.
2. Melt the butter in the microwave in a heatproof bowl until fully melted. Set aside.
3. Crush the cookies in a food processor or sealed bag with a rolling pin until they resemble a sand-like texture.

4. Add the melted butter to the crushed cookies and mix until evenly combined.

5. Spoon the mixture into the tin and use the back of the spoon to press it down firmly and smooth it out into an even layer. Place the tin in the fridge to firm up while you make the cheesecake filling.
Prepare the filling
6. Melt the white chocolate in the microwave or over a double boiler until completely smooth with no lumps. Set aside to cool slightly while you prepare the filling.

7. Using the whisk attachments of your mixer, whip the cold double cream to soft peaks.

8. In a separate large bowl, combine the room-temperature cream cheese, mascarpone, icing sugar, lemon zest, lemon juice and vanilla extract.

9. Using the same whisk attachments (no need to wash them), whisk the mixture until it's completely smooth and creamy, with no lumps or graininess.

10. Next, add the soft-whipped cream. Using low speed, whip the mixture until it's quite firm and holds its shape well. Be careful not to overwhip, or it may turn grainy.

11. Finally, pour in the slightly cooled melted white chocolate.

12. Whisk gently until the mixture is silky smooth. Again, be careful not to overwhip.

13. Spoon the cheesecake mix on top of the cookie base. Add it in three parts, smoothing each layer as you go to avoid any air pockets.
Chill the cheesecake in the fridge for at least 6 hours, but overnight is best for perfect firmness.
Add the lemon curd topping

14. Once the cheesecake has set, spread the lemon curd evenly over the top.
If your curd feels a bit stiff or jelly-like, warm it gently in the microwave for a few seconds, just enough to loosen it. Then, give it a good whisk to smooth out any lumps before spreading.
Chill the topping whilst you make the meringue.
Make the Swiss meringue topping

15. Attach the whisk attachment to a stand mixer or an electric hand mixer.

16. Fill a saucepan with at least 5cm/2" of boiling water. Place a bowl on top of the saucepan, ensuring the bottom of the bowl does not touch the water. Alternatively, if you have a double boiler, use that.
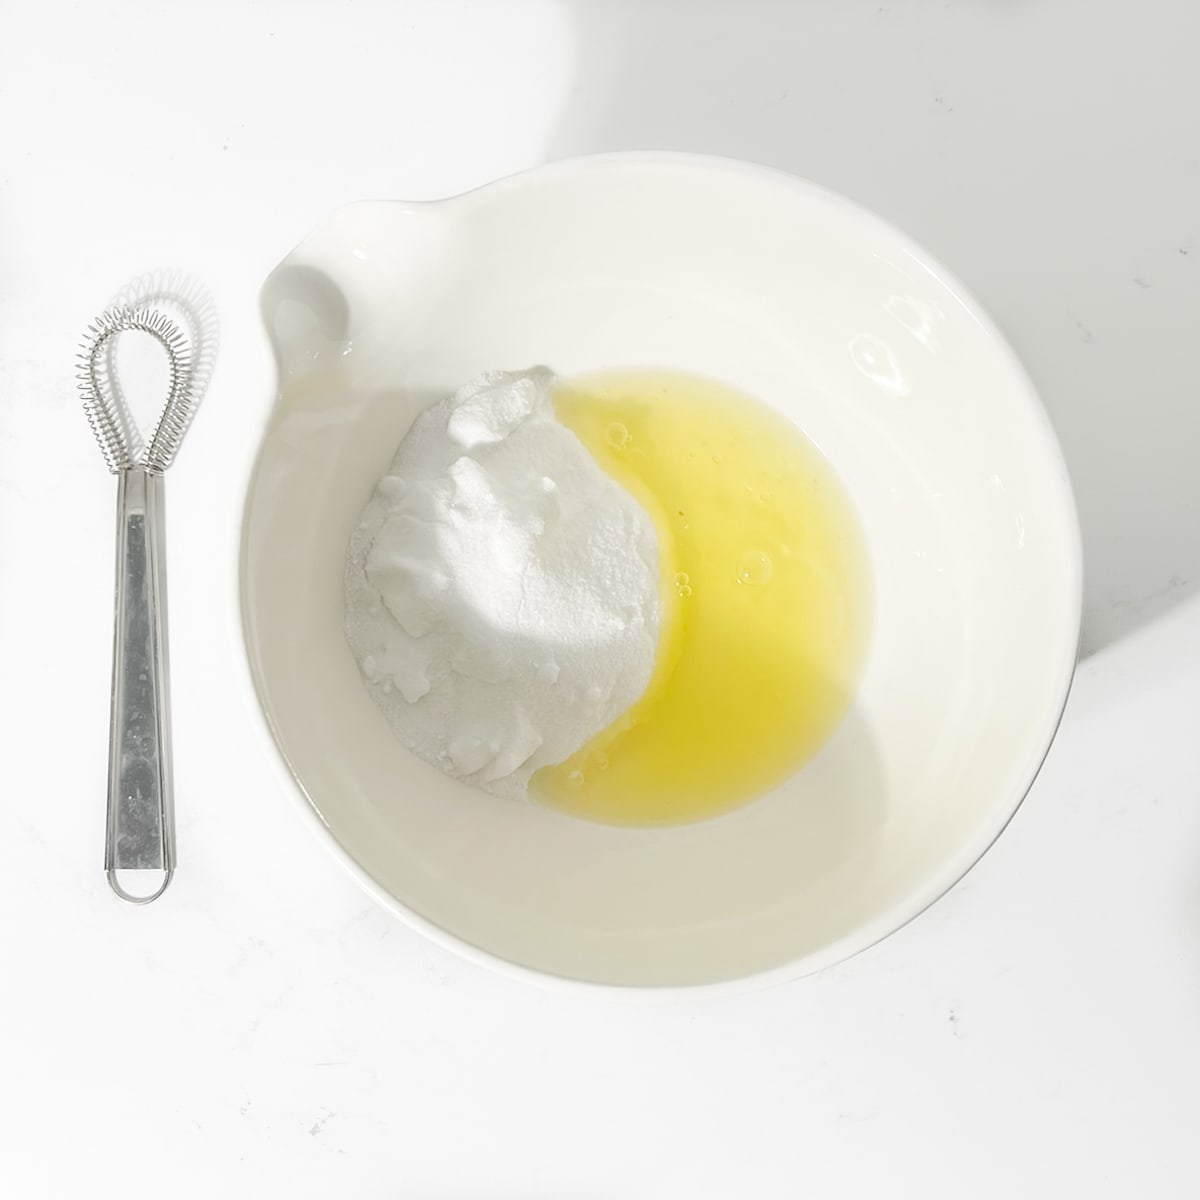
17. Add the caster sugar and egg whites to the bowl. Make sure you have a hand whisk ready.
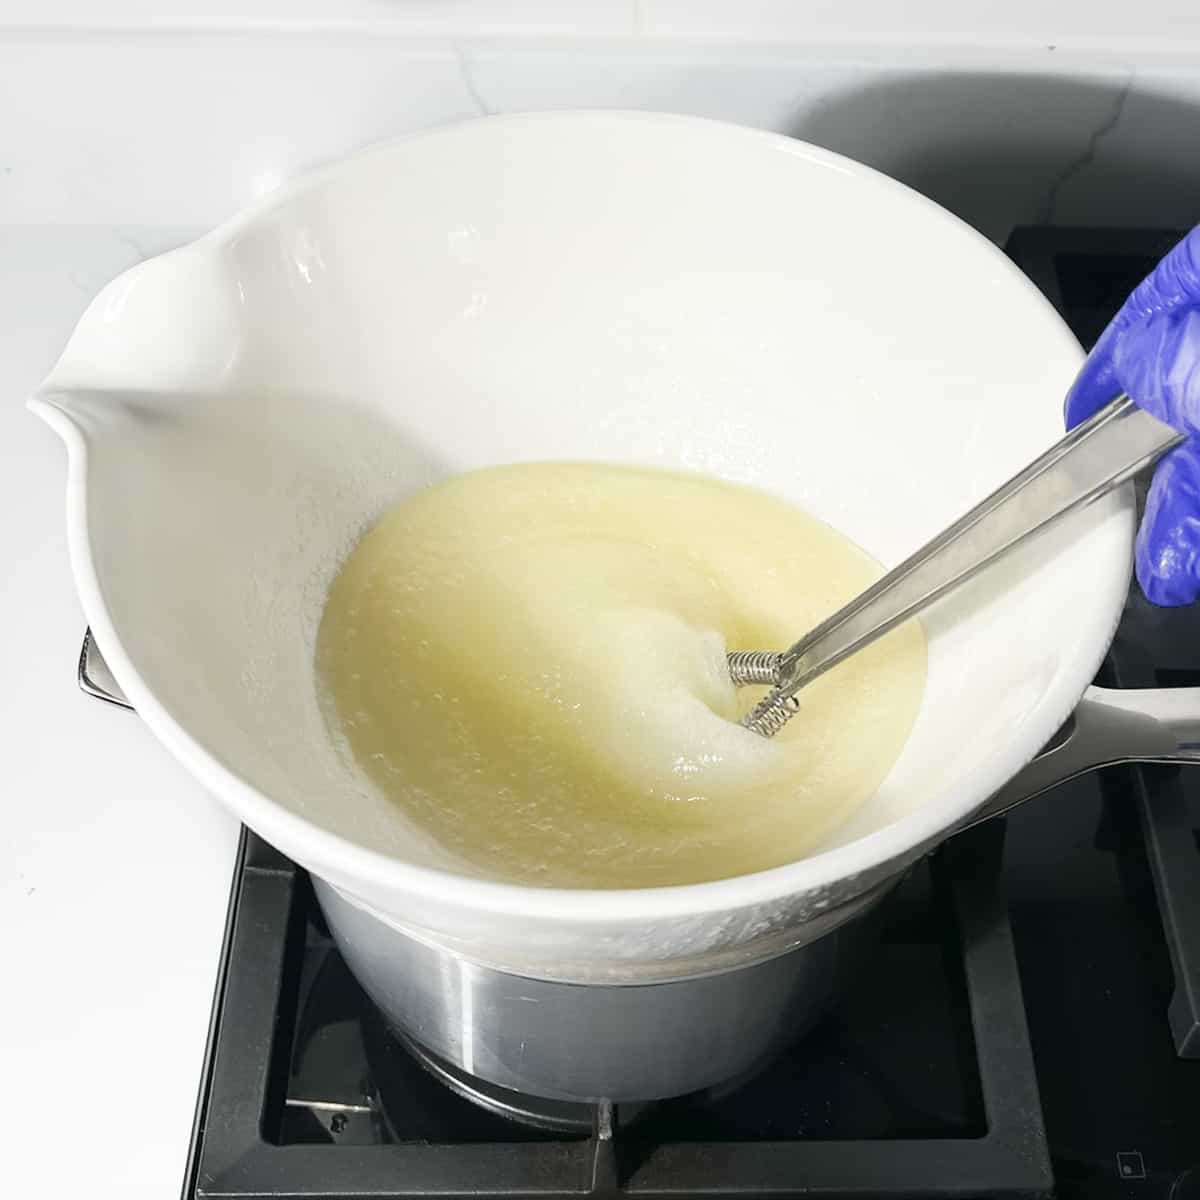
18. Over medium heat, whisk the egg white and sugar mixture continuously until all the sugar has melted. Expect the mixture to become very foamy as it heats up.

19. To check if the sugar has melted, quickly dip your fingertips into the mixture and feel for any graininess. Alternatively, if you have an instant-read thermometer, the temperature should read around 71C/160F.
Typically, this process takes around 5 minutes.
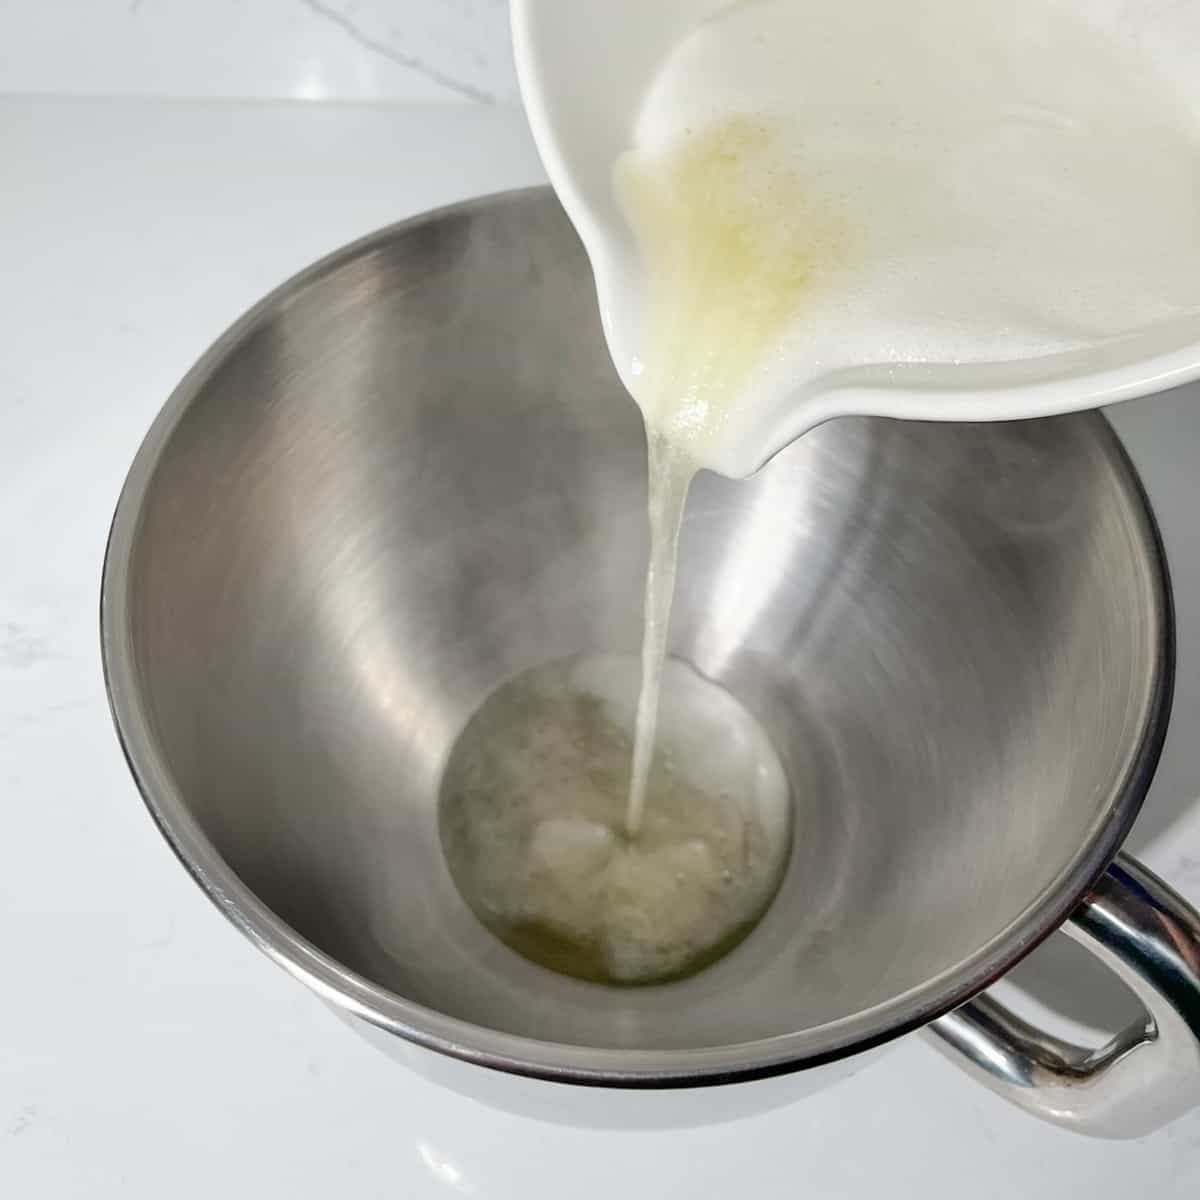
20. Transfer the hot egg and sugar mixture to the grease-free bowl of a stand mixer. If you're using an electric hand mixer, transfer the mixture to a grease-free, large mixing bowl.

21. Beat the meringue mixture on medium-high speed for 1-1.5 minutes until it starts to build a little volume. Then, add the cream of tartar, vanilla extract and a generous pinch of salt.
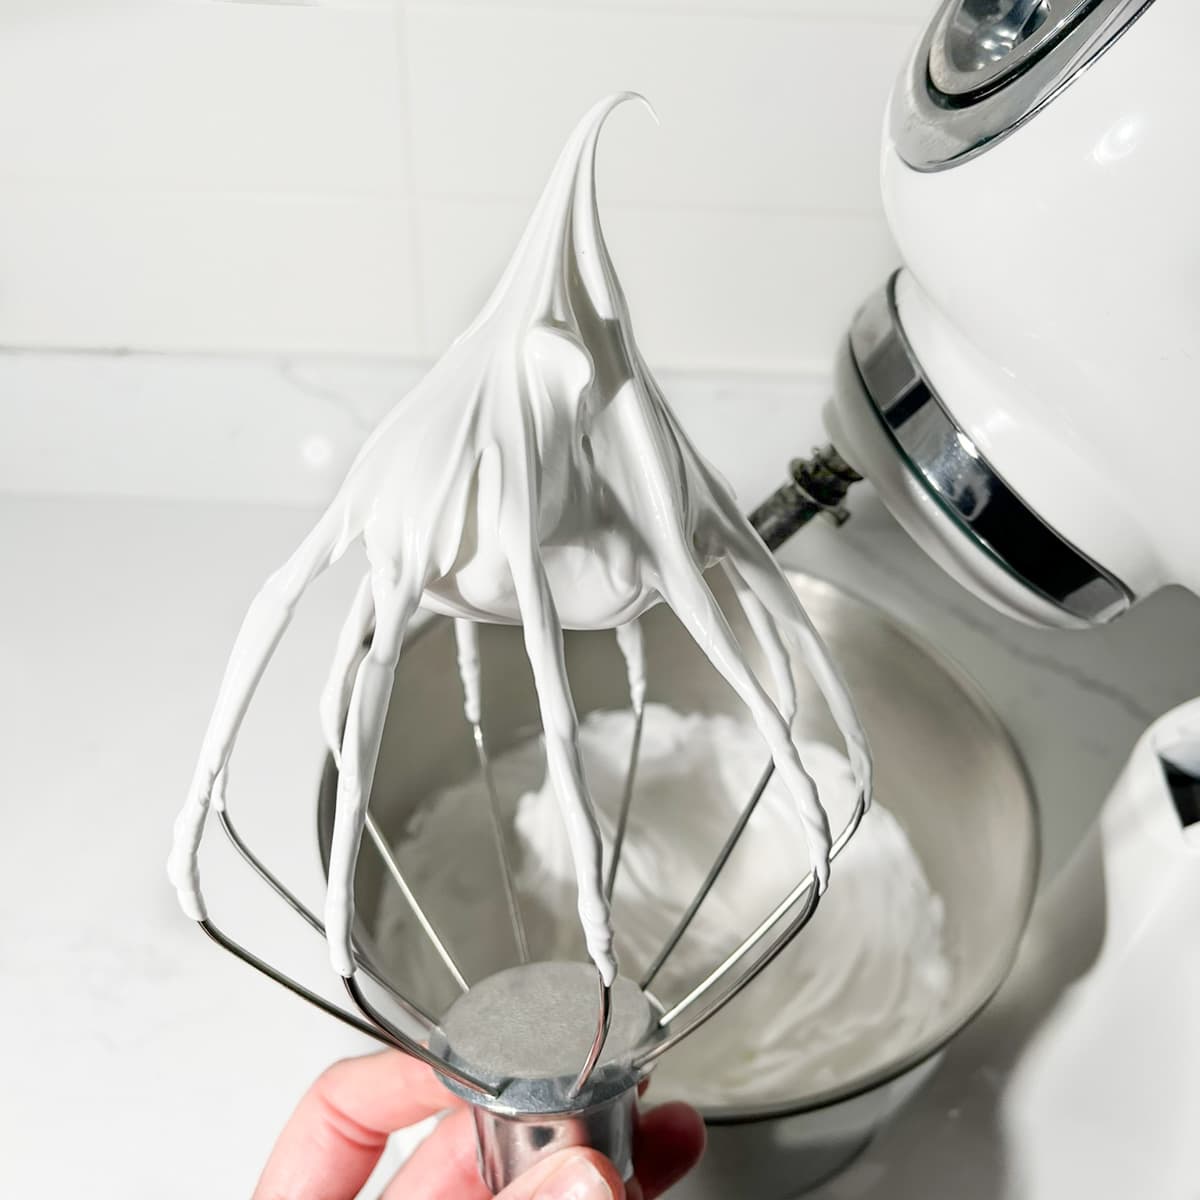
22. Continue beating until the meringue turns pure white with glossy, stiff peaks that hold their shape. Stop as soon as you reach this stage, as overbeating might cause graininess.
It should take approximately 3-4 minutes with a stand mixer on medium-high speed and a little longer with an electric hand mixer.
Top with meringue

23. Spoon or pipe the meringue over the curd, swirling it into dramatic peaks.
24. Torch lightly until golden. Keep the flame moving to avoid burning. A gentle pass is all it needs for a caramelised finish.
Storing and freezing
Fridge
Store the cheesecake in the fridge for up to 3 days.
To store with a high meringue pile: use a tall cake carrier or tent with foil or a large upturned bowl. Keep it chilled.
Freezing
You can freeze the base and cheesecake layer for up to three months (without lemon curd or meringue).
Add fresh curd and meringue after defrosting.
Drinks that pair well with a lemon meringue cheesecake
Sparkling wine or Prosecco - to echo the lightness of the meringue.
Earl Grey tea - for a citrusy contrast.
Limoncello or citrus liqueur - if you want to go all in.
Iced mint tea - fresh and cooling alongside the zesty filling.
Scaling the recipe
For a smaller cheesecake (6-inch): Reduce all ingredients by roughly ⅓.
For a larger crowd (9- or 10-inch): Increase ingredients by 1.5x.
Mini cheesecakes: Divide the crust and filling among muffin tins or dessert glasses. Chill as normal. Spoon on curd and pipe a small swirl of meringue on top of each.
FAQs
It likely needed more chilling time, or the white chocolate was too warm when folded in.
Lastly, the filling should be thick enough to be spooned, not poured. If it's looking a little loose, give it a quick whip to firm it up before it goes into the tin.
Absolutely. Just pick one made with real lemon juice and butter for the best flavour.
At least 6-8 hours. Overnight is even better. The filling must be firm before adding the curd.
Use gluten-free biscuits or graham crackers for the base. The rest of the recipe is naturally gluten-free.
Recipe

Lemon Meringue Cheesecake (no bake)
Equipment
- 8-inch (20cm) round springform baking tin
- stand mixer or electric hand mixer (grease-free)
- kitchen torch
Ingredients
For the base
- 2.8 ounces (80g) butter
- 8.8 ounces (250g) shortbread, digestives or graham crackers
For the lemon cheesecake filling
- 12.3 ounces (350g) white chocolate, broken into pieces
- 1 cup (240ml) heavy cream (double cream) - fridge cold
- 14.1 ounces (400g) full-fat cream cheese - room temperature
- 8.8 ounces (250g) mascarpone cheese - room temperature
- 2 tablespoons icing sugar (powdered sugar)
- 2 tablespoons lemon zest (packed) - roughly two large lemons
- 3 tablespoons fresh lemon juice
- 1 teaspoon vanilla extract
For the topping
- 6.3 ounces (180g) lemon curd - add more if you want
For the Swiss meringue
- 7.8 ounces (220g) caster sugar or granulated sugar
- 4 egg whites from large eggs
- ½ teaspoon cream of tartar
- 1 teaspoon vanilla extract
- ¼ teaspoon salt (or a large pinch)
Instructions
Prepare the base
- Line the base of an 8-inch (20cm) springform tin with baking paper. The easiest way is to place a sheet over the base, clamp the sides shut, then trim the excess paper for a neat finish.
- Melt the butter in the microwave in a heatproof bowl until fully melted. Set aside.2.8 ounces (80g) butter
- Crush the cookies in a food processor or sealed bag with a rolling pin until they resemble a sand-like texture.8.8 ounces (250g) shortbread, digestives or graham crackers
- Add the melted butter to the crushed cookies and mix until evenly combined.
- Spoon the mixture into the tin and use the back of the spoon to press it down firmly and smooth it out into an even layer. Place the tin in the fridge to firm up while you make the cheesecake filling.
Prepare the filling
- Melt the white chocolate in the microwave or over a double boiler until completely smooth with no lumps. Set aside to cool slightly while you prepare the filling.12.3 ounces (350g) white chocolate, broken into pieces
- Using the whisk attachments of your mixer, whip the cold double cream to soft peaks.1 cup (240ml) heavy cream (double cream)
- In a separate large bowl, combine the room-temperature cream cheese, mascarpone, icing sugar, lemon zest, lemon juice and vanilla extract.14.1 ounces (400g) full-fat cream cheese, 8.8 ounces (250g) mascarpone cheese, 2 tablespoons icing sugar (powdered sugar), 2 tablespoons lemon zest (packed), 3 tablespoons fresh lemon juice, 1 teaspoon vanilla extract
- Using the same whisk attachments (no need to wash them), whisk the mixture until it's completely smooth and creamy, with no lumps or graininess.
- Next, add the soft-whipped cream. Using low speed, whip the mixture until it's quite firm and holds its shape well. Be careful not to overwhip, or it may turn grainy.
- Finally, pour in the slightly cooled melted white chocolate.
- Whisk gently until the mixture is silky smooth. Again, be careful not to overwhip.
- Spoon the cheesecake mix on top of the cookie base. Add it in three parts, smoothing each layer as you go to avoid any air pockets.Chill the cheesecake in the fridge for at least 6 hours, but overnight is best for perfect firmness.
Add the lemon curd topping
- Once the cheesecake has set, spread the lemon curd evenly over the top. If your curd feels a bit stiff or jelly-like, warm it gently in the microwave for a few seconds, just enough to loosen it. Then, give it a good whisk to smooth out any lumps before spreading. Chill the topping whilst you make the meringue.6.3 ounces (180g) lemon curd
Make the Swiss meringue topping
- Attach the whisk attachment to a stand mixer or an electric hand mixer.
- Fill a saucepan with at least 5cm/2" of boiling water. Place a bowl on top of the saucepan, ensuring the bottom of the bowl does not touch the water. Alternatively, if you have a double boiler, use that.
- Add the caster sugar (or granulated sugar) and egg whites to the bowl. Make sure you have a hand whisk ready.7.8 ounces (220g) caster sugar or granulated sugar, 4 egg whites from large eggs
- Over medium heat, whisk the egg white and sugar mixture continuously until all the sugar has melted. Expect the mixture to become very foamy as it heats up.
- To check if the sugar has melted, quickly dip your fingertips into the mixture and feel for any graininess. Alternatively, if you have an instant-read thermometer, the temperature should read around 71C/160F.Typically, this process takes around 5 minutes.
- Transfer the hot egg and sugar mixture to the grease-free bowl of a stand mixer. If you're using an electric hand mixer, transfer the mixture to a grease-free, large mixing bowl.
- Beat the meringue mixture on medium-high speed for 1-1.5 minutes until it starts to build a little volume. Then, add the cream of tartar, vanilla extract and a generous pinch of salt.½ teaspoon cream of tartar, ¼ teaspoon salt (or a large pinch), 1 teaspoon vanilla extract
- Continue beating until the meringue turns pure white with glossy, stiff peaks that hold their shape. Stop as soon as you reach this stage, as overbeating might cause graininess.It should take approximately 3-4 minutes with a stand mixer on medium-high speed and a little longer with an electric hand mixer.
Top with meringue
- Spoon or pipe the meringue over the curd, swirling it into dramatic peaks.
- Torch lightly until golden. Keep the flame moving to avoid burning. A gentle pass is all it needs for a caramelised finish.
Notes
How to torch meringue
Hover the torch like you're painting with fire, just enough to kiss the peaks with colour. Don't linger too long in one place, it can go from pure white to scorched in a split second.Scaling the recipe
For a smaller cheesecake (6-inch): Reduce all ingredients by roughly ⅓. For a larger crowd (9- or 10-inch): Increase ingredients by 1.5x. Mini cheesecakes: Divide the crust and filling among muffin tins or dessert glasses. Chill as normal. Spoon on curd and pipe a small swirl of meringue on top of each.
**Nutritional data disclaimer**
Please keep in mind that the nutritional information provided below is calculated by a third party and we cannot guarantee the accuracy. We try our best to give you the most accurate information, but we do not take responsibility for errors that may be present. Also, the nutritional value of the recipe may change depending on the exact brands and products used. We recommend that you consult with a qualified healthcare professional or registered dietitian for personalised advice on your dietary needs.
Nutrition
For food safety advice, including guidance on food allergies
Elle says
Can you put the meringue topping on a few hours before serving and refrigerate until serving time and then torch before serving or best to place the meringue right before serving?
Maretha Corbett says
Hi Elle,
Great question! Since this recipe uses a Swiss meringue, you actually have a bit of flexibility. You can pipe it on and even torch it a little earlier if that helps with timing - it will hold up.
That said, torching it just before serving is still the best option. The meringue stays glossy and soft, and you get that gorgeous freshly-toasted smell drifting through the house...never a bad thing!
Hope you enjoy it!
Maretha x