An epicurean adventure to: The United Kingdom
Rustle up a timeless British classic with this Tottenham cake recipe!
This lovely, single-layer traybake has been a teatime staple for over 100 years. Our easy recipe produces a feather-light, moist vanilla sponge topped with a gloriously cheerful pink icing made from either blueberries or raspberries.
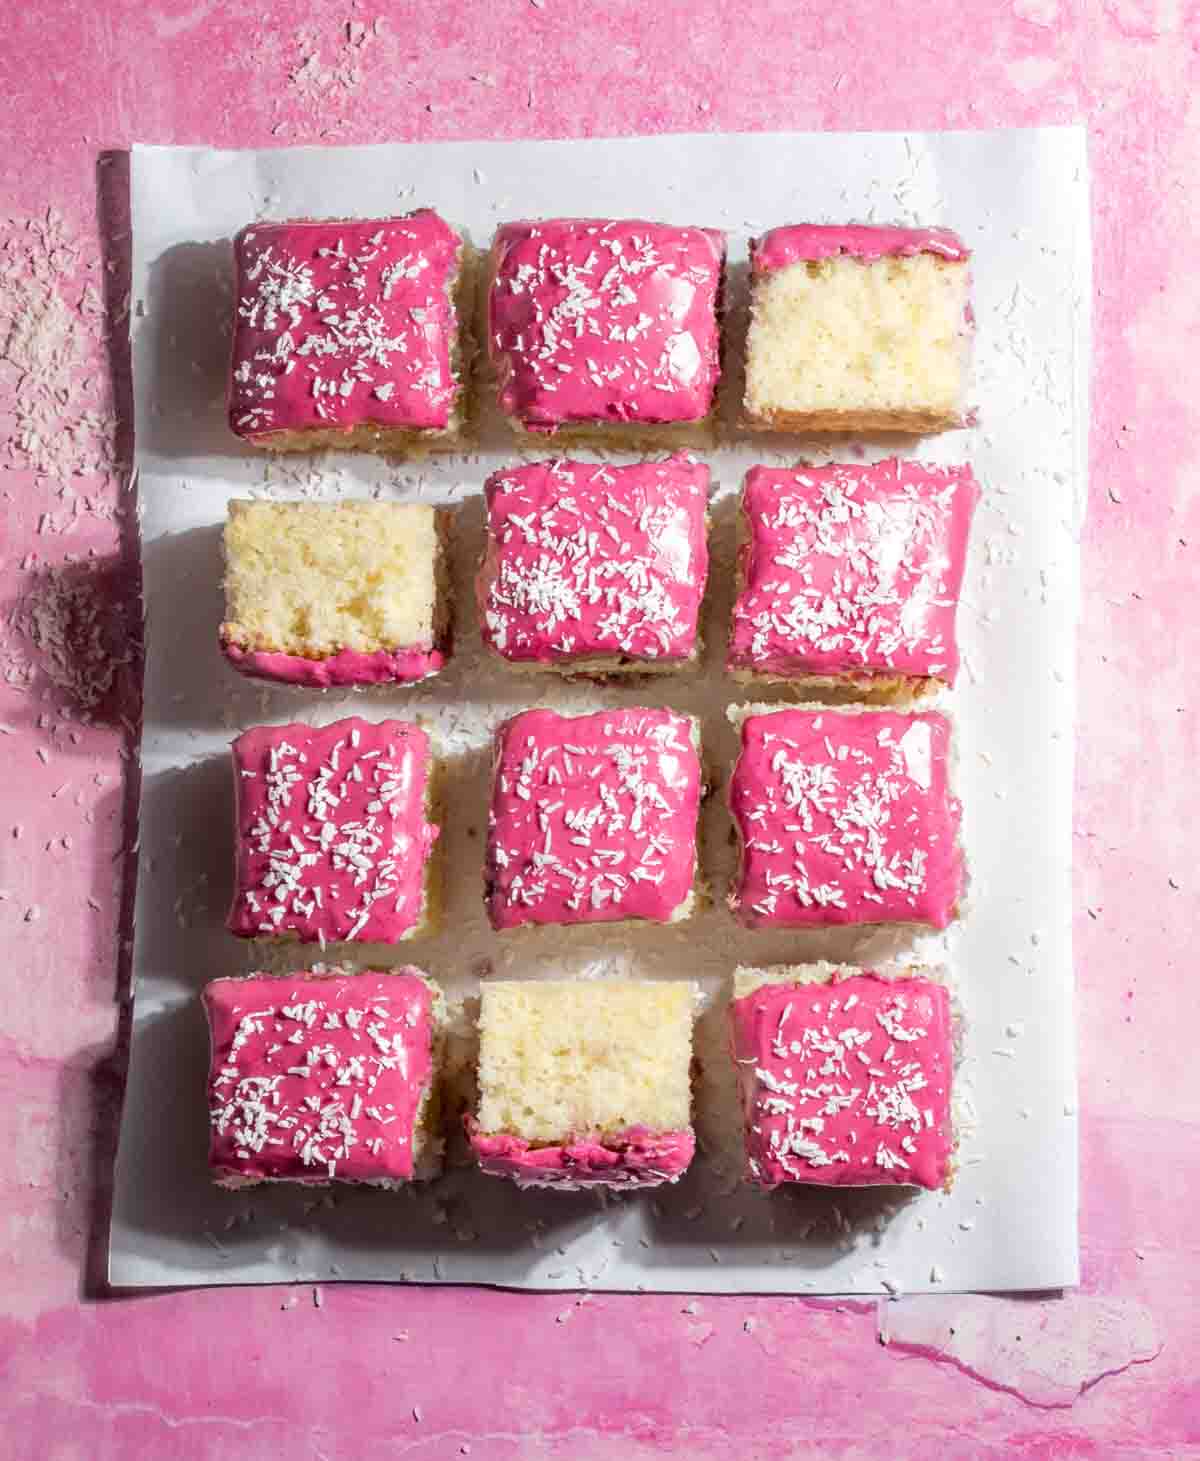
Tottenham cake always makes a party spread more fun. Who can resist the sheer joy of a tender white sponge traybake capped with pretty pink icing? It's enough to brighten anyone's day!
Our easy step-by-step instructions, accompanied by photos, walk you through making the perfect soft sponge base. Simply follow the directions closely, from ingredient prep to bake times, to master this adaptable base recipe.
Once you have the method down, this light, versatile vanilla sponge will become a go-to cake for all your baking needs. Get creative by switching it up with different types of icing or decorations.
This vanilla sponge also features in our old-fashioned school cake recipe for Jam and coconut sponge and the classic Vanilla tray bake with buttercream and sprinkles.
Jump to:
- Fast facts - United Kingdom
- What is Tottenham cake?
- A heart-warming history
- What's to love about this recipe
- Key ingredient notes and substitutions
- Equipment needed
- How to line a rectangular baking tin
- How to make Tottenham Cake - Step-by-step
- Top Tips
- Variations
- Can you bake this cake in round cake tins?
- Can you make cupcakes from this recipe?
- Storage
- More recipes from the United Kingdom
- Recipe
Fast facts - United Kingdom

| Location | The United Kingdom (UK) is located in North-western Europe, comprising four countries: England, Scotland, Wales, and Northern Ireland. |
| Capital | London. |
| Language | In addition to English and Welsh, the United Kingdom is home to a rich linguistic diversity with twelve other indigenous languages used including Gaelic, Cornish, Manx, Scots and three sign languages. English stands as the most widely spoken language, while Cornish is among the least commonly used. |
| Population | Circa 66.8 million people. |
| Trivia | In 1945, a substantial group of starlings perched upon the minute hand of St. Stephen's Tower, famously known as Big Ben, causing the clock to regress by 5 minutes. |
What is Tottenham cake?
Tottenham cake gained worldwide fame after being featured on The Great British Bake Off in 2013, surprising many with the popularity of this simple British tea cake.
It consists of a basic, light vanilla sponge cut into squares or rectangles. With its plain sponge appearance reminiscent of old-fashioned school cake, what distinguishes Tottenham cake is its topping of bright pink icing.
Traditionally coloured using berries from local mulberry bushes, modern versions often use pink food dye or fruit like raspberries or blueberries to tint the icing pink.
A heart-warming history
Tottenham cake originated in the late 1800s and is tied to the history of its North London namesake.
It was developed by the Quakers, who were known in the area for their affordable treats for local children, which aligned with their ethos of equality and community care. The simple, inexpensive cake with natural mulberry icing was sold for just one penny a piece, or half that for the off-cuts.
Around the same time, the Tottenham Hotspur football club was also emerging. Local baker and Quaker Henry Chalkley created a scone-like version of the cake that was handed out to kids after Tottenham Hotspur won the 1901 FA Cup against Sheffield United (my husband, a Blades fan, is a bit sour about this tale!).
Over time, the cake evolved into the light sponge base and pink icing we recognise today. While ingredients and preparations changed, Tottenham cake remains connected to its humble beginnings as an accessible, unpretentious treat created to bring joy!
What's to love about this recipe
- Simple, everyday ingredients make it very approachable but also economical. No butter needed.
- Easy to whip up for beginner bakers.
- Step-by-step photos plus tips and tricks to make your cake a success.
- This simple sponge cake produces a featherlight, fluffy vanilla sponge.
- Add your own favourite flavourings, like lemon zest.
- Quick to assemble and decorate.
- Nostalgic throwback treat with a whimsical charm.
- Kids go nuts for the pink icing!
- Perfect for birthday parties and bake sales.
- A timeless British classic.
- Easy-eating format everyone loves.
Key ingredient notes and substitutions
**Please see the recipe card at the bottom of this post for the full list of ingredients.

Eggs
You will need four large eggs at room temperature, each weighing about 62g with the shell on. Eggs a few grams over or under will still work fine.
Using room-temperature eggs is an important detail for making sponge cakes. When eggs are at room temperature, they blend into the batter more smoothly and uniformly. This helps the cake rise evenly and achieve a delicate, tender crumb.
To warm fridge-cold eggs quickly, place them in a bowl of warm water for about 5 minutes.
Sugar
Plain, white granulated sugar works well in this recipe. Caster sugar can also be used, but it is not essential.
Oil
Use a flavourless, neutral oil like vegetable or sunflower oil.
Oil offers advantages for sponge cakes over butter. Since it's liquid, oil keeps cakes moist over time without them drying out. Oil also prevents too much gluten development for a softer crumb. Its neutral taste allows the cake flavours to shine. Lastly, oil is more economical than butter.
Baking powder
You might be alarmed to see this cake needs one whole tablespoon of baking powder. That's correct. Please measure it carefully. Scoop a big heap and scrape the top with a butter knife to level it off.
Blueberries/food colouring
Traditionally, the icing for Tottenham cake was made using fruit from the mulberry tree on the grounds of the Tottenham Quaker house.
If you have access to mulberries, feel free to use them! You'll need the same amount as the blueberries listed in the recipe. Raspberries can also be used.
Alternatively, you can omit the fruit and opt for pink food colouring. Without berry juice, you can add milk or water to the icing sugar. About 5-6.5 tablespoons of liquid are needed, depending on how thick you want the icing to be.
Fresh lemon juice
In this recipe, we include 30ml of freshly squeezed lemon juice with the blueberries to create the fruit juice for the icing. You can substitute water for the lemon juice, but the lemon does provide a pleasant tang to balance the sweetness of the icing.
For reference, about half of a large lemon will yield approximately 30ml of juice.
Desiccated coconut (optional)
Adding desiccated coconut on top is a contemporary tradition rather than an original one, but it's definitely delicious! Vibrant, colourful sprinkles also create a visually appealing effect on the pink icing. Alternatively, you can choose to leave the icing plain if you prefer!
Equipment needed
- An electric hand mixer or a stand mixer.
- A couple of mixing bowls.
- A rectangular baking tin of approximately 33cm x 23cm. A larger tin will result in a flatter cake, and you might also need to reduce the baking time. A slightly smaller cake tin will yield a thicker cake, and you may need to bake it for a few minutes longer.
How to line a rectangular baking tin

- Place the baking tin on the baking paper and cut around it, leaving a border of about 8-10cm.
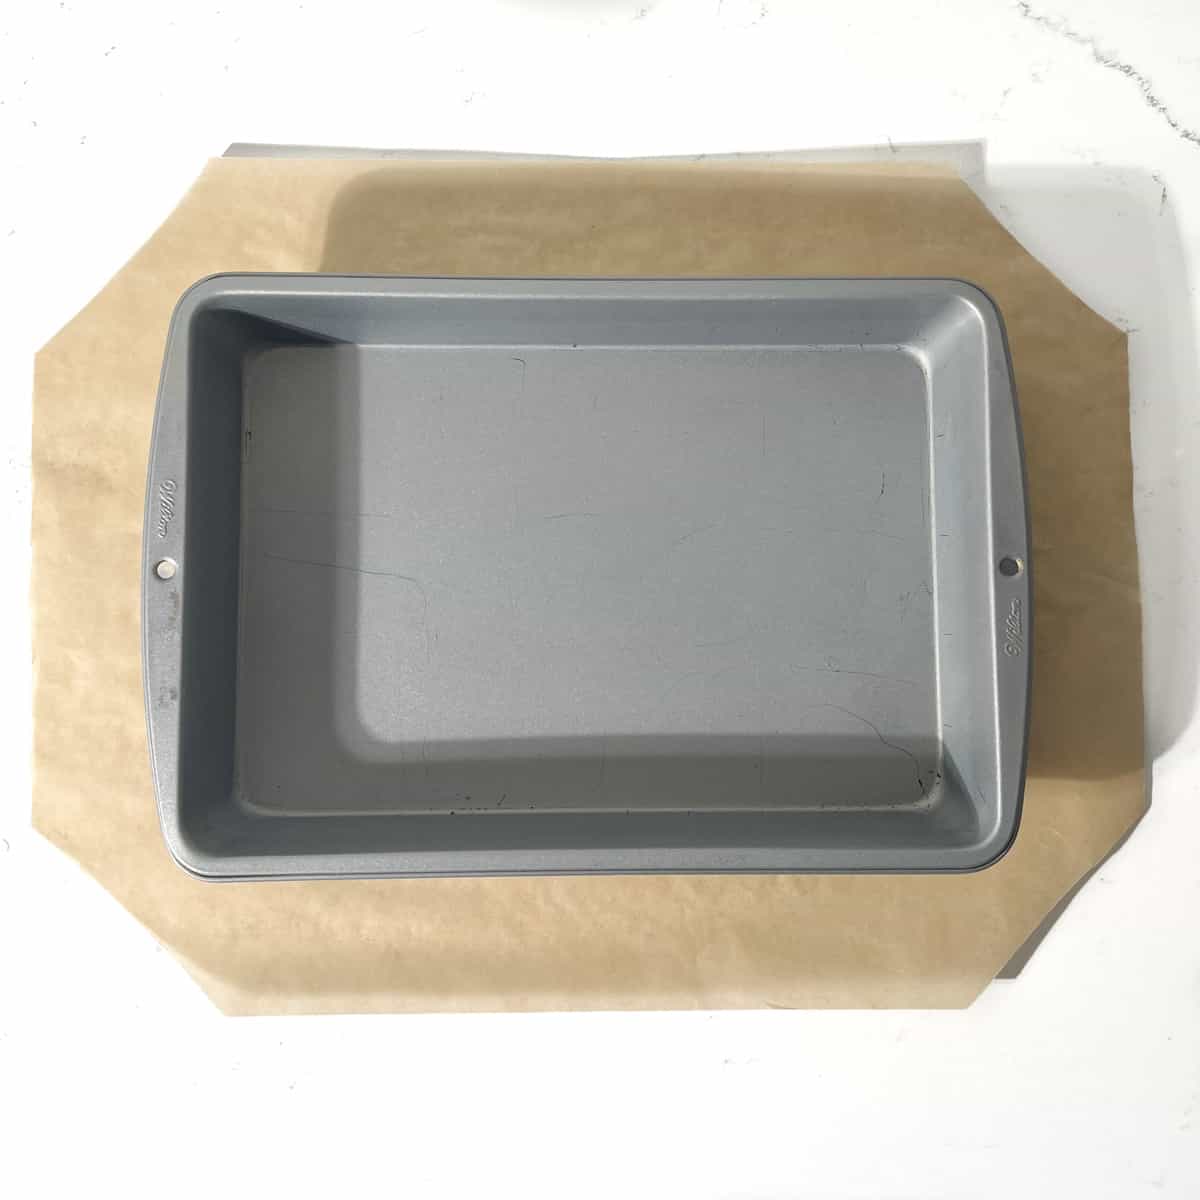
- Cut the corners off to get rid of any excess paper once the tin has been lined. Leave about 4cm between the edge of the paper and the corner of the tray.
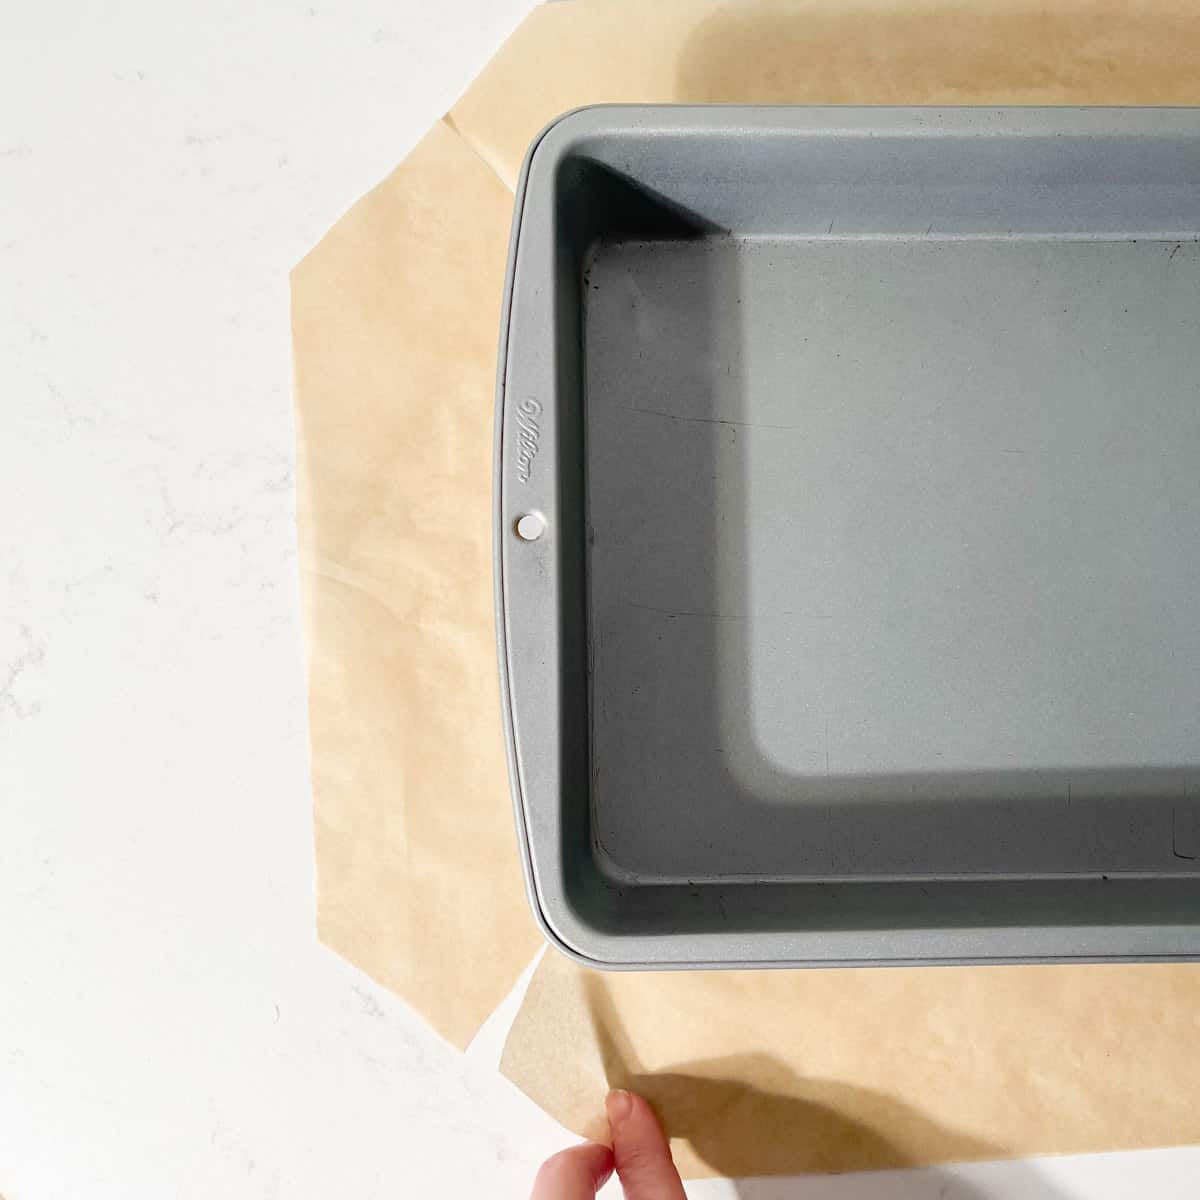
- On each corner, cut a diagonal slit perpendicular to the edge of the paper, right up to the corner of the tray (as shown above).
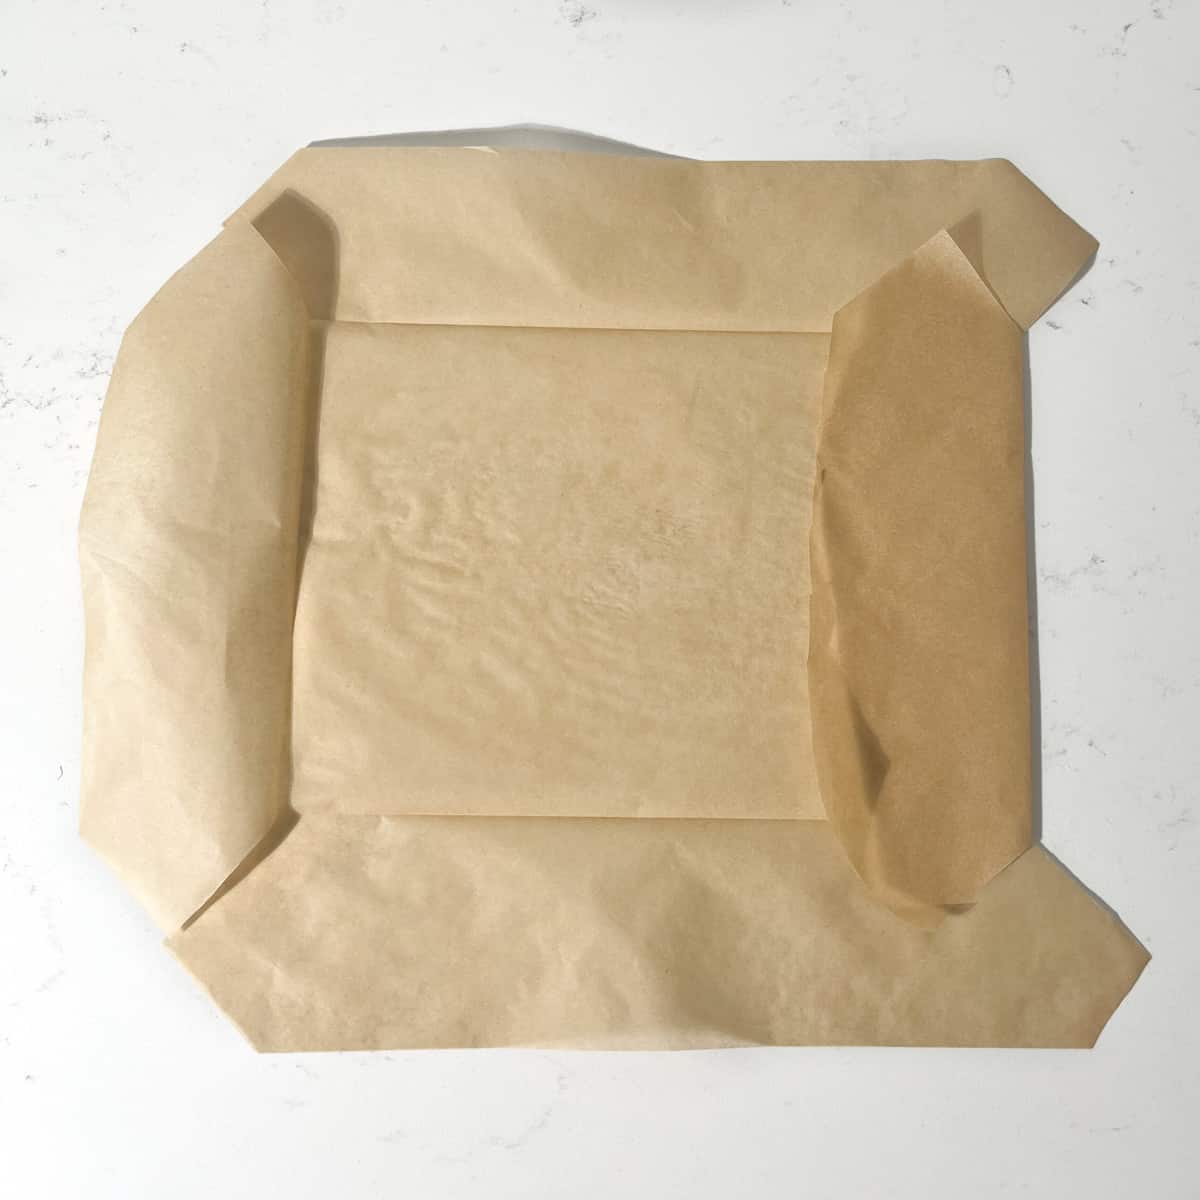
- Remove the baking tin and fold the paper. Fold each side in towards the centre to the depth of the cut made in the previous step (as shown above). This will shape the paper to fit the tin neatly.
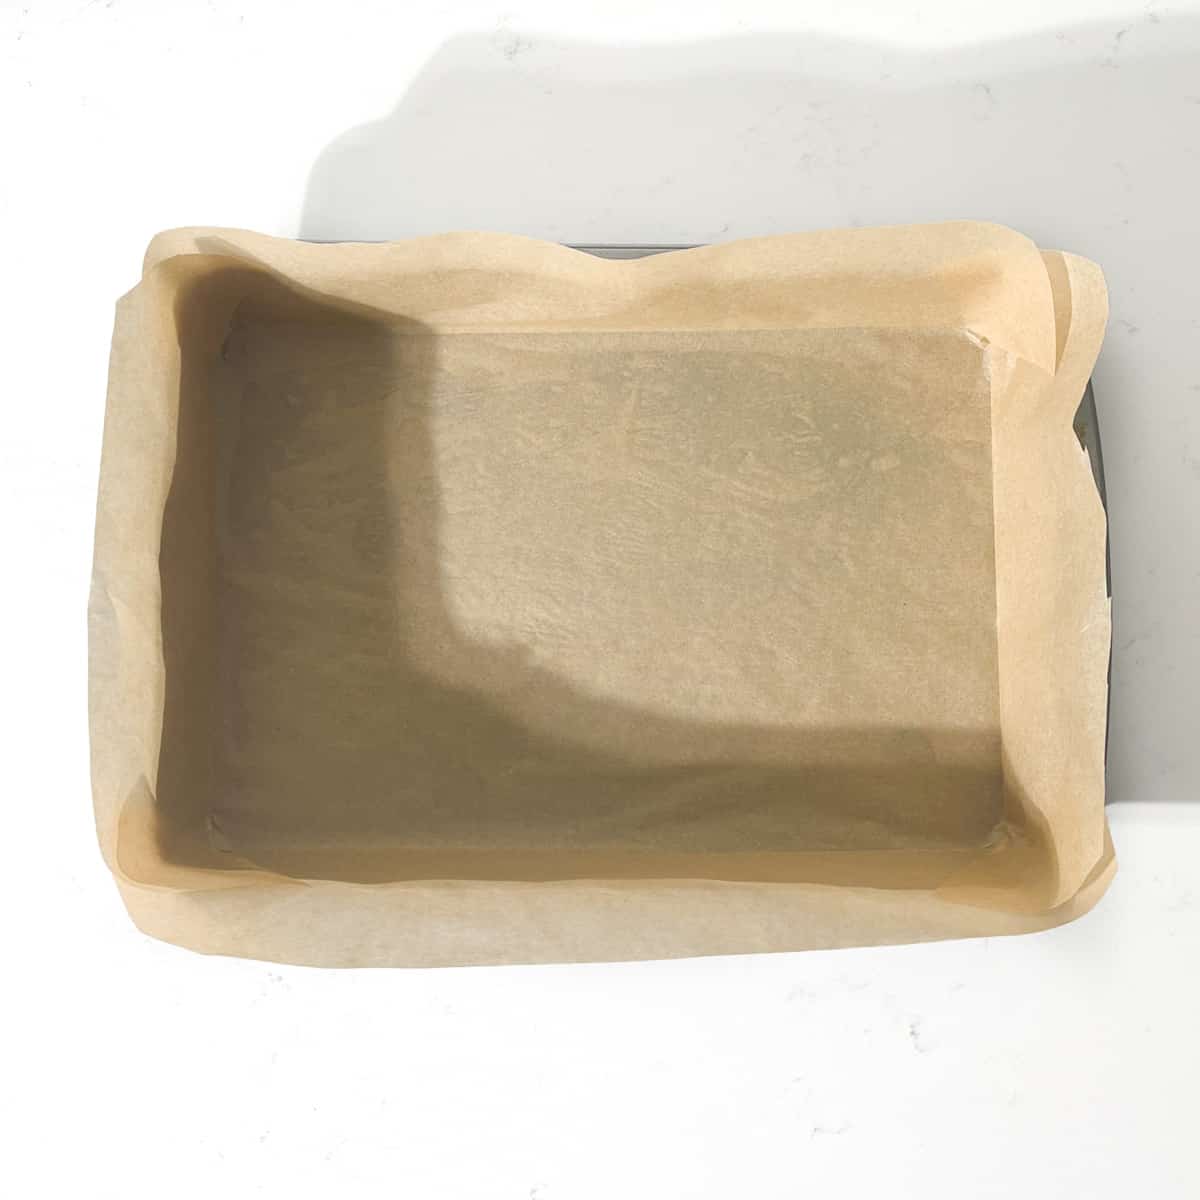
- Lower the baking paper into the tin and press it into the corners and sides. It should fit perfectly from the folds you made in the previous step.

- Overlap the corners as in the picture above.
How to make Tottenham Cake - Step-by-step
Prepping
- If the eggs are fridge-cold, remove them from the fridge approximately 30 minutes before you start to bake. Alternatively, place the eggs in a bowl of warm water for 5 minutes to bring them to room temperature more quickly.
- Heat the milk in the microwave or a small saucepan until it starts to simmer. Allow it to cool to a lukewarm temperature that you can insert a clean finger into without burning.
- Line the baking tin with baking paper (see 'Equipment' above for the baking tin size).

- If you are adding lemon zest to the cake batter, zest the lemon now.
Making the cake
- Preheat the oven to 170℃/338℉/gas mark 3.
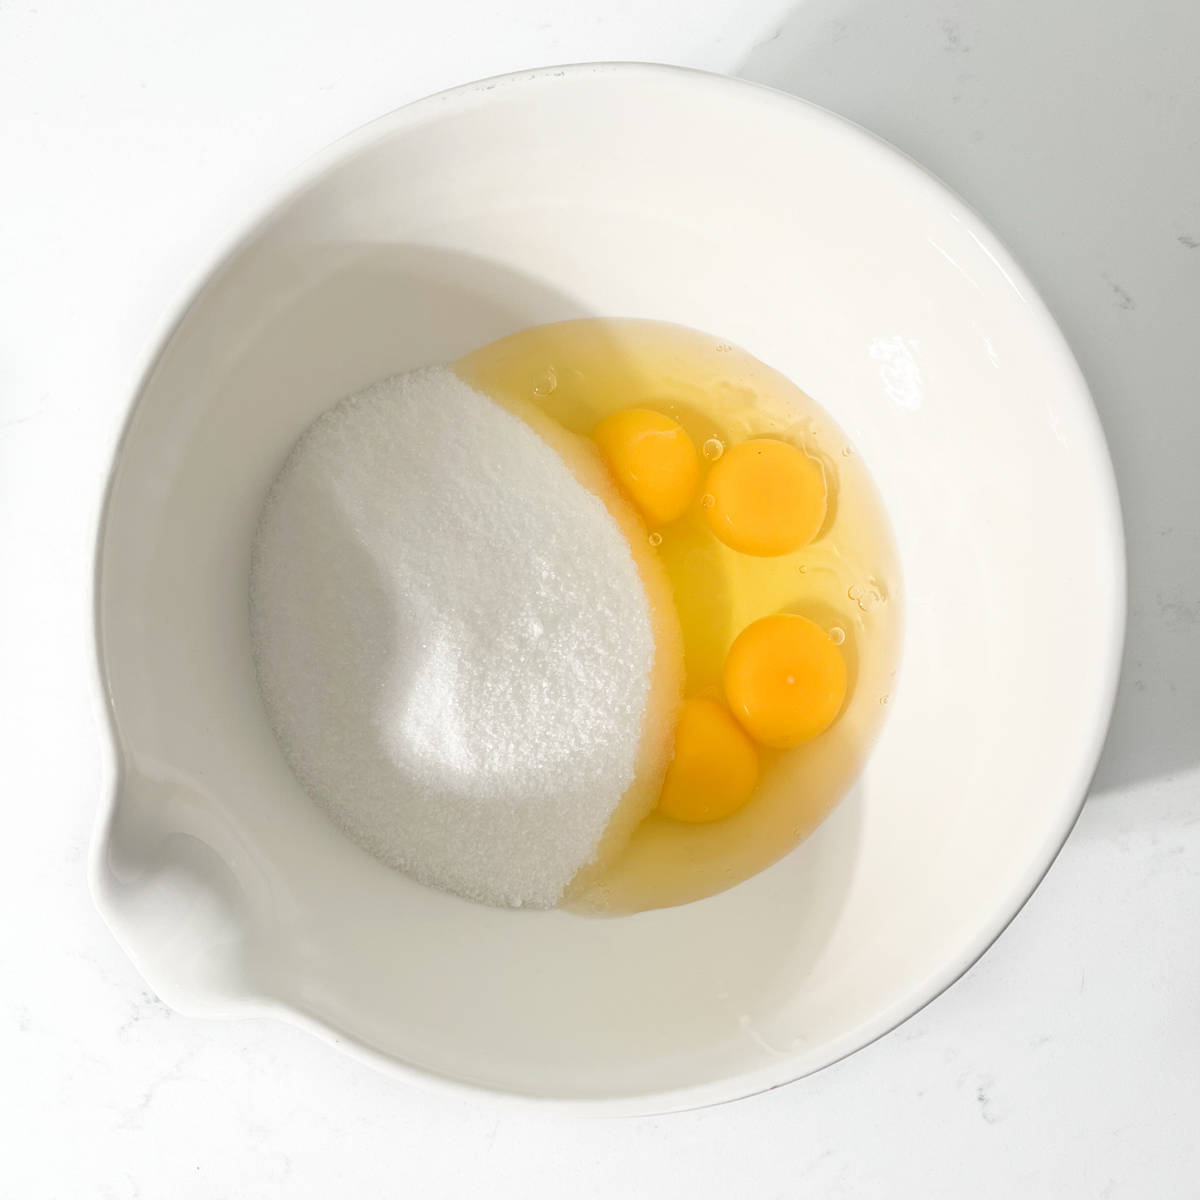
- Add the granulated sugar, room-temperature eggs and vanilla extract to a large mixing bowl.
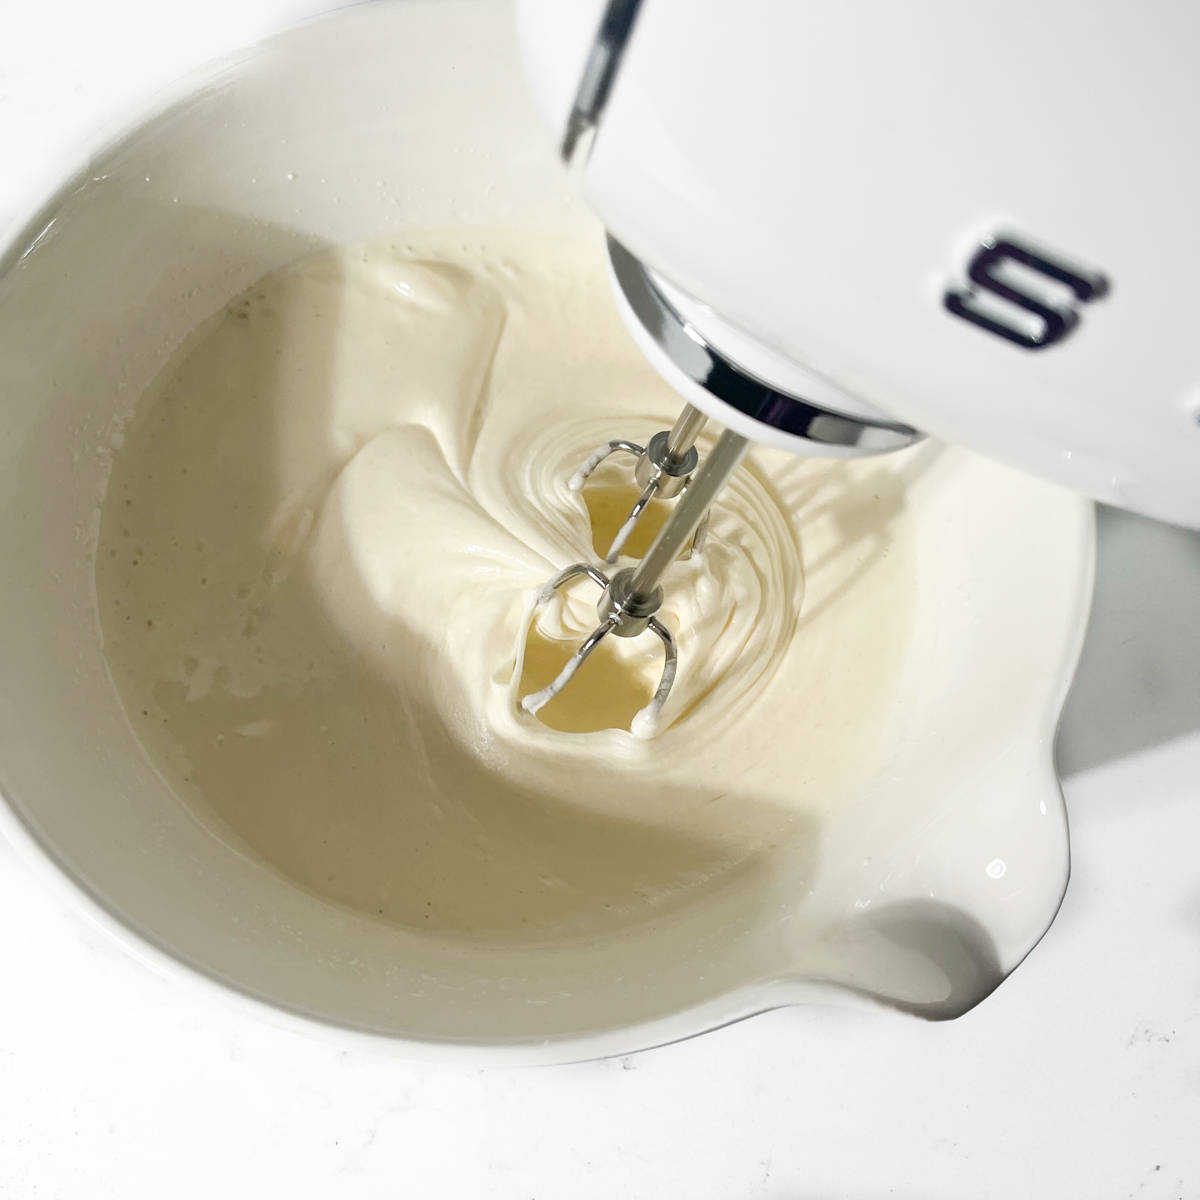
- Using an electric hand mixer or stand mixer, beat the sugar, eggs and vanilla extract together until the mixture is thick, fluffy and very pale in colour. You should notice trails in the mixture left by the beaters. This will take a minimum of 5 minutes of beating.

- In a separate bowl or jug, combine the oil and lukewarm milk. Whisk together with a fork until reasonably well blended.

- Sift together the flour, baking powder and salt in a bowl.

- Add half of the sifted flour mixture to the eggs and sugar mixture and beat on a very low speed using an electric hand mixer or a stand mixer. Stop as soon as the dry ingredients have been incorporated.

- Next, add half of the milk and oil mixture and beat again at a low speed. Stop as soon as the liquids have been incorporated.
- Repeat these steps one more time for the remaining flour and liquid ingredients. Beat on low speed after each addition and be careful not to overbeat.
- If you're including lemon zest, add it at this point and beat it in briefly.
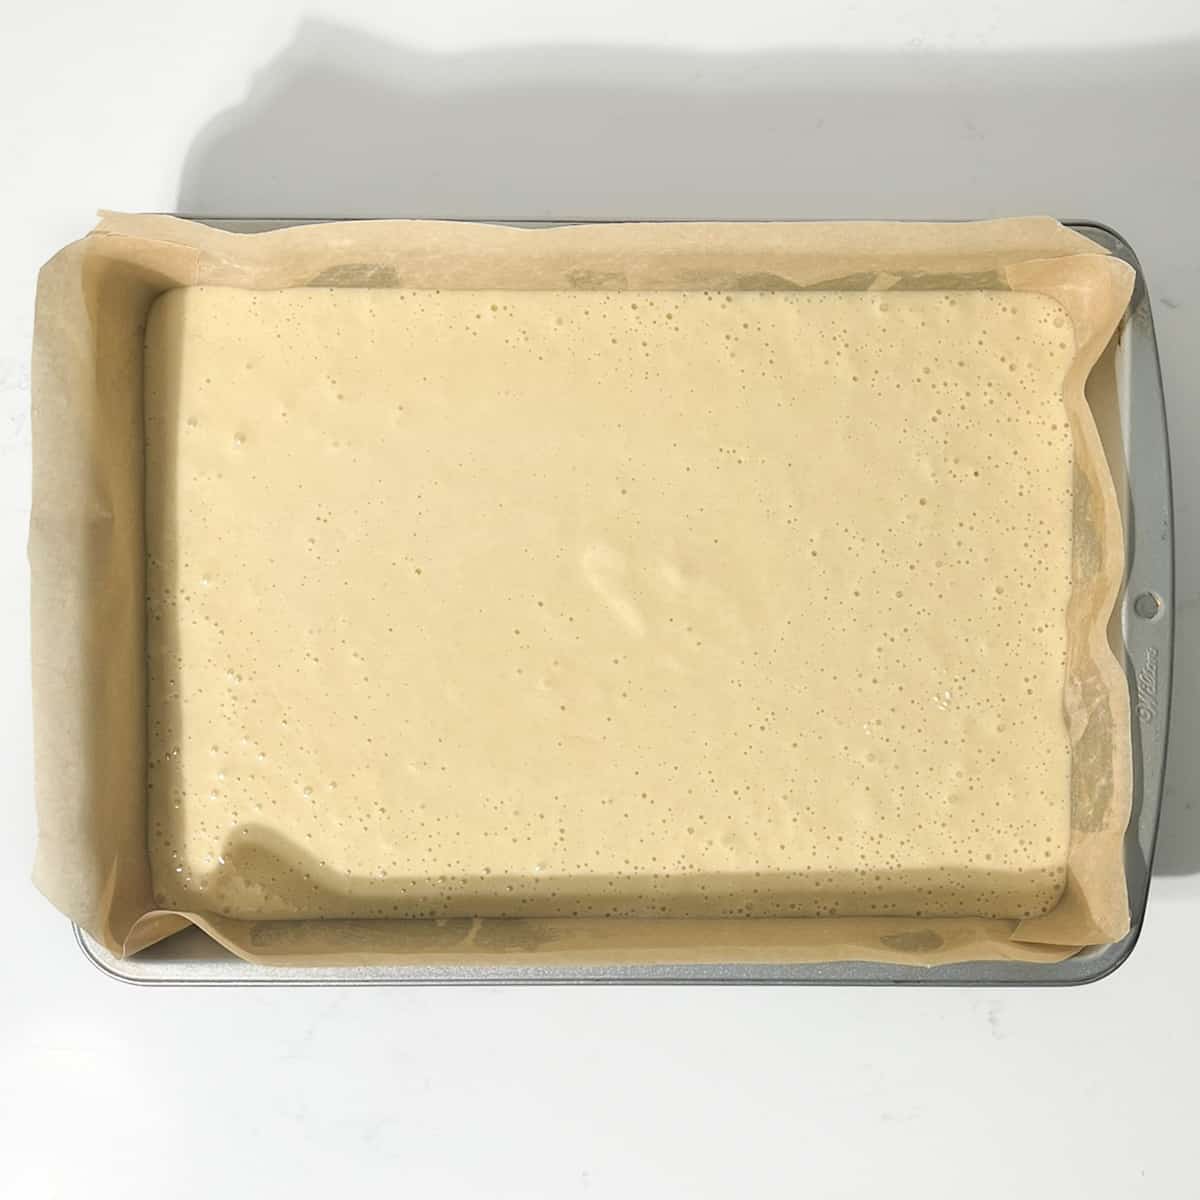
- Pour the cake batter into the prepared tin and tap it gently on the counter a few times to remove any air bubbles.

- Bake on the middle oven shelf for 35-40 minutes until the top of the golden brown cake springs back when touched and a tester inserted in the centre comes out clean. Test doneness at 35 minutes. If your oven runs hot, test earlier at 30 minutes or use a lower oven temperature to begin with.
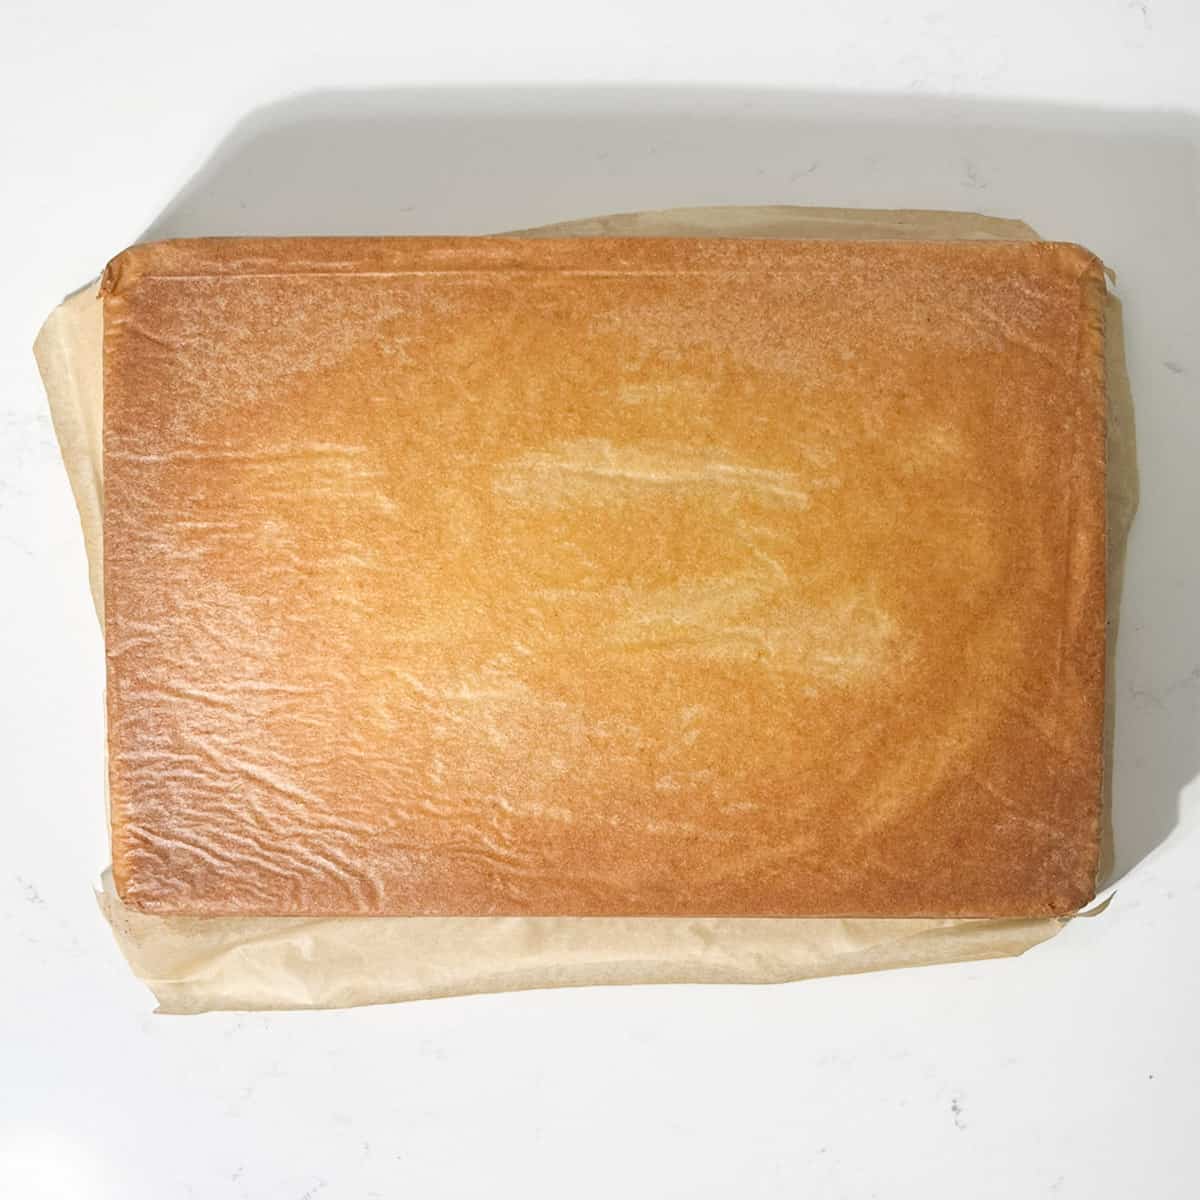
- Let the baked cake cool in the tin for at least 20 minutes before flipping it upside down onto a cooling rack.
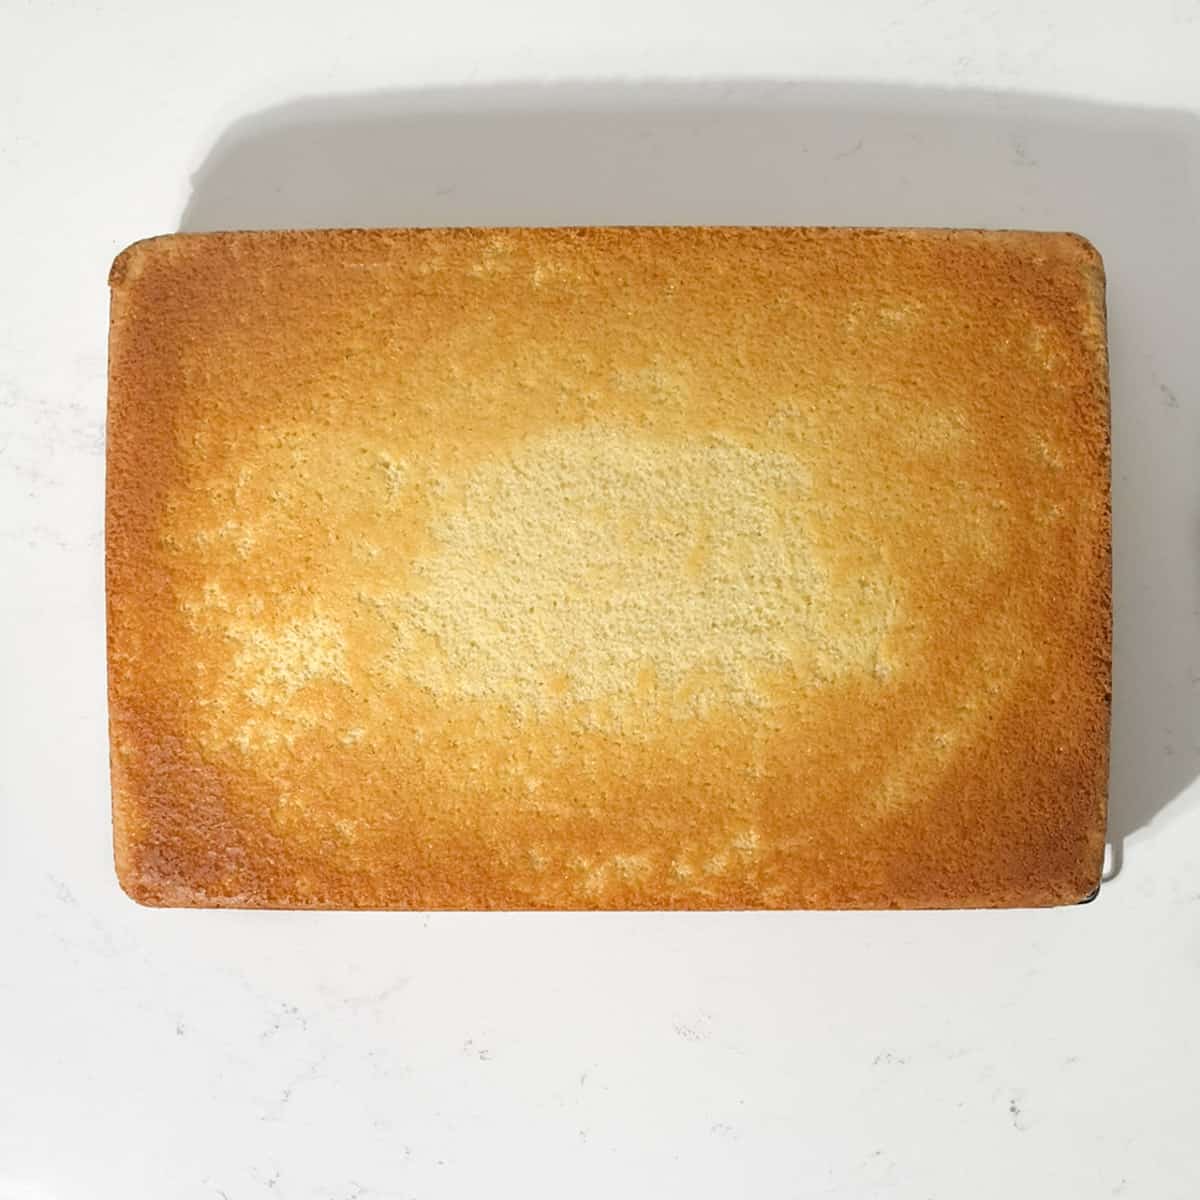
- Carefully peel off the parchment paper, paying extra attention to the corners where the cake might have baked into the folds of the paper. Set the cake aside to cool fully while we make the icing.
Note: We will frost the cake on the bottom side, which is why we turned it upside down. This ensures a smoother and flatter surface for icing.
Making the pink icing

- Place the berries in a small bowl and pour the lemon juice or water over the top. Give it a quick stir.
- Microwave the berries for 1 minute, stirring halfway through. If the berries are still quite firm, microwave for 15 seconds more.

- Use a fork to mash and squash the berries to release their juice.

- Strain the berries through a sieve, reserving the juice and discarding the pulp.

- Add the icing sugar to a large bowl. It's not necessary to sift it if your icing sugar is fresh and fluffy, but if it's lumpy, definitely sift it.

- Start by adding about 3 tablespoons of the berry juice (or water) to the icing sugar and mix it through with a fork.

- Add more liquid slowly until the icing reaches the thickness you prefer. It needs to be a thick but spreadable icing. Around six tablespoons of liquid usually do the trick.
If you run out of berry juice, just add a splash of water to create more liquid.
You can add a few drops of food colouring if you wish, but be careful not to turn it into a completely lurid pink icing!
- Check if the cake has fully cooled down, then scoop the icing onto the surface of the cake.

- Use an offset spatula, palette knife or the back of a spoon to spread the icing evenly across the top of the cooled cake, making sure to reach the corners and sides. If the icing is a bit runny, apply it slightly inward from the sides, as it tends to spread on its own.
- You can now sprinkle some desiccated coconut or sprinkles over the top of the cake if you wish or leave it plain.
Top Tips
Use a scale and measuring spoons
Consider investing in a reliable digital kitchen scale and high-quality measuring spoons to ensure precise ingredient measurements. Accuracy plays a crucial role in achieving cake perfection!
Bring eggs to room temperature
Remember to allow fridge-cold eggs to reach room temperature before baking. Cold eggs can't blend as smoothly into the batter. Room-temperature eggs contribute to creating tender and evenly rising cakes.
You can achieve this by removing the eggs from the fridge about 30 minutes beforehand or placing them in warm water for 5 minutes.
Beat the eggs and sugar thoroughly
Don't rush this step! Taking 5 minutes, or more, to beat the eggs and sugar makes them light and fluffy. Using an electric mixer helps incorporate tonnes of air for the ultimate lift. Well-beaten eggs = tender crumb.
Gently-gently does it
Overmixing can deflate the batter, so handle it with care to preserve those essential air bubbles for a soft texture. Stop as soon as no specks of flour are visible and keep the mixer on the lowest speed.
Know your oven
Get to know your oven's quirks. If it runs hotter or cooler than expected, tweak your bake times and temperatures accordingly.
Trust your eyes and perform visual tests, like checking for springy tops and using a cake tester as indicators of doneness.
When uncertain, it's always safer to bake lower and slower, within reason.
Fixing thin icing
Don't fret if your icing turns out too thin. Simply blend in additional icing sugar gradually until it's just right.
Remember, adding liquids in small amounts helps prevent your icing from becoming overly runny.
Add toppings to wet icing
For the perfect finishing touch, sprinkle coconut, sprinkles or other toppings onto the icing immediately after spreading it, while it's still moist. This ensures they stick beautifully in place, otherwise, they will just roll off.
Allow the icing to set before cutting the cake
Exercise patience and give the icing time to firm up before you start slicing your cake. This helps maintain clean, well-defined squares instead of having them smudge together. When you're ready to cut, use a long, sharp knife for precise, neat slices.
On the flip side, when it comes to Tottenham cake, it's not all about achieving perfection in its appearance. It's about embracing its down-to-earth and unpretentious charm. So, don't stress too much about how your cake looks, just enjoy it.
Variations
- Skip the lemon zest and just make a plain vanilla cake.
- Add other flavourings like almond essence, orange extract or orange zest.
- Use the recipe for the sponge cake but pair it with other buttercreams and icings like mascarpone cream or marshmallow fluff. This is of course no longer a Tottenham cake though!
Can you bake this cake in round cake tins?
Yes, batter from this recipe will make 2 x round 8" cakes. Bake at 170℃/338℉/gas mark 3 for 25-30 minutes.
Can you make cupcakes from this recipe?
Yes, the batter for this recipe will make 24 cupcakes. Bake at 170℃/338℉/gas mark 3 for 20-25 minutes.
Storage
Store the cake in an airtight container at room temperature for up to 3 days. Keep it away from moisture and heat.
For longer storage, wrap the cooled, un-iced cake tightly in plastic wrap, then foil and freeze it for up to 2 months.
Thaw the frozen cake slowly in the fridge overnight before decorating and serving.
More recipes from the United Kingdom
Sticky Jamaican Ginger Cake Recipe
Easy mince and dumplings recipe
Fool-proof 3-ingredients scones
Creamy chicken and leek pies with puff pastry
Easy chicken sausage rolls with puff pastry
Homemade mini butter chicken pies
Cheese and onion pasties with puff pastry
Posh fish finger sandwich with homemade tartar sauce
Recipe

Tottenham Cake
Equipment
- 1 circa 33cm x 23cm sheet pan
Ingredients
For the cake
- 4 large eggs - at room temperature, circa 62g per egg in its shell.
- 250 millilitre (1 US cup + 1 tbsp) milk - whole or semi-skimmed. Boiled, then cooled down to lukewarm.
- 360 grams (12½ oz) granulated sugar
- 2 teaspoons vanilla extract
- 100 millilitre (0.4 US cup) oil - neutral oil like vegetable or sunflower oil
- 360 grams (12½ oz) all-purpose flour
- 1 tablespoon baking powder
- ½ teaspoon salt
- zest from one lemon (optional)
For the icing
- 150 grams blueberries - or raspberries
- 30 millilitre lemon juice - or water
- 500 grams icing sugar
- pink food colouring (optional) - only use this if you want a stronger colour pink to what the berries provide
- desiccated coconut for sprinkling (optional)
Instructions
Prepping
- If the eggs are fridge-cold, remove them from the fridge approximately 30 minutes before you start to bake. Alternatively, place the eggs in a bowl of warm water for 5 minutes to bring them to room temperature more quickly.4 large eggs
- Heat the milk in the microwave or a small saucepan until it starts to simmer. Allow it to cool to a lukewarm temperature that you can insert a clean finger into without burning.250 millilitre (1 US cup + 1 tbsp) milk
- Line the baking tin with baking paper (see 'Equipment' above for the baking tin size).
- If you are adding lemon zest to the cake batter, zest the lemon now.zest from one lemon (optional)
Making the cake
- Preheat the oven to 170℃/338℉/gas mark 3.
- Add the granulated sugar, room-temperature eggs and vanilla extract to a large mixing bowl.360 grams (12½ oz) granulated sugar, 2 teaspoons vanilla extract
- Using an electric hand mixer or stand mixer, beat the sugar, eggs and vanilla extract together until the mixture is thick, fluffy and very pale in colour. You should notice trails in the mixture left by the beaters. This will take a minimum of 5 minutes of beating.
- In a separate bowl or jug, combine the oil and lukewarm milk. Whisk together with a fork until reasonably well blended.100 millilitre (0.4 US cup) oil
- Sift together the flour, baking powder and salt in a bowl.360 grams (12½ oz) all-purpose flour, 1 tablespoon baking powder, ½ teaspoon salt
- Add half of the sifted flour mixture to the eggs and sugar mixture and beat on a very low speed using an electric hand mixer or a stand mixer. Stop as soon as the dry ingredients have been incorporated.
- Next, add half of the milk and oil mixture and beat again at a low speed. Stop as soon as the liquids have been incorporated.
- Repeat these steps one more time for the remaining flour and liquid ingredients. Beat on low speed after each addition and be careful not to overbeat.
- If you're including lemon zest, add it at this point and beat it in briefly.
- Pour the cake batter into the prepared tin and tap it gently on the counter a few times to remove any air bubbles.
- Bake on the middle oven shelf for 35-40 minutes until the top of the golden brown cake springs back when touched and a tester inserted in the centre comes out clean. Test doneness at 35 minutes. If your oven runs hot, test earlier at 30 minutes or use a lower oven temperature to begin with.
- Let the baked cake cool in the tin for at least 20 minutes before flipping it upside down onto a cooling rack.
- Carefully peel off the parchment paper, paying extra attention to the corners where the cake might have baked into the folds of the paper. Set the cake aside to cool fully while we make the icing.Note: We will frost the cake on the bottom side, which is why we turned it upside down. This ensures a smoother and flatter surface for icing.
Making the pink icing
- Place the berries in a small bowl and pour the lemon juice or water over the top. Give it a quick stir.150 grams blueberries, 30 millilitre lemon juice
- Microwave the berries for 1 minute, stirring halfway through. If the berries are still quite firm, microwave for 15 seconds more.
- Use a fork to mash and squash the berries to release their juice.
- Strain the berries through a sieve, reserving the juice and discarding the pulp.
- Add the icing sugar to a large bowl. It's not necessary to sift it if your icing sugar is fresh and fluffy, but if it's lumpy, definitely sift it.500 grams icing sugar
- Start by adding about 3 tablespoons of the berry juice (or water) to the icing sugar and mix it through with a fork.
- Add more liquid slowly until the icing reaches the thickness you prefer. It needs to be a thick but spreadable icing. Around six tablespoons of liquid usually does the trick.
- Check if the cake has fully cooled down, then scoop the icing onto the surface of the cake.
- Use an offset spatula or the back of a spoon to spread the icing evenly across the top of the cooled cake, making sure to reach the corners and sides. If the icing is a bit runny, apply it slightly inward, as it tends to spread on its own.
- You can now sprinkle some desiccated coconut or sprinkles over the top of the cake if you wish, or leave it plain.desiccated coconut for sprinkling (optional)
Notes
Use a scale and measuring spoons
Consider investing in a reliable digital kitchen scale and high-quality measuring spoons to ensure precise ingredient measurements. Accuracy plays a crucial role in achieving cake perfection!Bring eggs to room temperature
Remember to allow fridge-cold eggs to reach room temperature before baking. Cold eggs can't blend as smoothly into the batter. Room temperature eggs contribute to creating tender and evenly rising cakes. You can achieve this by removing the eggs from the fridge about 30 minutes beforehand or placing them in warm water for 5 minutes.Beat the eggs and sugar thoroughly
Don't rush this step! Taking 5 minutes, or more, to beat the eggs and sugar makes them light and fluffy. Using an electric mixer helps incorporate tonnes of air for the ultimate lift. Well-beaten eggs = tender crumb.Gently-gently does it
Overmixing can deflate the batter, so handle it with care to preserve those essential air bubbles for a soft texture. Stop as soon as no specks of flour are visible.Know your oven
Get to know your oven's quirks. If it runs hotter or cooler than expected, tweak your bake times and temperatures accordingly. Trust your eyes and perform visual tests, like checking for springy tops and using a cake tester as indicators of doneness. When uncertain, it's always safer to bake lower and slower, within reason.Fixing thin icing
Don't fret if your icing turns out too thin. Simply blend in additional icing sugar gradually until it's just right. Remember, adding liquids in small amounts helps prevent your icing from becoming overly runny.Add toppings to wet icing
For the perfect finishing touch, sprinkle coconut, sprinkles or other toppings onto the icing immediately after spreading it, while it's still moist. This ensures they stick beautifully in place, otherwise they will just roll off.Allow the icing to set before cutting the cake
Exercise patience and give the icing time to firm up before you start slicing your cake. This helps maintain clean, well-defined squares instead of having them smudge together. When you're ready to cut, use a long, sharp knife for precise, neat slices. On the flip side, when it comes to Tottenham cake, it's not all about achieving perfection in its appearance. It's about embracing its down-to-earth and unpretentious charm. So, don't stress too much about how your cake looks, focus on enjoying the delightful simplicity it brings!**Nutritional data disclaimer**
Please keep in mind that the nutritional information provided below is calculated by a third party and we cannot guarantee the accuracy. We try our best to give you the most accurate information, but we do not take responsibility for errors that may be present. Also, the nutritional value of the recipe may change depending on the exact brands and products used. We recommend that you consult with a qualified healthcare professional or registered dietitian for personalised advice on your dietary needs.
Nutrition
For food safety advice, including guidance on food allergies




Leave a Reply