
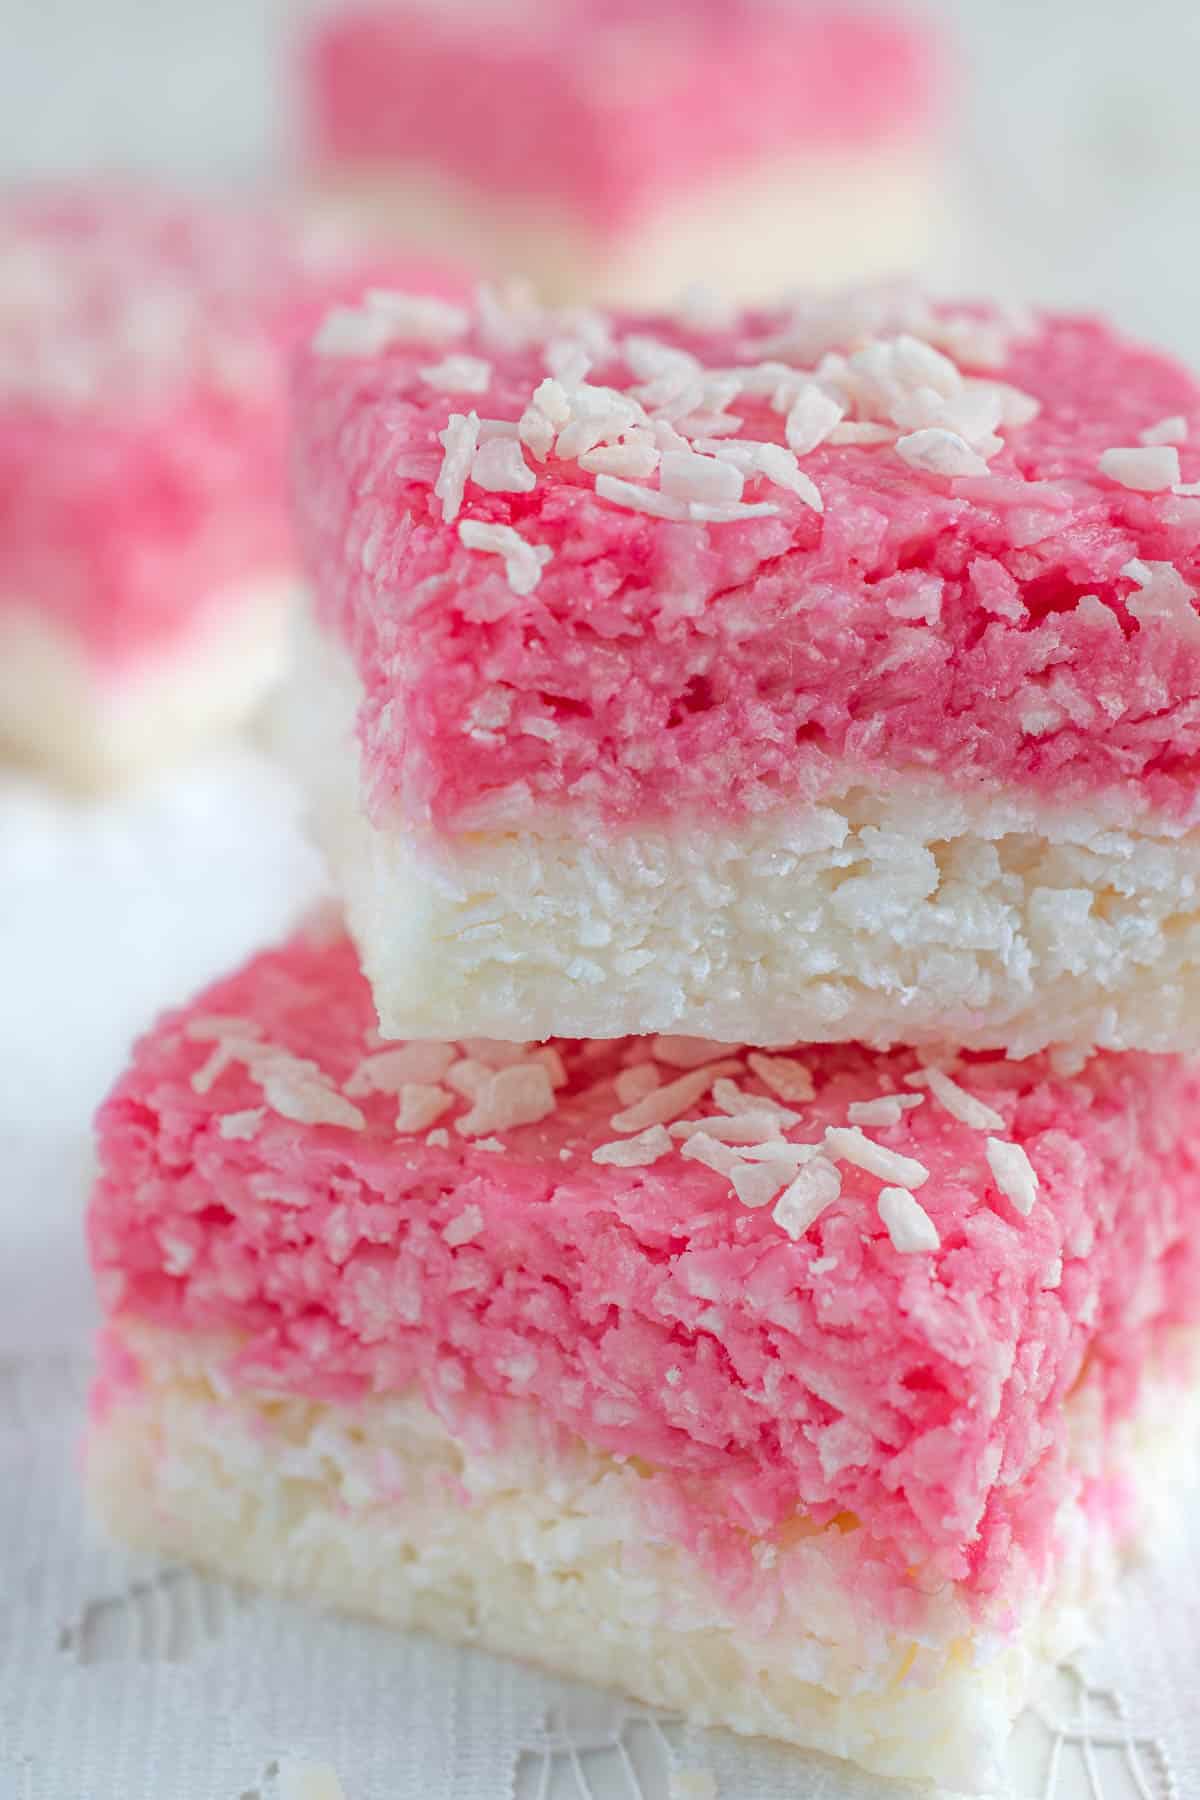
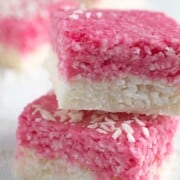
This easy coconut ice with condensed milk is a no-cook version of the classic pink and white sweet. There's no boiling sugar, no sugar thermometer and no stovetop faff. Just mix, press, chill and cut.
It's sweet, chewy, coconutty and made with three core ingredients: condensed milk, icing sugar and desiccated coconut. The pink colouring is optional, but very much part of the nostalgic coconut ice look.
Jump to:
- A nostalgic favourite, made the easy way
- From the comments
- Why this recipe works
- Ingredient notes
- Is this a no-cook coconut ice recipe?
- How to make coconut ice with condensed milk
- What should the coconut ice mixture feel like?
- Tips for neat layers and clean slices
- Storage and freezing
- Make-ahead and gifting
- Variations
- Dietary notes
- More recipes using condensed milk
- Recipe
A nostalgic favourite, made the easy way
Coconut ice, or klapperys in Afrikaans, is one of those old-fashioned sweets I remember from bake sales, Christmas tables and South African sweet trays. This condensed milk version keeps the familiar pink-and-white nostalgia, but skips the boiled sugar syrup.
It's simple, sweet and properly old-school. Exactly the sort of thing that looks lovely in a gift box and disappears suspiciously quickly from the fridge.
Recipe updated in June 2026 with a clearer no-cook method, extra setting and cutting tips, storage advice, colour-layer guidance and more ideas for Christmas gifting.
From the comments
"Best coconut ice recipe I've ever tried! I'm sure this will be used time and time again in the future. Easy to make and very tasty."
- Maureen
Why this recipe works
- No cooking needed: No boiling sugar, no thermometer and no stovetop faff.
- Three core ingredients: Condensed milk, icing sugar and desiccated coconut do the heavy lifting.
- Easy to make ahead: It sets in the fridge and keeps well once firm.
- Great for gifting: Cut it into small squares for Christmas boxes, bake sales or sweet bags.
- Proper nostalgic charm: Pink and white, sweet and coconutty, with less fuss than the old boiled-syrup method.
Ingredient notes
You'll find the full ingredient list with measurements in the recipe card at the bottom of the post.
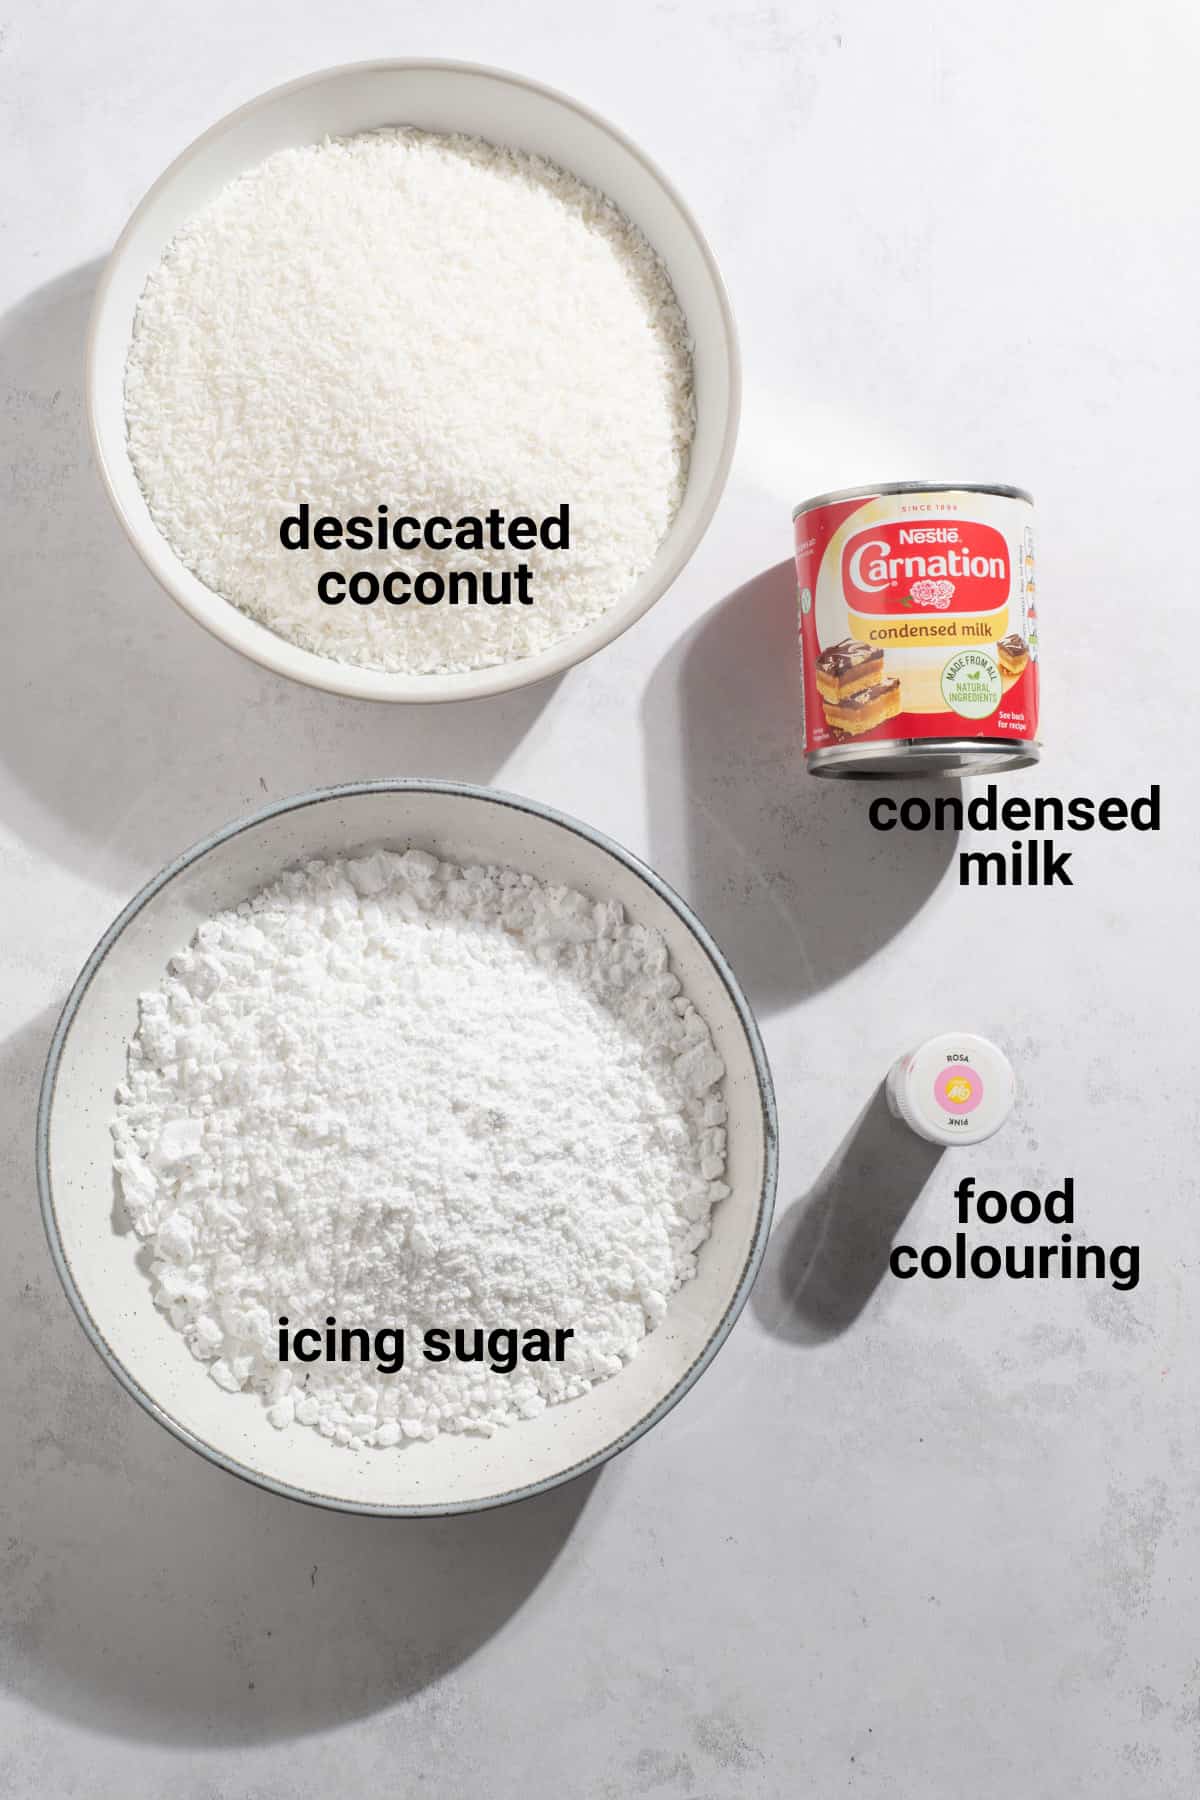
Sweetened condensed milk
Use one standard tin of sweetened condensed milk. In the UK, this is usually around 397g. A few grams either way will not matter, but do not use evaporated milk. It is much thinner and will not set the coconut ice properly.
Desiccated coconut
Use fine desiccated coconut, not large coconut flakes. Desiccated coconut absorbs the condensed milk mixture and gives coconut ice its firm, chewy texture.
If your coconut is very coarse, pulse it briefly in a food processor, but do not turn it into powder.
Icing sugar
Icing sugar, also called powdered sugar or confectioners' sugar, helps bind and firm up the mixture. Do not swap it for granulated sugar, as it will stay gritty in this no-cook recipe.
Pink food colouring
Gel or liquid food colouring both work. Start with a tiny amount and add more only if needed.
A little red food colouring also works if you do not have pink.
Vanilla extract, optional
A teaspoon of vanilla extract softens the sweetness slightly and gives the coconut ice a more rounded flavour. It is optional, so leave it out if you prefer the classic plain coconut version.
Is this a no-cook coconut ice recipe?
Yes. This coconut ice is made without boiling sugar syrup. The condensed milk, icing sugar and desiccated coconut are mixed into a firm dough, pressed into a tin and chilled until set.
How to make coconut ice with condensed milk
You'll find the printable recipe card with measurements at the bottom of the post, but here's the step-by-step version with extra tips to help you get neat layers and clean slices.
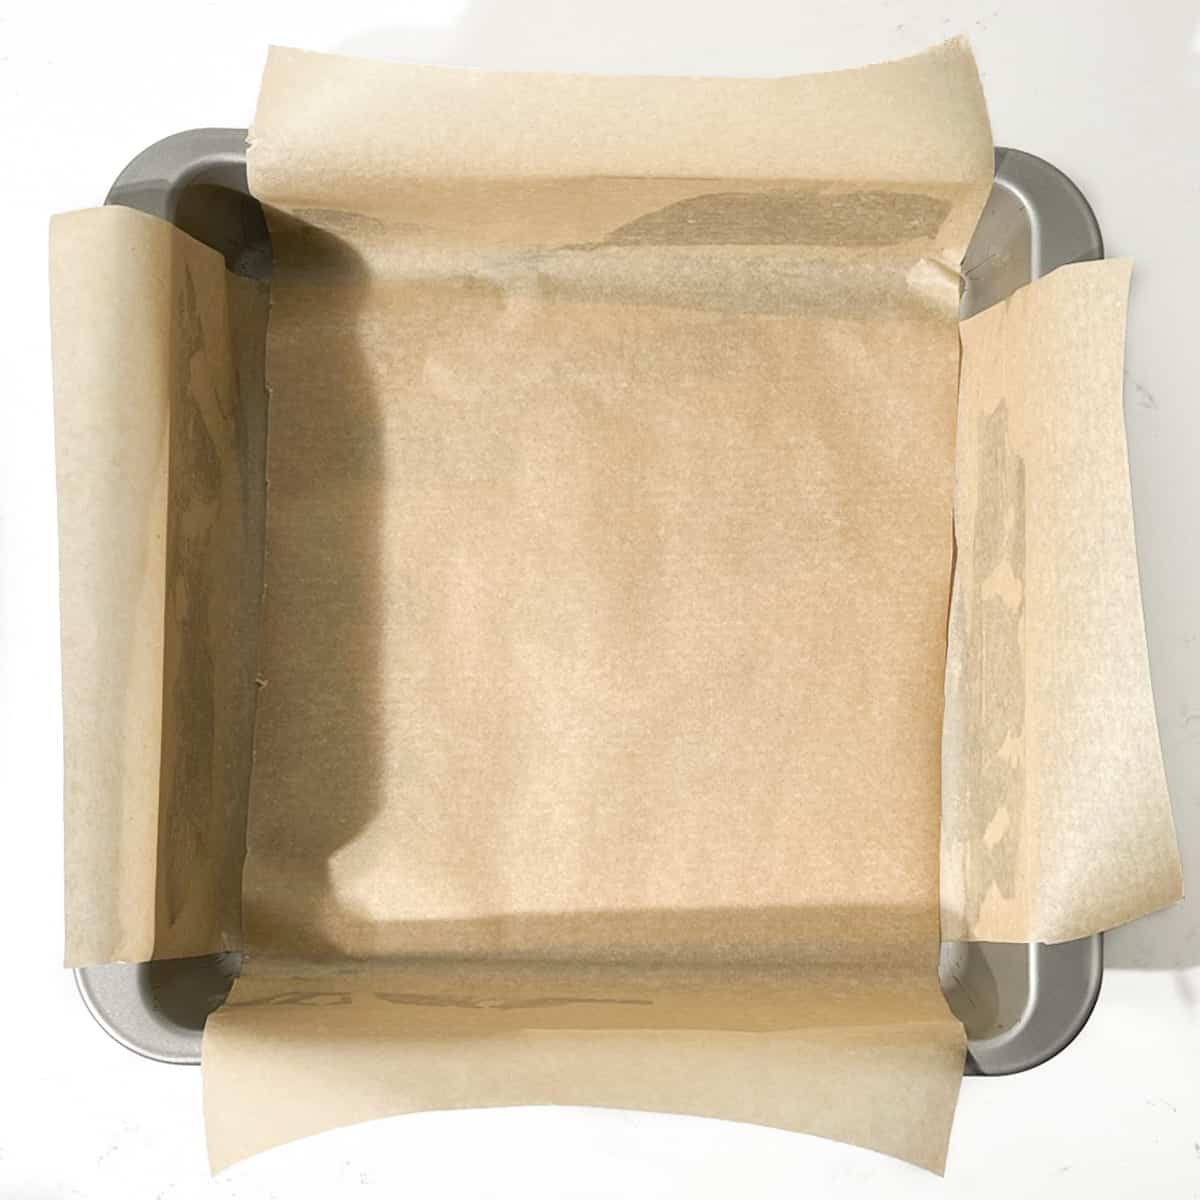
1. Line a 20cm x 20cm (8" x 8") square tin with baking paper, leaving a little overhang on two sides. This makes it much easier to lift the coconut ice out once it has set.
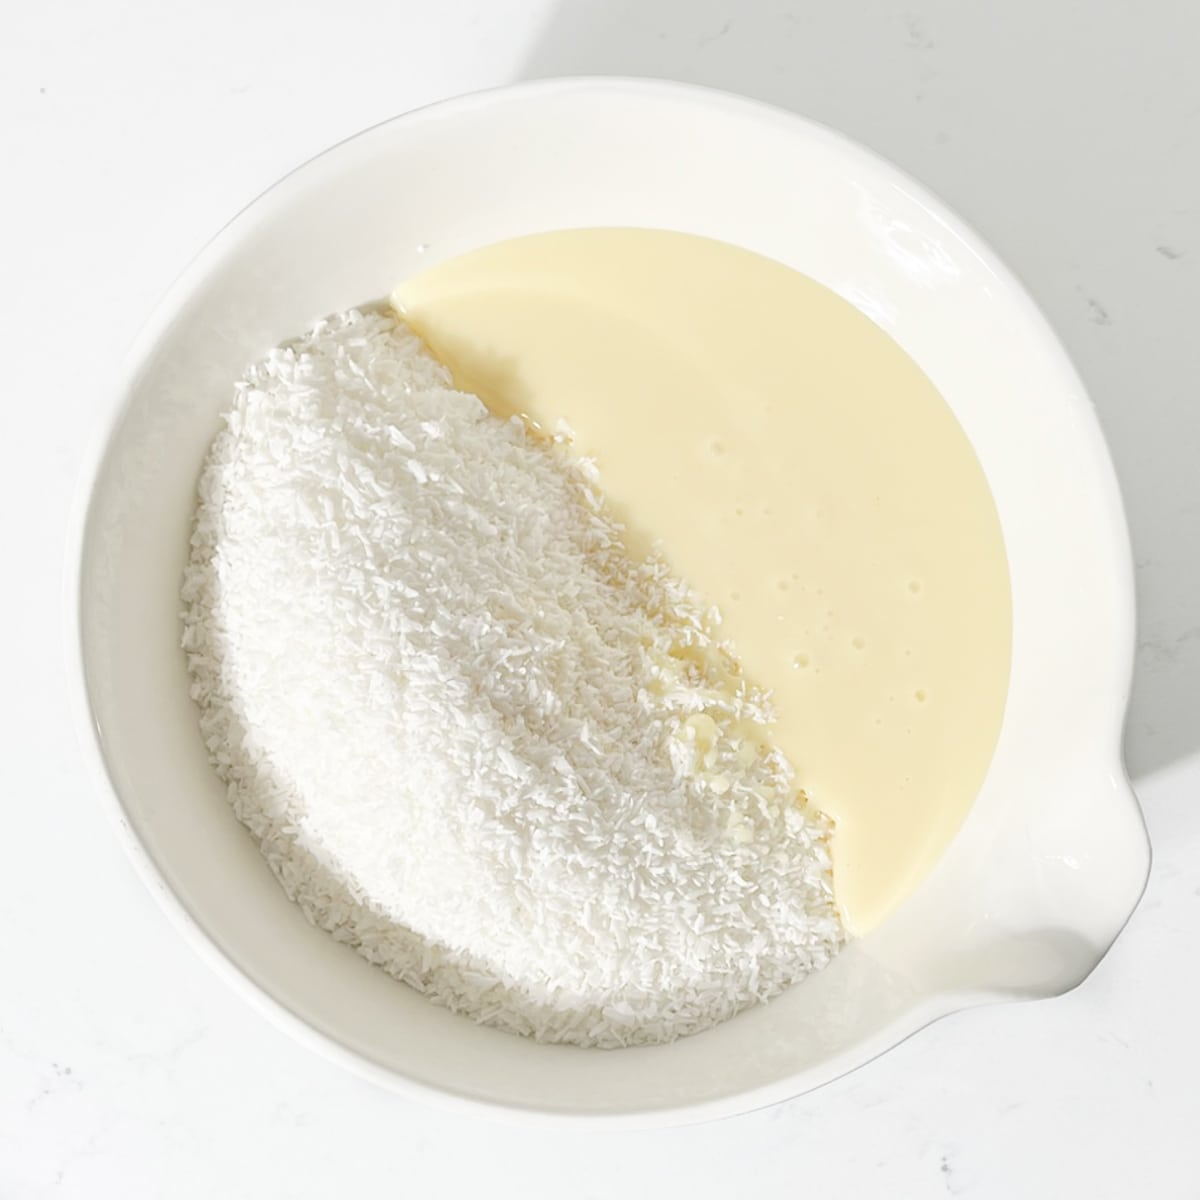
2. Add the condensed milk, icing sugar and desiccated coconut to a large mixing bowl. Leave out the food colouring for now. You'll only colour half the mixture later.
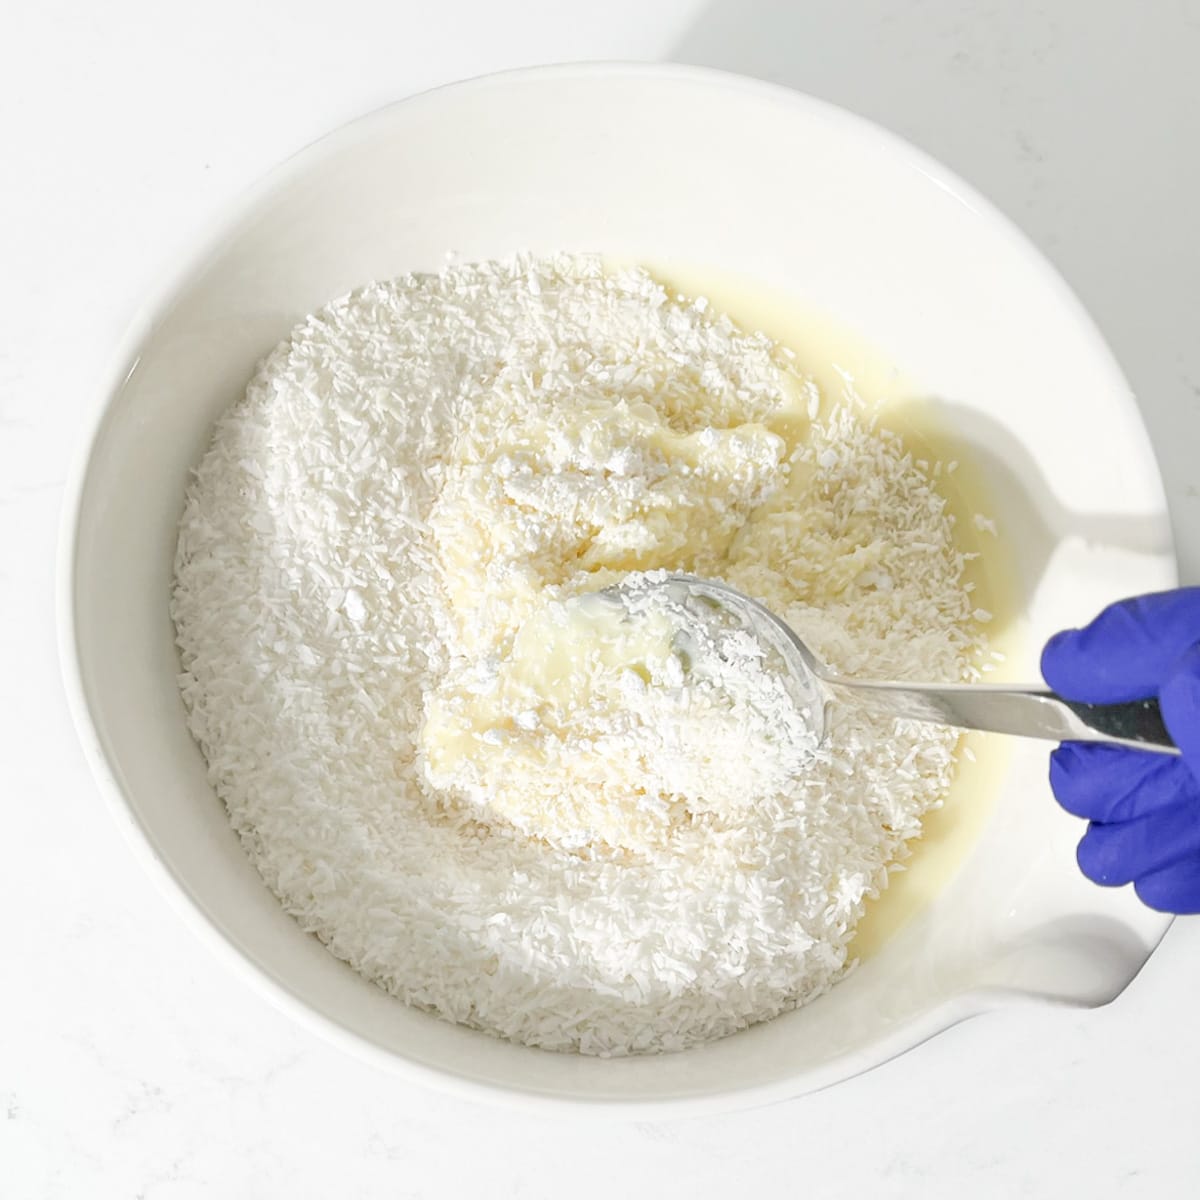
3. Mix everything together with a sturdy spoon. At first, it may look as if there is too much dry coconut and icing sugar, but keep going. The condensed milk will gradually pull everything together into a thick, sticky mixture.
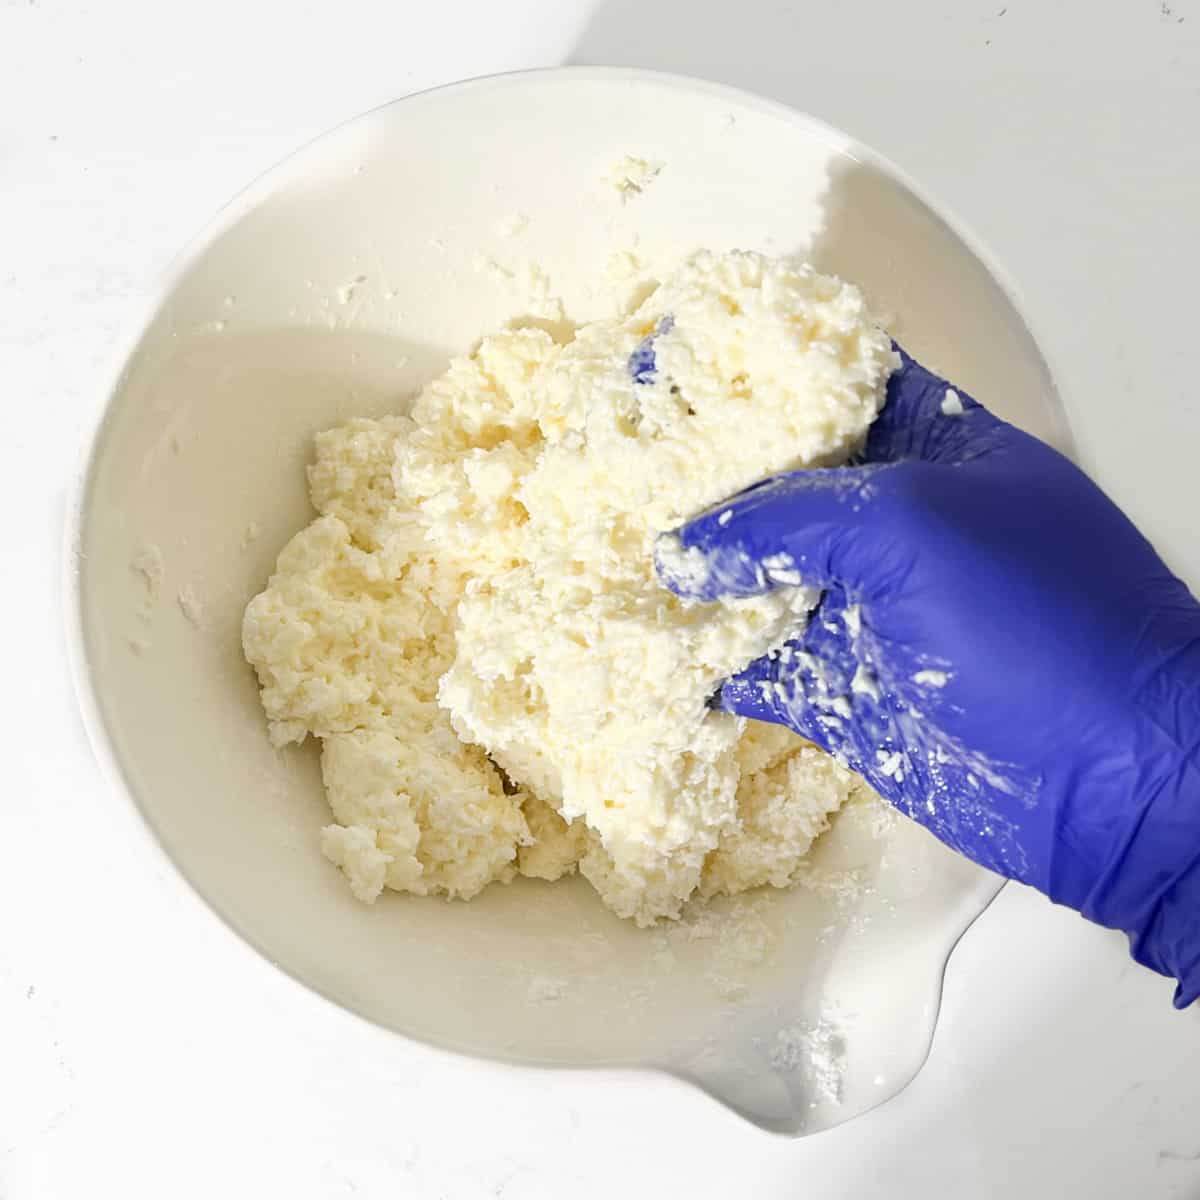
4. Once it becomes too stiff to stir easily, use clean hands to bring the mixture together. It should feel firm, dense and slightly sticky, almost like a thick coconut dough. Wear food-safe gloves if you prefer, especially when adding the colouring.
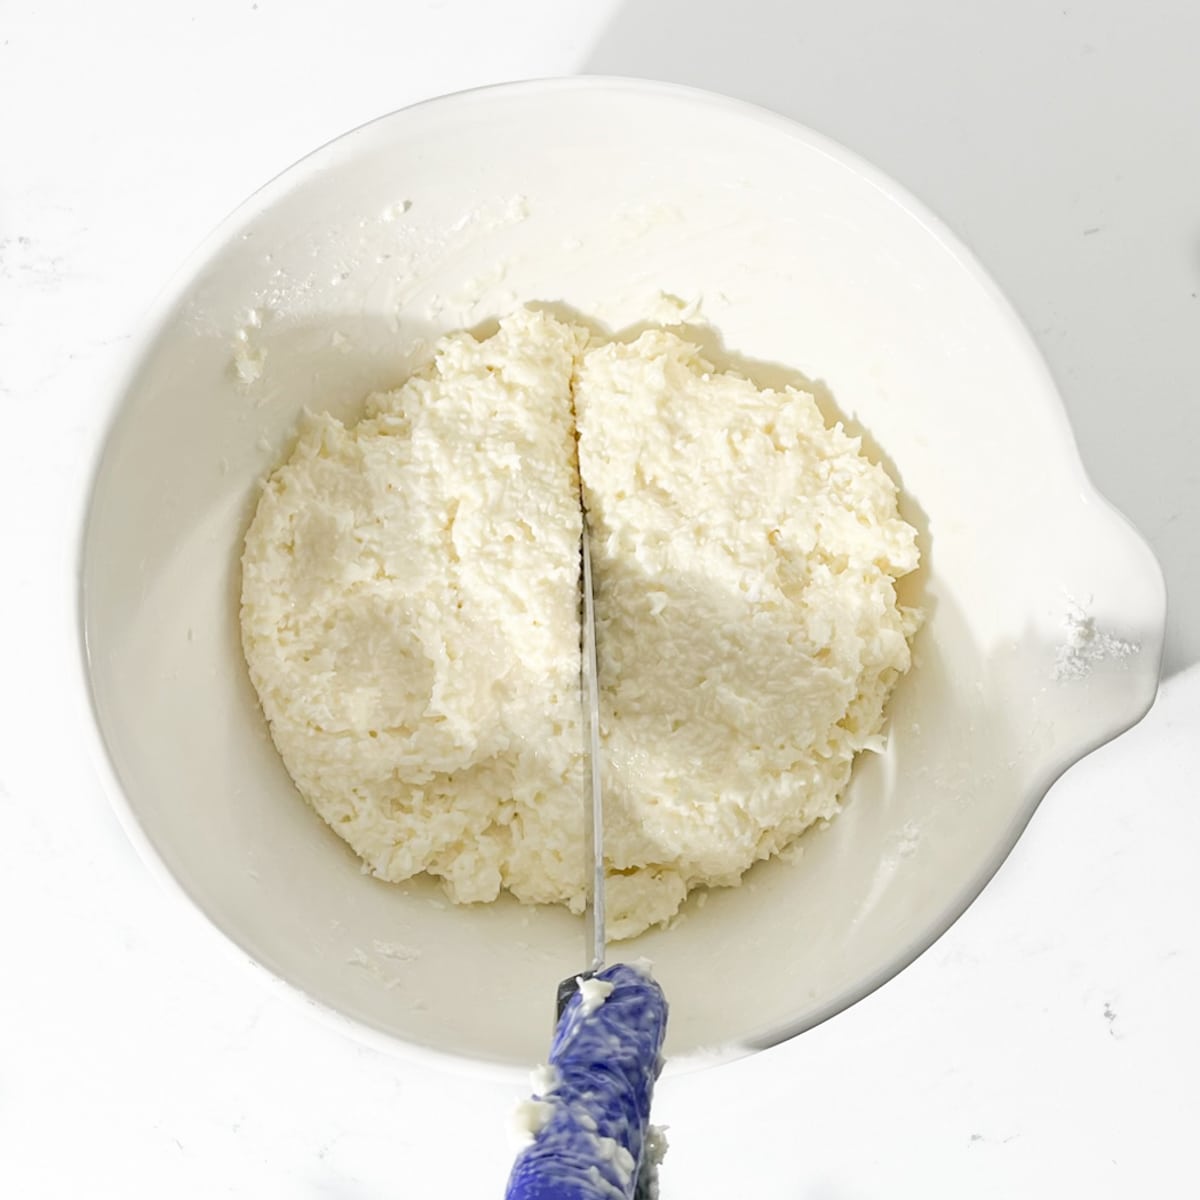
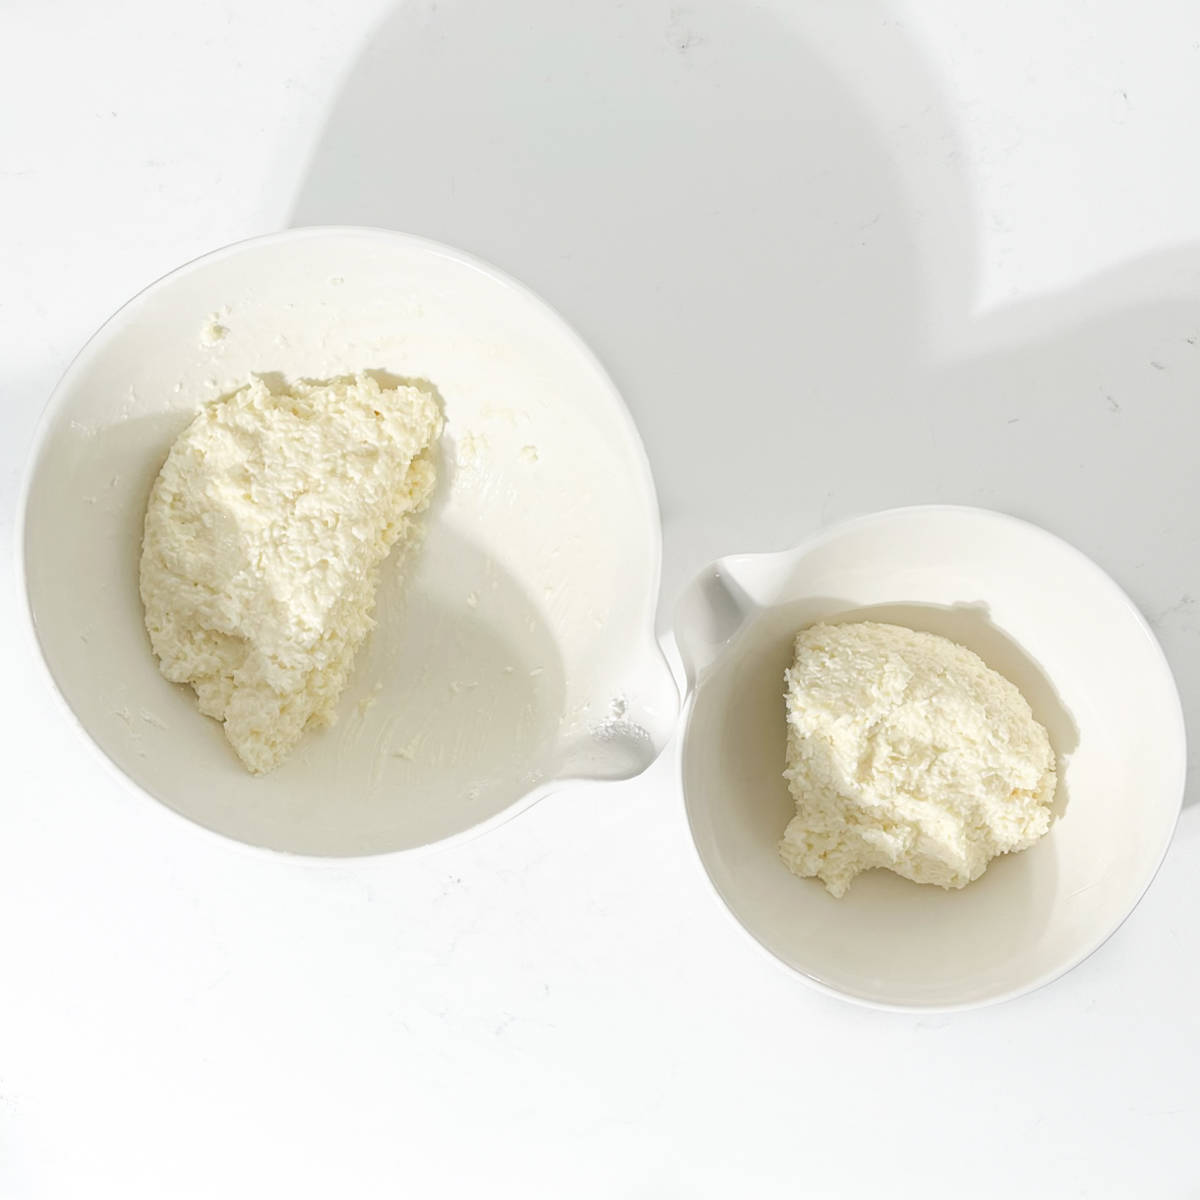
5. Divide the mixture in half. For the neatest layers, weigh the mixture and split it evenly. You can eyeball it, but weighing gives you a tidier pink-and-white finish.
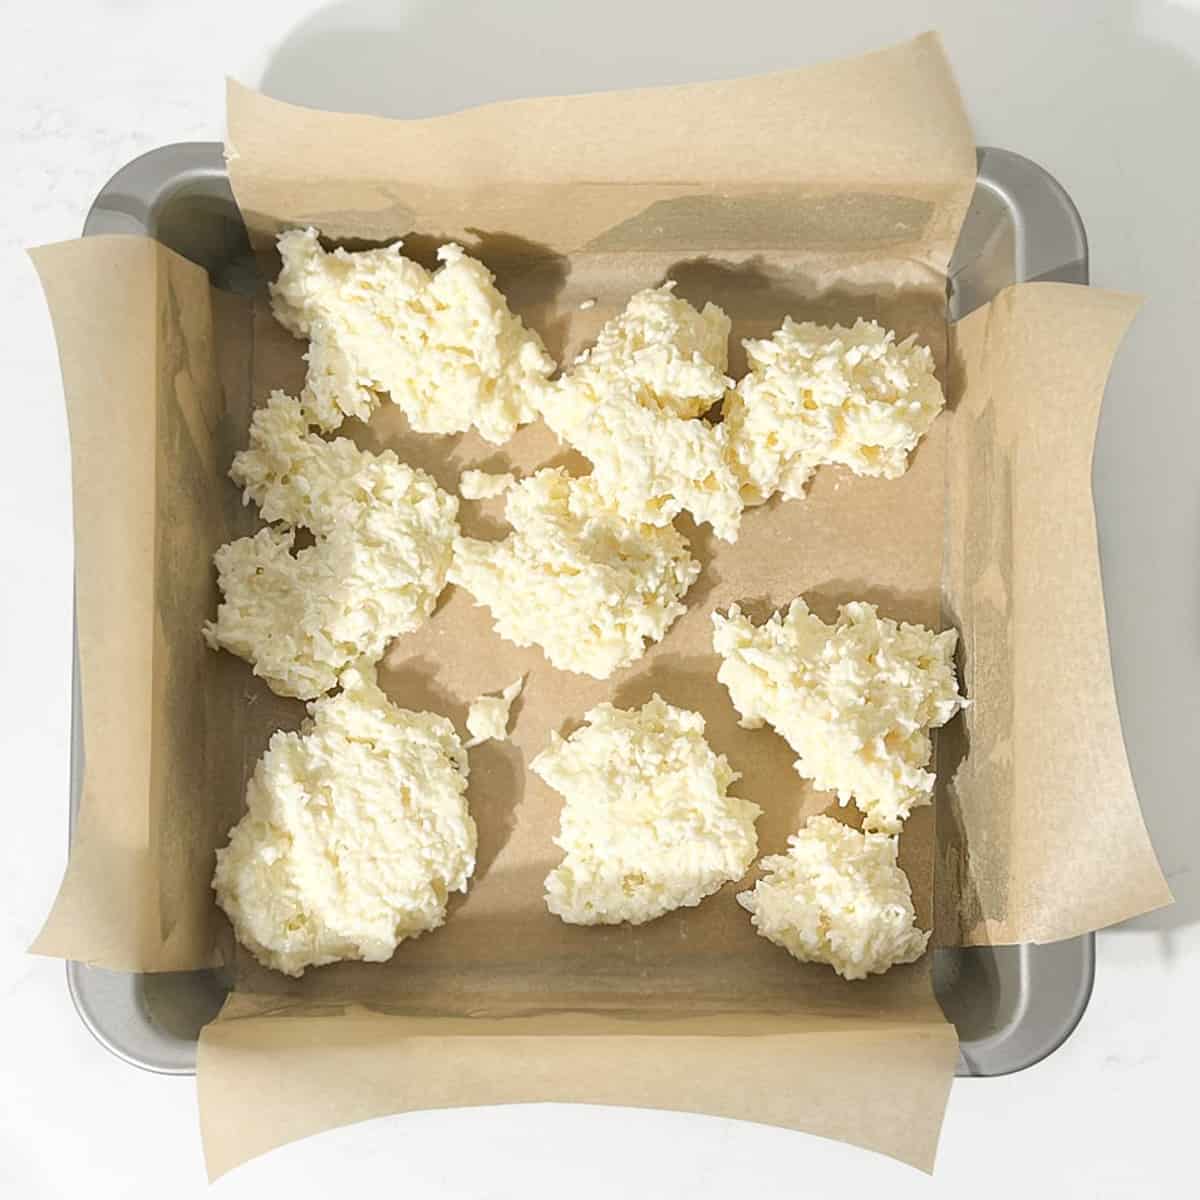
6. Break one half of the mixture into smaller pieces and scatter them across the base of the lined tin. Press the pieces firmly into an even layer, making sure you get right into the corners and along the edges.
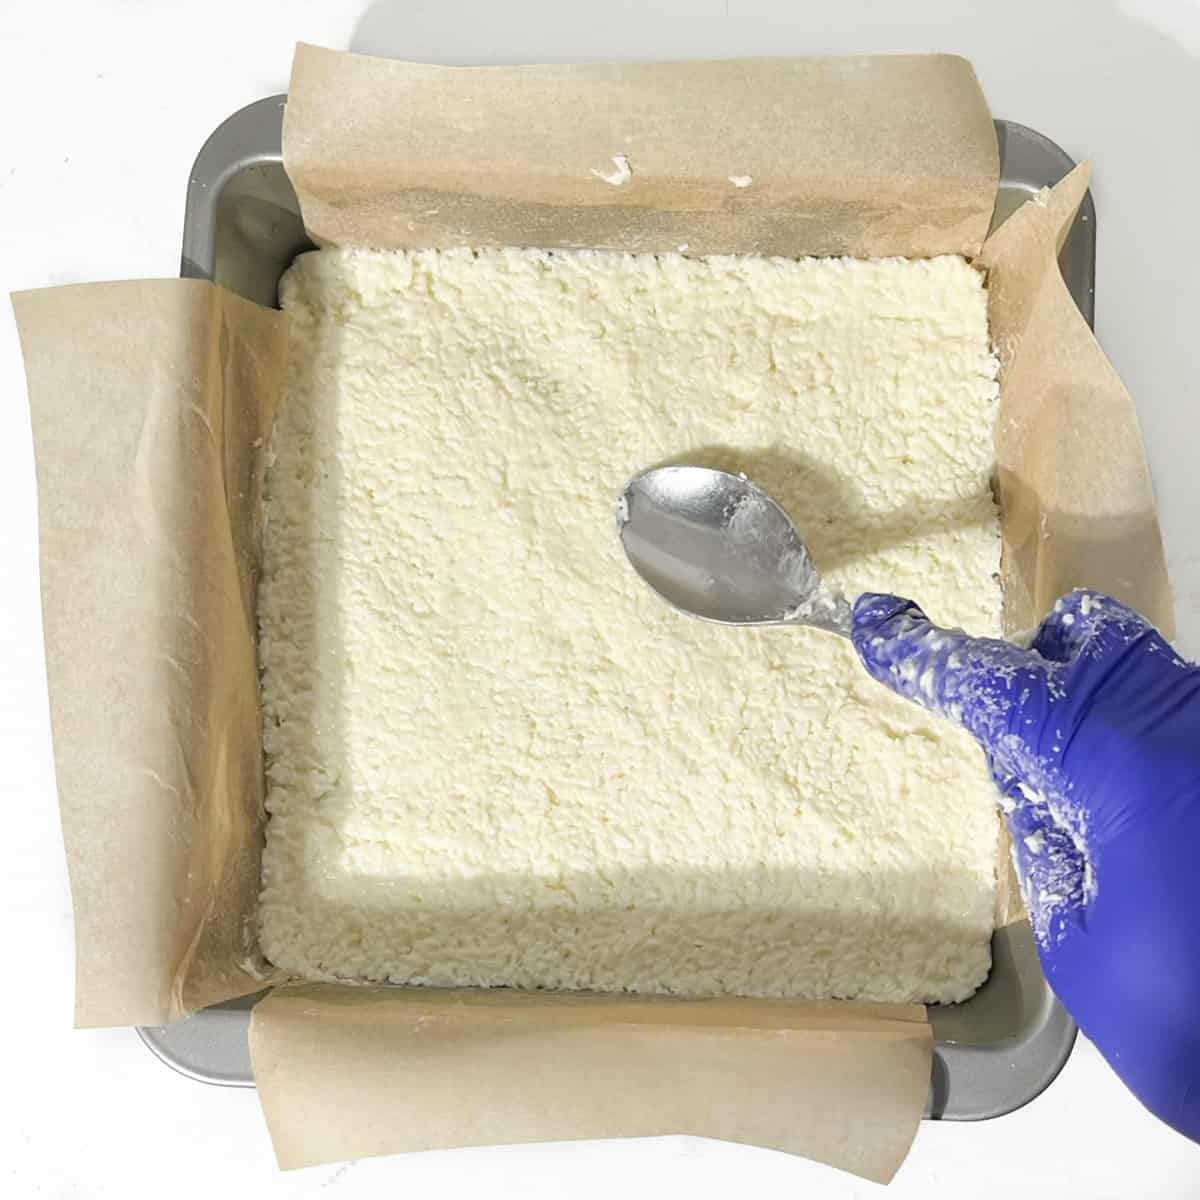
7. Smooth the top of the white layer with the back of a metal spoon or lightly damp fingers. It does not need to be perfect, but try to keep the layer fairly even.
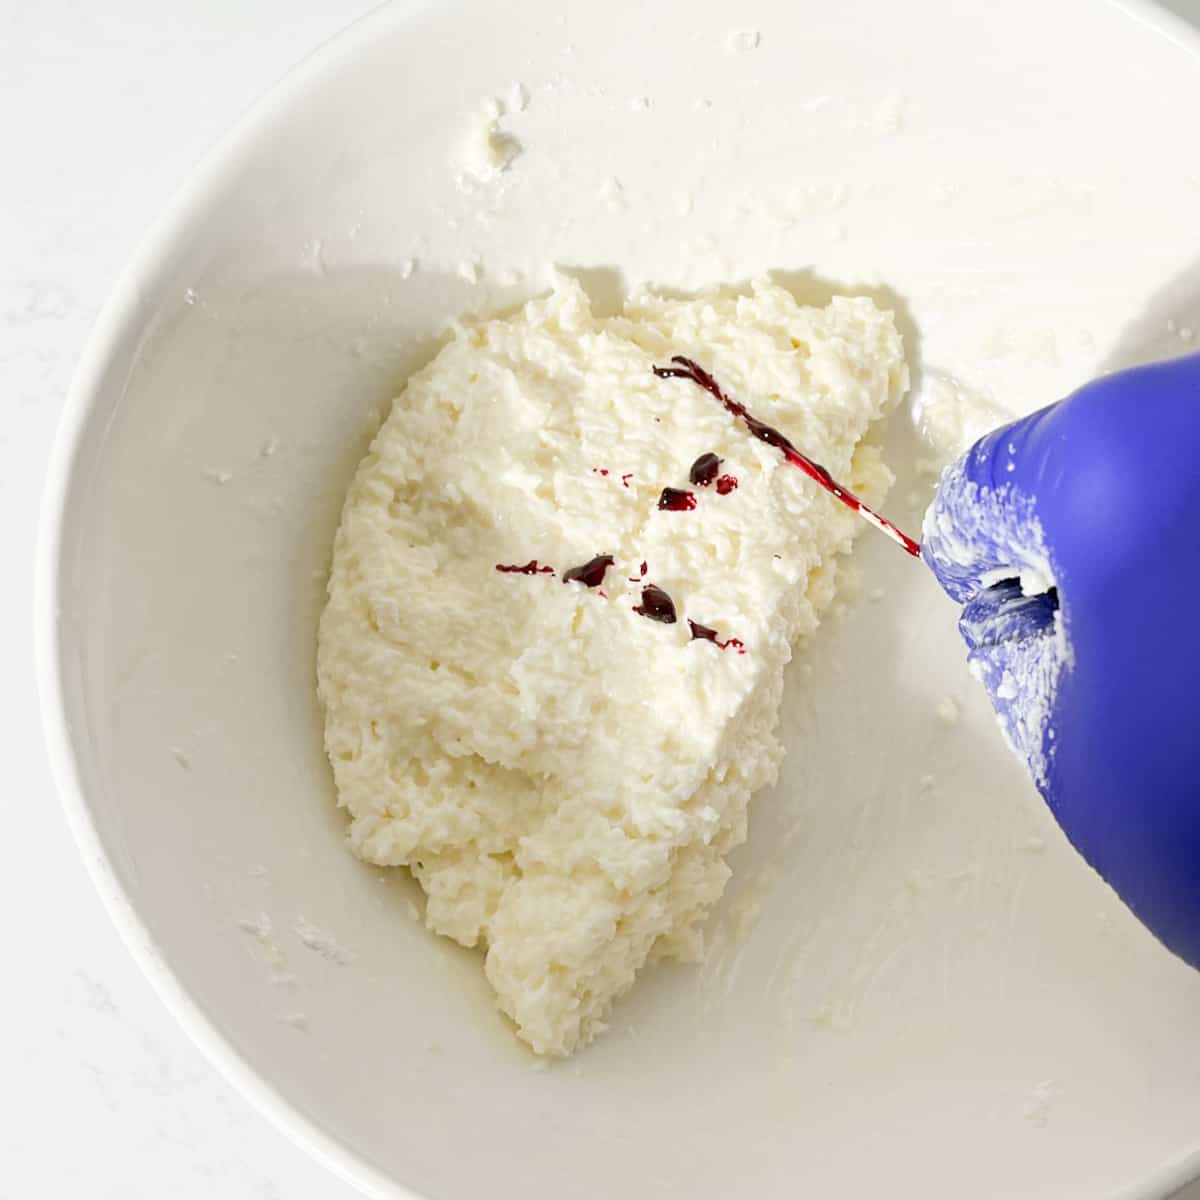
8. Add a tiny amount of pink food colouring to the remaining coconut mixture.
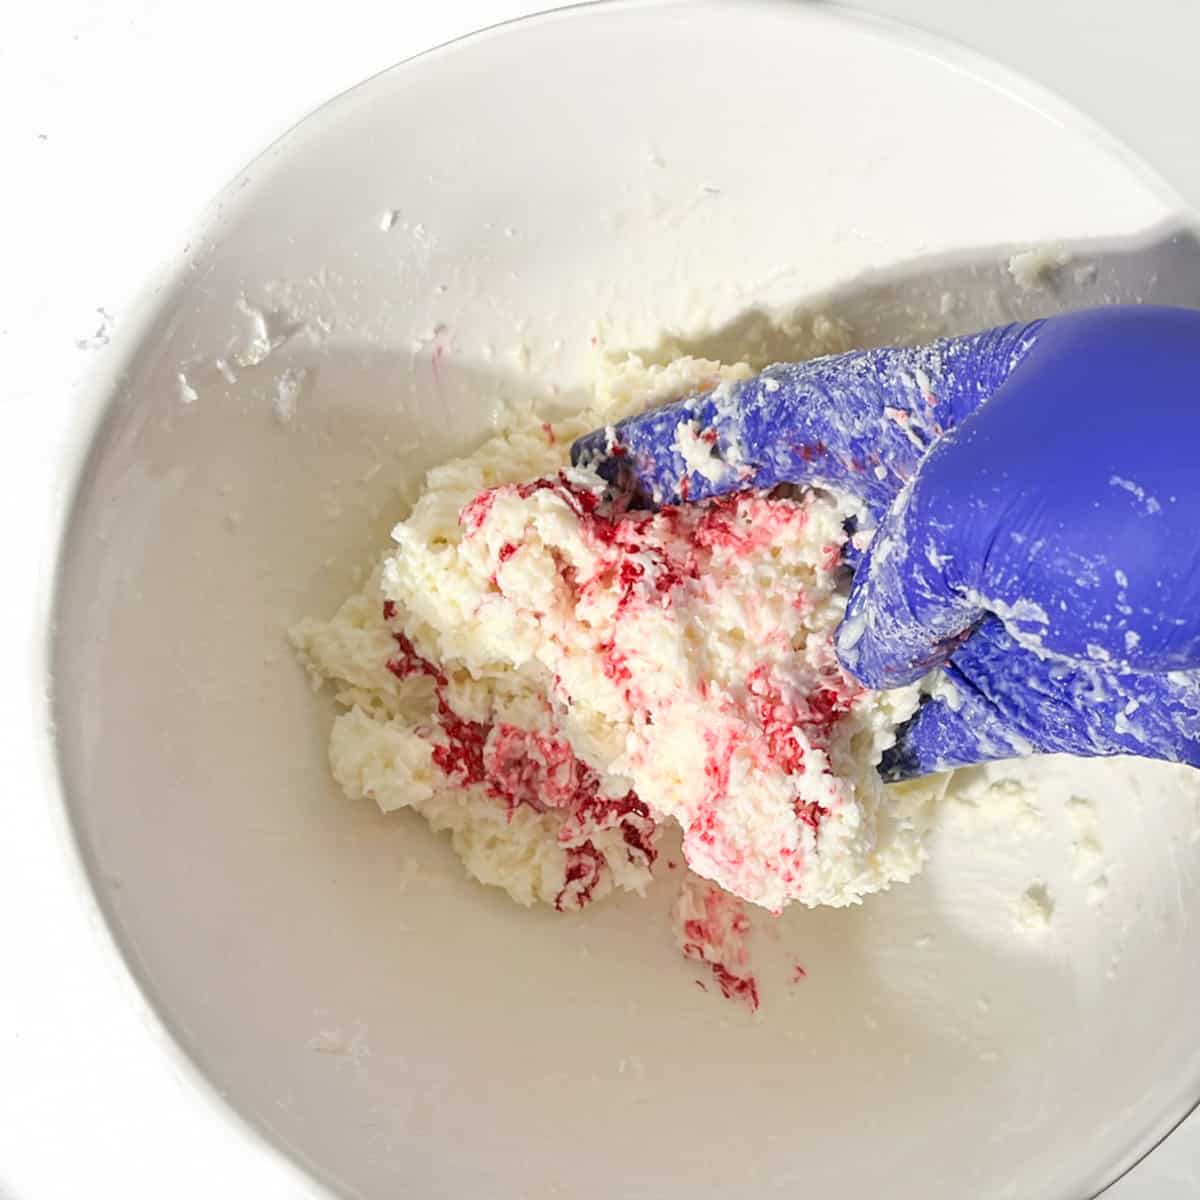
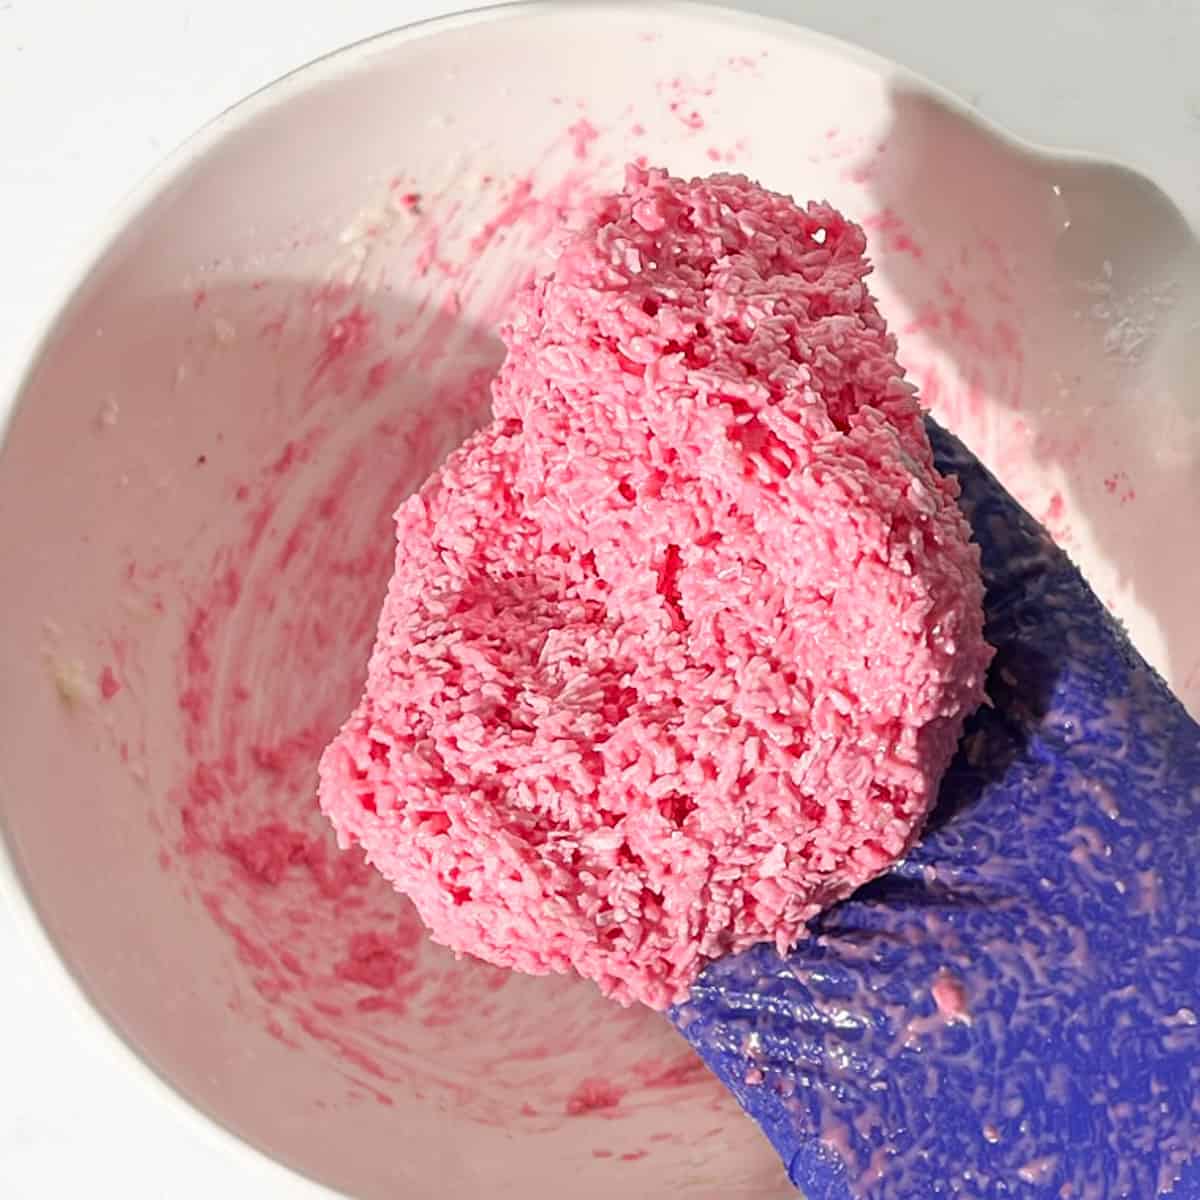
9. Knead it through by hand until the colour is even. Add a little more colouring only if needed.
10. Break the pink mixture into small pieces and scatter them evenly over the white layer. Don't place it on top in one big lump, as this can disturb the white layer underneath.
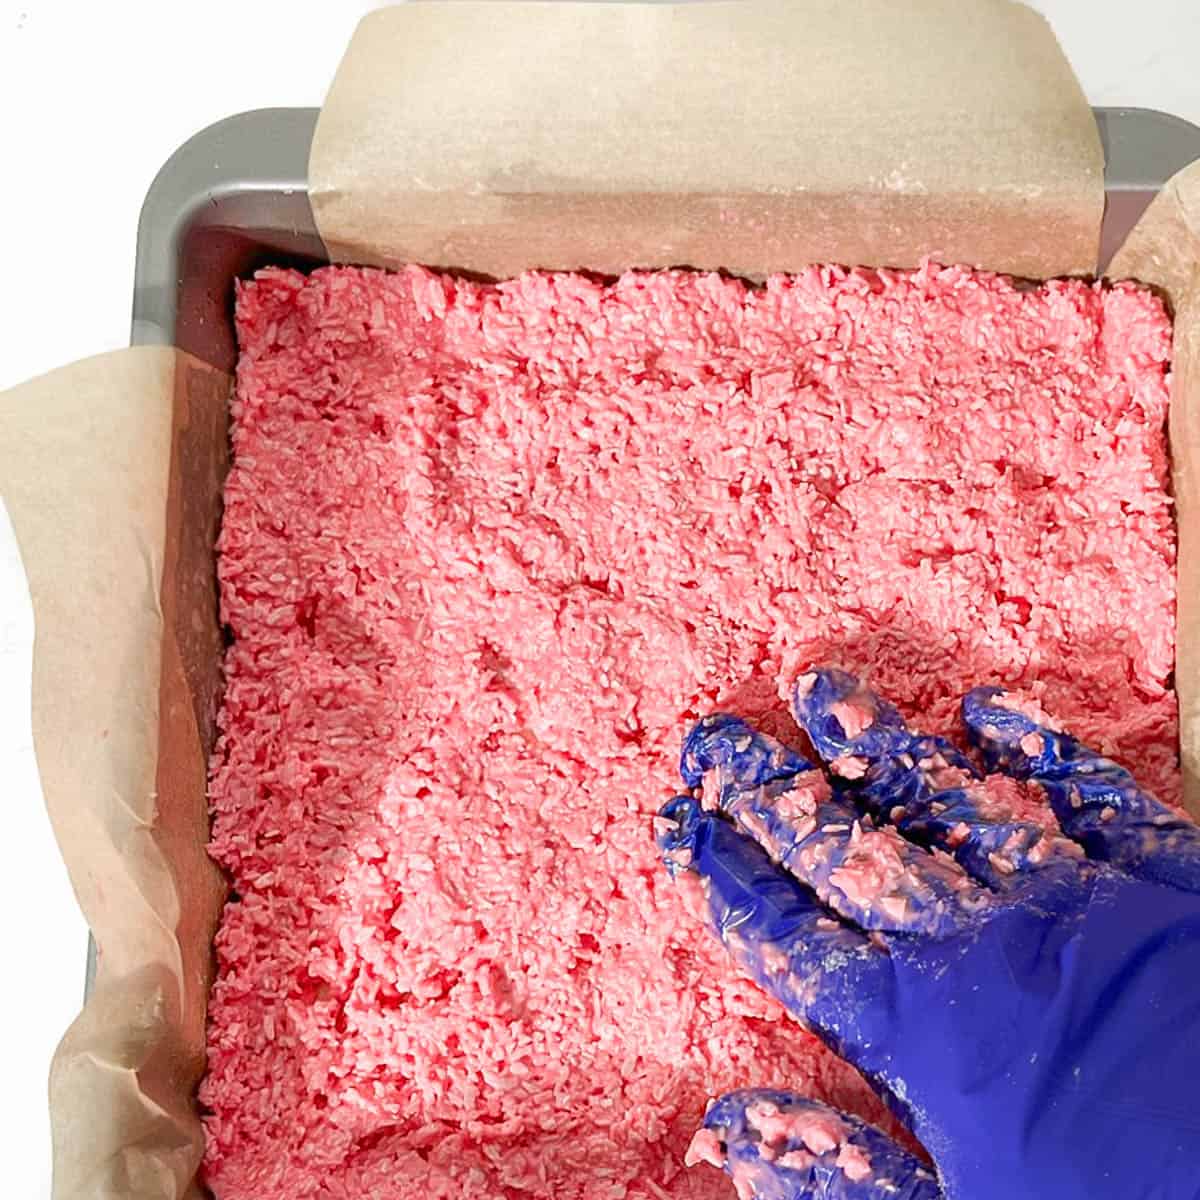
11. Gently but firmly press the pink mixture over the white layer until it is even and compact. Smooth the top with the back of a spoon or lightly damp fingers.

12. Cover the tin and chill the coconut ice in the fridge for at least 6 hours, or overnight if you have time. Overnight chilling gives the neatest slices.
13. Use the baking paper overhang to lift the slab out of the tin. Cut into small squares with a sharp knife. For cleaner slices, wipe the knife between cuts if the pink layer starts marking the white layer.
What should the coconut ice mixture feel like?
The mixture should be thick, firm and slightly sticky, almost like a dense coconut dough. It should hold together when pressed, but not feel wet or sloppy.
At first, it may look too dry, but be patient and keep working the condensed milk through the coconut and icing sugar. It often comes together with a bit of firm mixing.
If it still feels too soft before pressing it into the tin, work in a little extra desiccated coconut. If it crumbles badly and won't hold together after you've mixed it properly, add a small spoonful of condensed milk and knead it through.
Tips for neat layers and clean slices
Weigh the layers
For the cleanest pink and white split, weigh the mixture after mixing and divide it evenly. Eyeballing it works, but weighing gives a neater finish.
Press firmly
Coconut ice sets best when it is pressed firmly into the tin. Pay attention to the corners and edges so you do not end up with crumbly gaps.
Add the pink layer in small pieces
Do not drop the pink half on top in one big lump. Scatter small pieces over the white layer first, then press gently. This helps keep the layers even.
Chill before cutting
The slab cuts much more neatly once fully chilled. A sharp knife and small, confident cuts work better than dragging a blunt knife through it.
Cut small pieces
Coconut ice is rich and sweet, so small squares are best. Think sweetie tin, not paving slabs.
Storage and freezing
Store coconut ice in an airtight container. For firmer, cleaner pieces, keep it in the fridge for up to 1 month. It can also be kept at cool room temperature, but the pieces will be softer.
If stacking the squares, place baking paper between the layers to stop them sticking together or marking each other.
Coconut ice can be frozen for up to 3 months. Freeze it in an airtight container with baking paper between the layers, then thaw at room temperature for a few hours before serving.
Make-ahead and gifting
Coconut ice is ideal for making ahead because it sets firmly and keeps well. For gifting, cut it into small squares and pack it into paper sweet bags, small boxes, jars or cellophane bags with ribbon.
For the neatest gift boxes, chill the slab overnight before cutting and keep the pieces small. They look much prettier when they are dainty, and they are easier to eat too.

Variations
- Strawberry coconut ice - Add a few drops of strawberry essence to the pink layer. This is a lovely reader suggestion and works well with the coconut.
- Rose coconut ice - Add a tiny amount of rose water or rose essence to the pink layer. Go carefully, as it can take over quickly.
- Chocolate-dipped coconut ice - Dip the bottoms in melted dark chocolate and let them set on baking paper.
- Christmas coconut ice - Use red and green layers, or keep it white and pink and package it as a nostalgic homemade sweet.
Dietary notes
Gluten-free - Coconut ice is usually gluten-free, but check the labels on your icing sugar, condensed milk and food colouring if you are making it for someone with coeliac disease or a severe intolerance.
Dairy-free or vegan - Use a coconut condensed milk alternative. The coconut flavour works well here, but check the tin size and consistency.
If the mixture feels softer than usual, add a little extra desiccated coconut until it becomes firm and dough-like.
More recipes using condensed milk
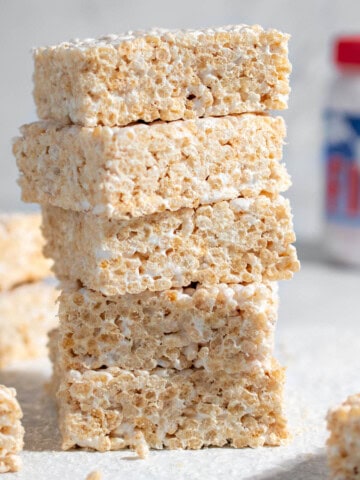
If you love easy condensed milk recipes, try my condensed milk cookies from South Africa, condensed milk rice pudding, Peppermint Crisp tart, milk tart with condensed milk, Beijinhos Brazilian coconut kisses or iced coffee with condensed milk.
Recipe
Easy Coconut Ice with Condensed Milk
Equipment
- 20cm x 20cm x 5cm (8''x8''x2'') square tin
Ingredients
- 1 can condensed milk - circa 395g
- 250 grams icing sugar
- 300 grams desiccated coconut
- ½ teaspoon vanilla extract, optional
- Few drops pink food colouring
Instructions
- Line a 20cm x 20cm (8" x 8") square tin with baking paper, leaving a little overhang on two sides. This will help you lift the coconut ice out once it has set.
- Add the condensed milk, icing sugar, desiccated coconut and optional vanilla to a large mixing bowl. Leave out the food colouring for now.1 can condensed milk , 250 grams icing sugar, 300 grams desiccated coconut, ½ teaspoon vanilla extract, optional
- Mix everything together with a sturdy spoon. The mixture will look quite dry at first, but keep mixing until the condensed milk starts working through the coconut and icing sugar.
- Once the mixture becomes too stiff to stir easily, use clean hands to bring it together. It should feel firm, dense and slightly sticky, almost like a thick coconut dough.
- Divide the mixture in half. For the neatest layers, weigh the mixture and split it evenly.
- Break one half of the mixture into smaller pieces and scatter them across the base of the lined tin. Press firmly into an even layer, making sure it reaches the corners and edges.
- Smooth the layer with the back of a spoon or lightly damp fingers.
- Add a small amount of pink food colouring to the other half of the coconut mixture. Knead it through by hand until the colour is even. Add a little more colouring only if needed.Few drops pink food colouring
- Break the pink mixture into small pieces and scatter them evenly over the white layer. Don't place it on top in one big lump, as this can disturb the white layer underneath.
- Press the pink mixture gently but firmly over the white layer until even and compact. Smooth the top with the back of a spoon or lightly damp fingers.
- Cover the tin and chill in the fridge for at least 6 hours, or overnight for the neatest slices.
- Lift the coconut ice from the tin using the baking paper overhang. Cut into small squares with a sharp knife.
Notes
- The mixture will look dry at first, but it comes together as you mix and press it by hand.
- Weigh the mixture before colouring one half if you want even pink and white layers.
- Chill for at least 6 hours, or overnight for cleaner slices.
- Store in an airtight container in the fridge for up to 1 month.
- Freeze for up to 3 months with baking paper between the layers.

**Nutritional data disclaimer**
Please keep in mind that the nutritional information provided below is calculated by a third party and we cannot guarantee the accuracy. We try our best to give you the most accurate information, but we do not take responsibility for errors that may be present. Also, the nutritional value of the recipe may change depending on the exact brands and products used. We recommend that you consult with a qualified healthcare professional or registered dietitian for personalised advice on your dietary needs.
Nutrition
For food safety advice, including guidance on food allergies


Johan says
Easy to make. I added a bit of strawberry essence to the pink part.
Maretha Corbett says
Hey Johan!
Thank you so much for your review! We're really happy to hear that you found the recipe easy to make - it really is! The mixing part is probably the most challenging.
Adding a touch of strawberry essence for that extra flavour is a brilliant idea! We love hearing about personal twists, it's always inspiring.
Happy cooking!
Maretha.
Maureen says
Best coconut ice recipe I've ever tried! I'm sure this will be used time and time again in the future. Easy to make and very tasty.
Maretha Corbett says
Hi Maureen!
Thanks a bunch for your lovely review! I'm delighted to hear that you enjoyed the coconut ice recipe. If you ever have more sweet cravings or questions, feel free to reach out. Happy cooking!
Maretha.