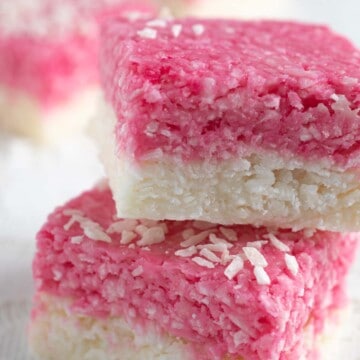
Easy Coconut Ice with Condensed Milk
Easy no-cook coconut ice made with condensed milk, icing sugar and desiccated coconut. A nostalgic pink and white sweet for Christmas, bake sales, gifts and party trays.
Equipment
- 20cm x 20cm x 5cm (8''x8''x2'') square tin
Ingredients
- 1 can condensed milk circa 395g
- 250 grams icing sugar
- 300 grams desiccated coconut
- ½ teaspoon vanilla extract, optional
- Few drops pink food colouring
Instructions
- Line a 20cm x 20cm (8" x 8") square tin with baking paper, leaving a little overhang on two sides. This will help you lift the coconut ice out once it has set.
- Add the condensed milk, icing sugar, desiccated coconut and optional vanilla to a large mixing bowl. Leave out the food colouring for now.1 can condensed milk , 250 grams icing sugar, 300 grams desiccated coconut, ½ teaspoon vanilla extract, optional
- Mix everything together with a sturdy spoon. The mixture will look quite dry at first, but keep mixing until the condensed milk starts working through the coconut and icing sugar.
- Once the mixture becomes too stiff to stir easily, use clean hands to bring it together. It should feel firm, dense and slightly sticky, almost like a thick coconut dough.
- Divide the mixture in half. For the neatest layers, weigh the mixture and split it evenly.
- Break one half of the mixture into smaller pieces and scatter them across the base of the lined tin. Press firmly into an even layer, making sure it reaches the corners and edges.
- Smooth the layer with the back of a spoon or lightly damp fingers.
- Add a small amount of pink food colouring to the other half of the coconut mixture. Knead it through by hand until the colour is even. Add a little more colouring only if needed.Few drops pink food colouring
- Break the pink mixture into small pieces and scatter them evenly over the white layer. Don’t place it on top in one big lump, as this can disturb the white layer underneath.
- Press the pink mixture gently but firmly over the white layer until even and compact. Smooth the top with the back of a spoon or lightly damp fingers.
- Cover the tin and chill in the fridge for at least 6 hours, or overnight for the neatest slices.
- Lift the coconut ice from the tin using the baking paper overhang. Cut into small squares with a sharp knife.
Notes
- The mixture will look dry at first, but it comes together as you mix and press it by hand.
- Weigh the mixture before colouring one half if you want even pink and white layers.
- Chill for at least 6 hours, or overnight for cleaner slices.
- Store in an airtight container in the fridge for up to 1 month.
- Freeze for up to 3 months with baking paper between the layers.
Nutrition
Calories: 281kcal | Carbohydrates: 36g | Protein: 3g | Fat: 15g | Saturated Fat: 13g | Polyunsaturated Fat: 0.2g | Monounsaturated Fat: 1g | Cholesterol: 9mg | Sodium: 41mg | Potassium: 207mg | Fiber: 3g | Sugar: 32g | Vitamin A: 70IU | Vitamin C: 1mg | Calcium: 80mg | Iron: 1mg
